This post covers how to flash the latest version of OpenTX (currently 2.3.1), which is a highly configurable open source firmware for radios, that acts as the operating system on Taranis transmitters. We will also see how to flash the firmware of the internal transmitter module of the Taranis into the EU-LBT mode. To register and bind an ACCESS receiver look into the next post.

OpenTX
To begin with the update of the OpenTX firmware on the Taranis, download the latest version of the OpenTX Companion software (available for Windows, Mac and Linux) from open-tx.org. On this webpage you also find the sdcard content which we will need to put on a seperate sd card that will be inserted in the Taranis radio.
Note that the Taranis X9D Plus SE 2019 doesn’t ship with a sd card. However, it has an internal storage for the bootloader and the firmware (OpenTX) and the firmware of the internal transmitter module.
In case you are using Windows, make sure to install the Zadig utility. For Linux make sure to install dfu-util.
More information can be in the OpenTX gitbook.
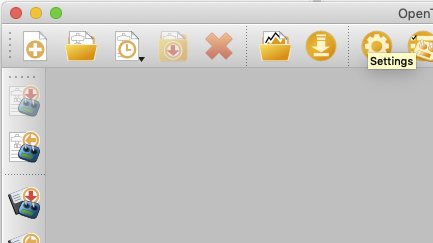
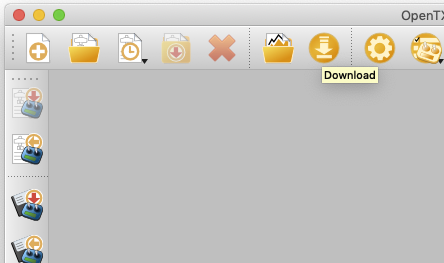
With the OpenTX Companion software it is possible to backup your radio using the following button, which lets you store
a *.bin file on your computer:

It is advised that you backup your radio settings and models before you proceed with the next steps.
This way you can restore your backup using the Write Backup to Radio button, right above the Backup Radio to File button.
OpenTX Settings
After downloading OpenTX Companion and installing it on your operating system, execute the application and open the settings, shown in the following screenshots.
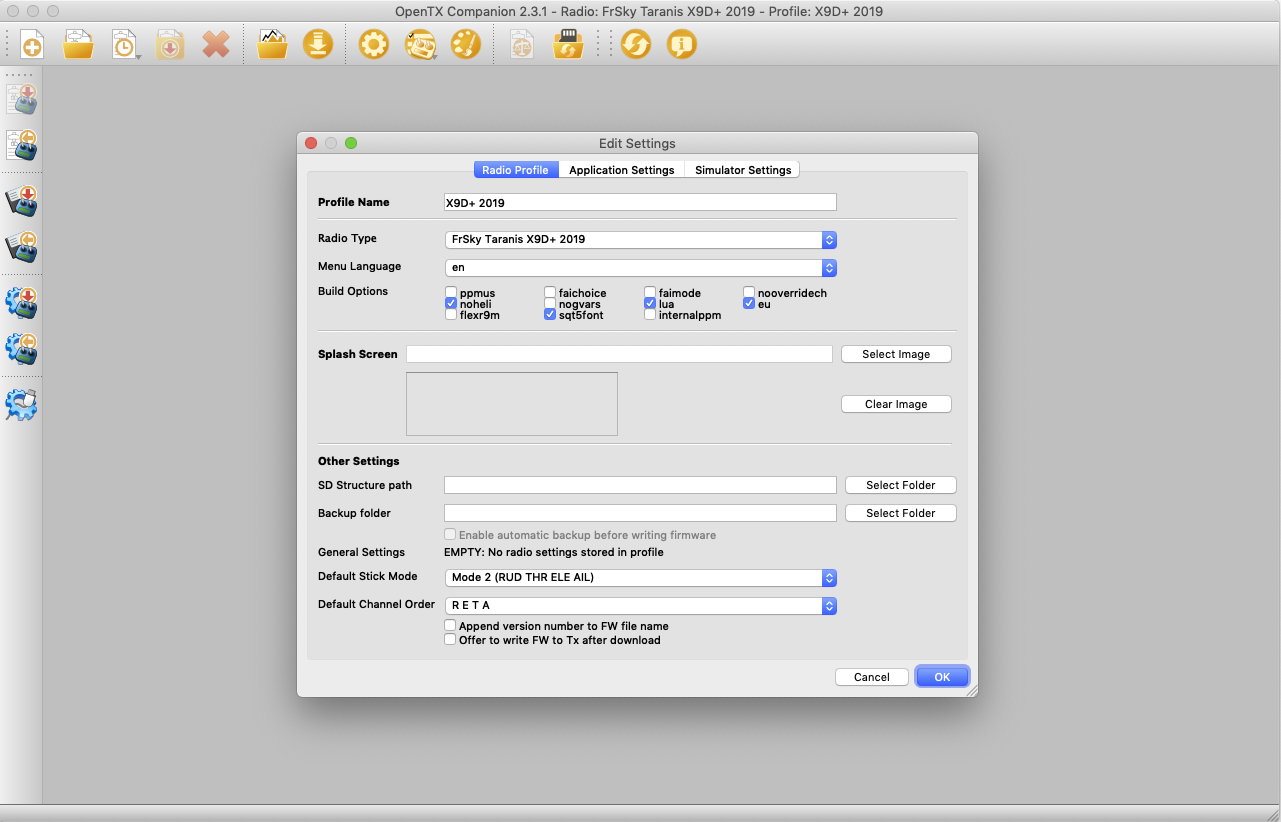
Here you can see the settings in the Radio Profile tab.
As Radio Type choose the FrSky Taranis X9D+ 2019 and the following Build Options:
luaenables lua custom script screennohelito disable the Helicoper menu page on the Taranis in the case you are not flying a helicopter.flexr9moreuwhich can be both used to flash the internal transmitter module from the FCC to the EU-LBT firmware.
Use flexr9m if you have an external transmitter module such as the FrSky R9M and want to flash its firmware.
In case you ordered from a vendor that shiped the Taranis X9D with the FCC firmware on the internal transmitter module and you don’t have an external module choose either flexr9m or eu. flexr9m lets you also flash the EU-LBT firmware.
Note that you cannot check both, so you have to choose between flexr9m or eu.
Also choose an SD Structure path on your Mac or PC that will mirror the internal storage of the Taranis to your local machine. Note that this is NOT the path where we will place the previously downloaded sd card content.
If you want you can change the Default Stick Mode or the Default Channel Order. For convenience, select the two options:
Append version number to FW file nameOffer to write FW to Tx after download
Save the radio profile using a Profile Name and press Ok.
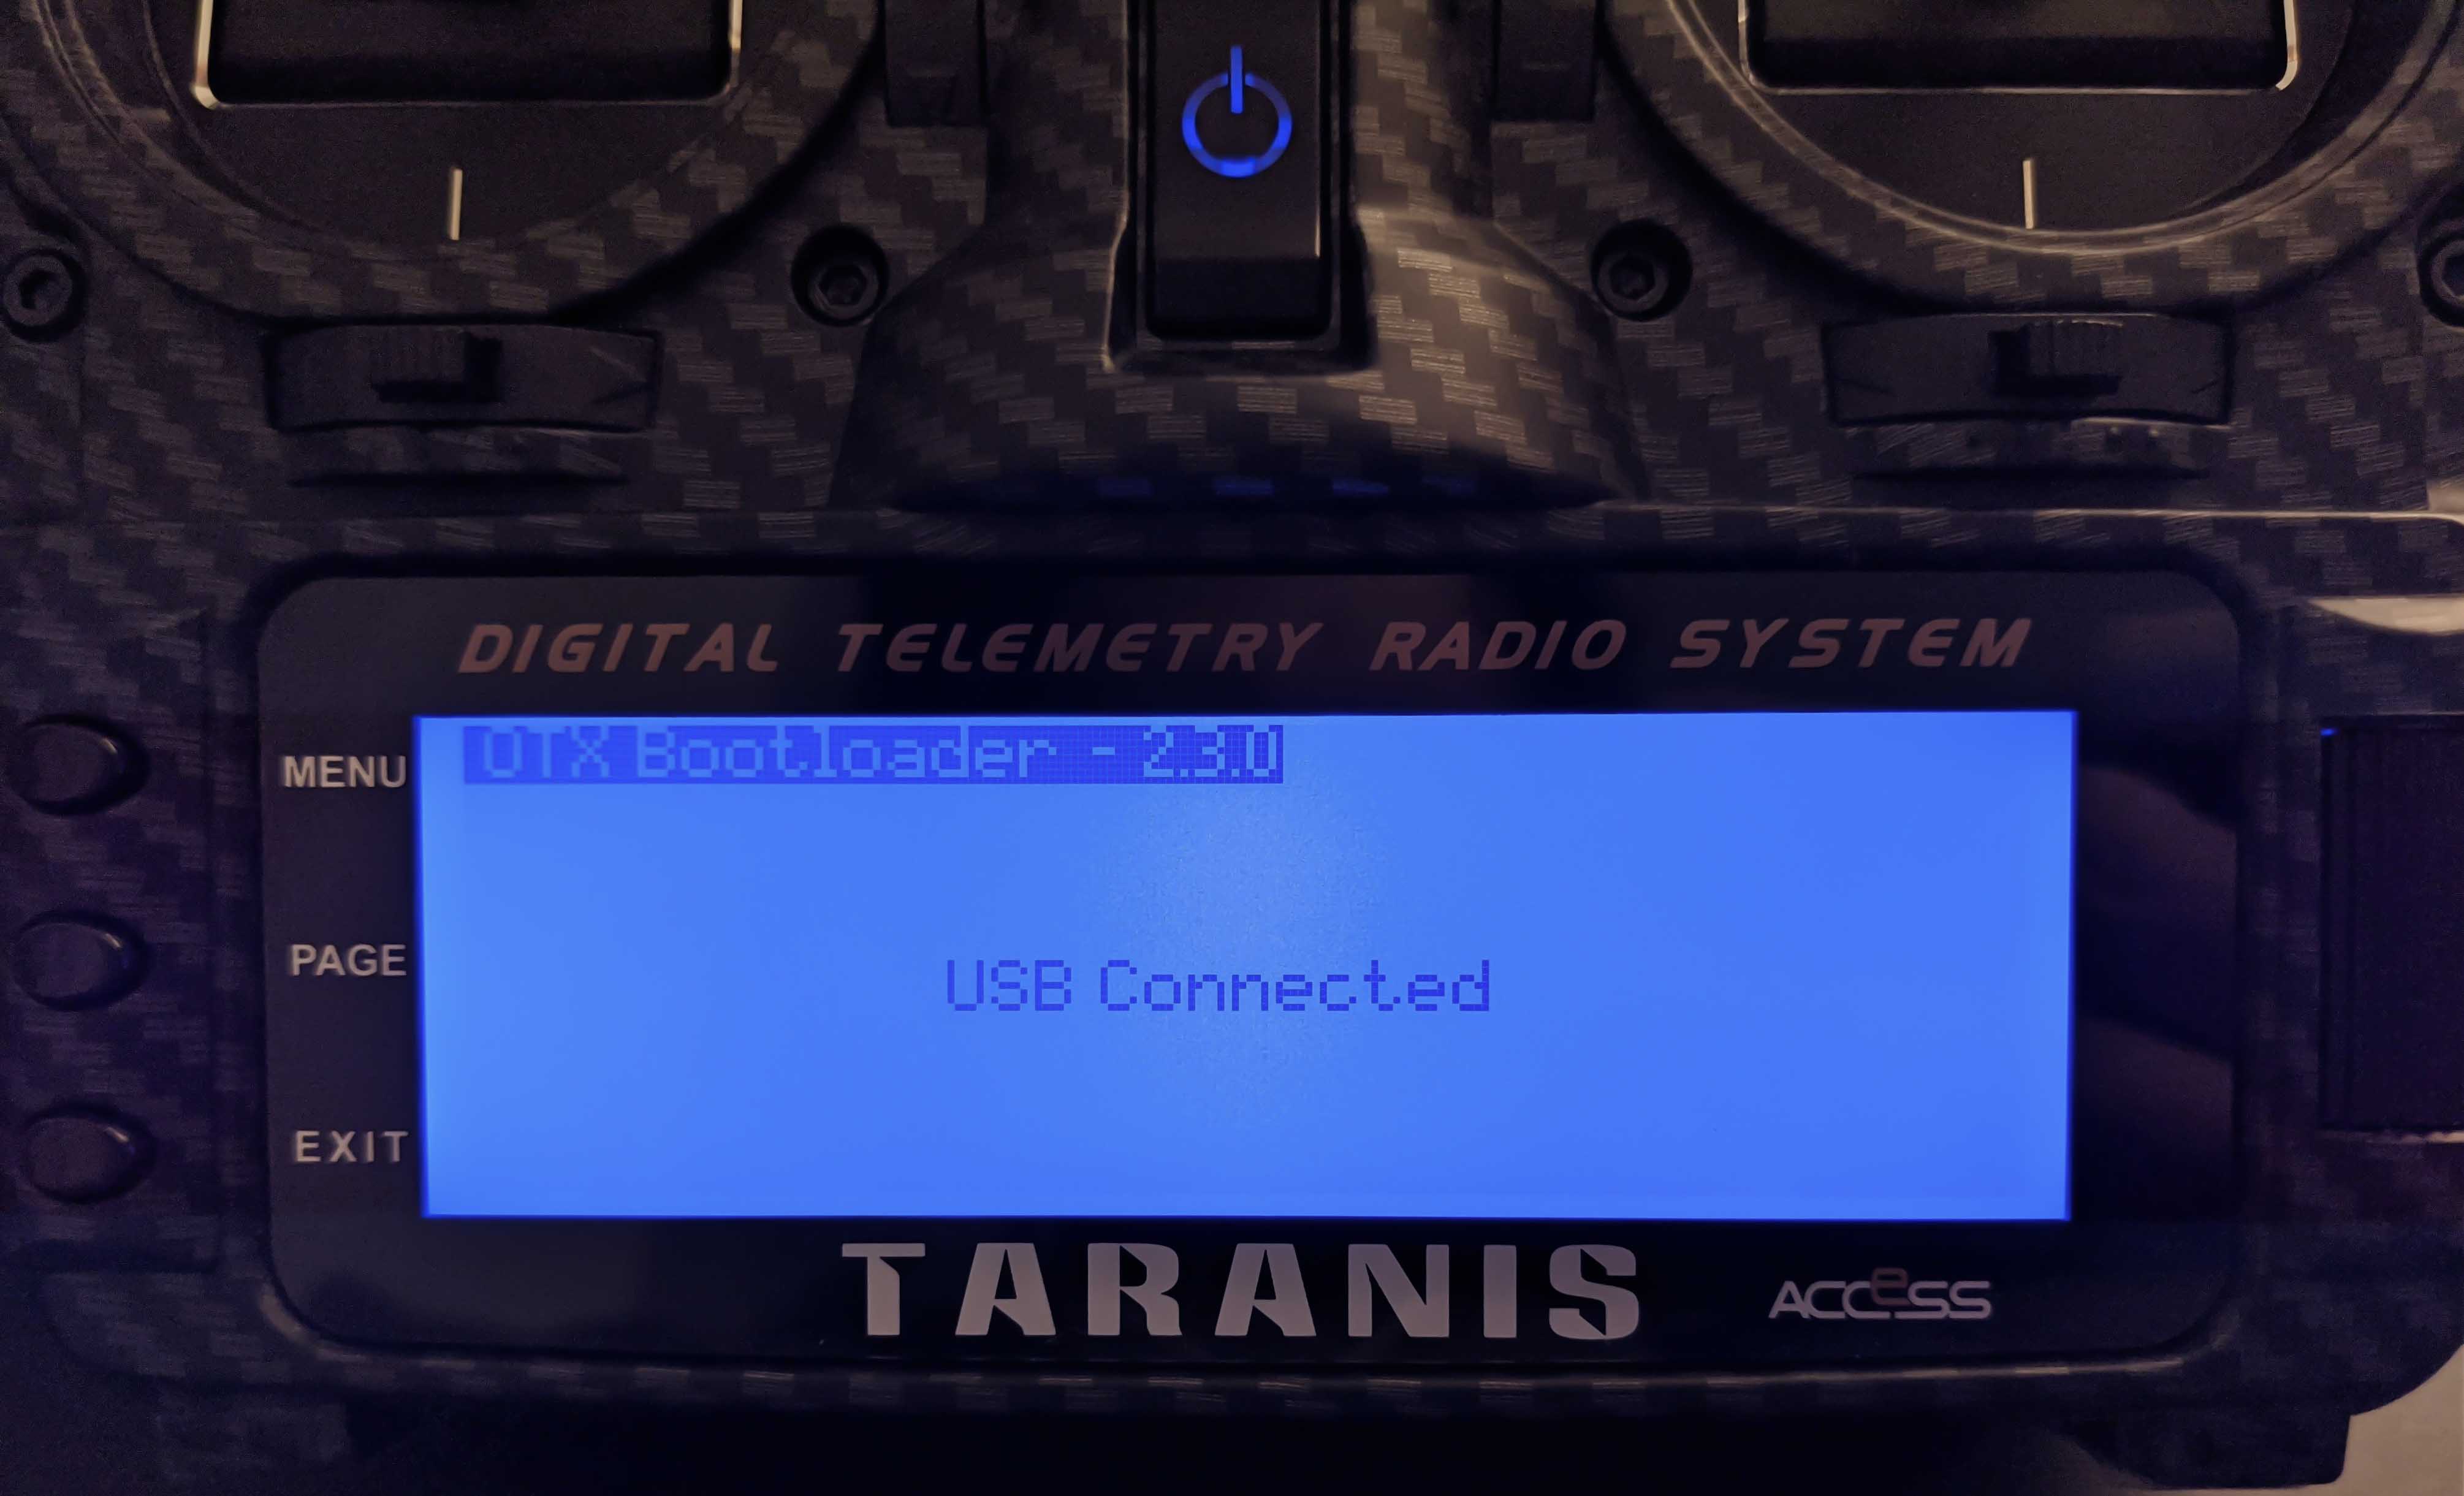
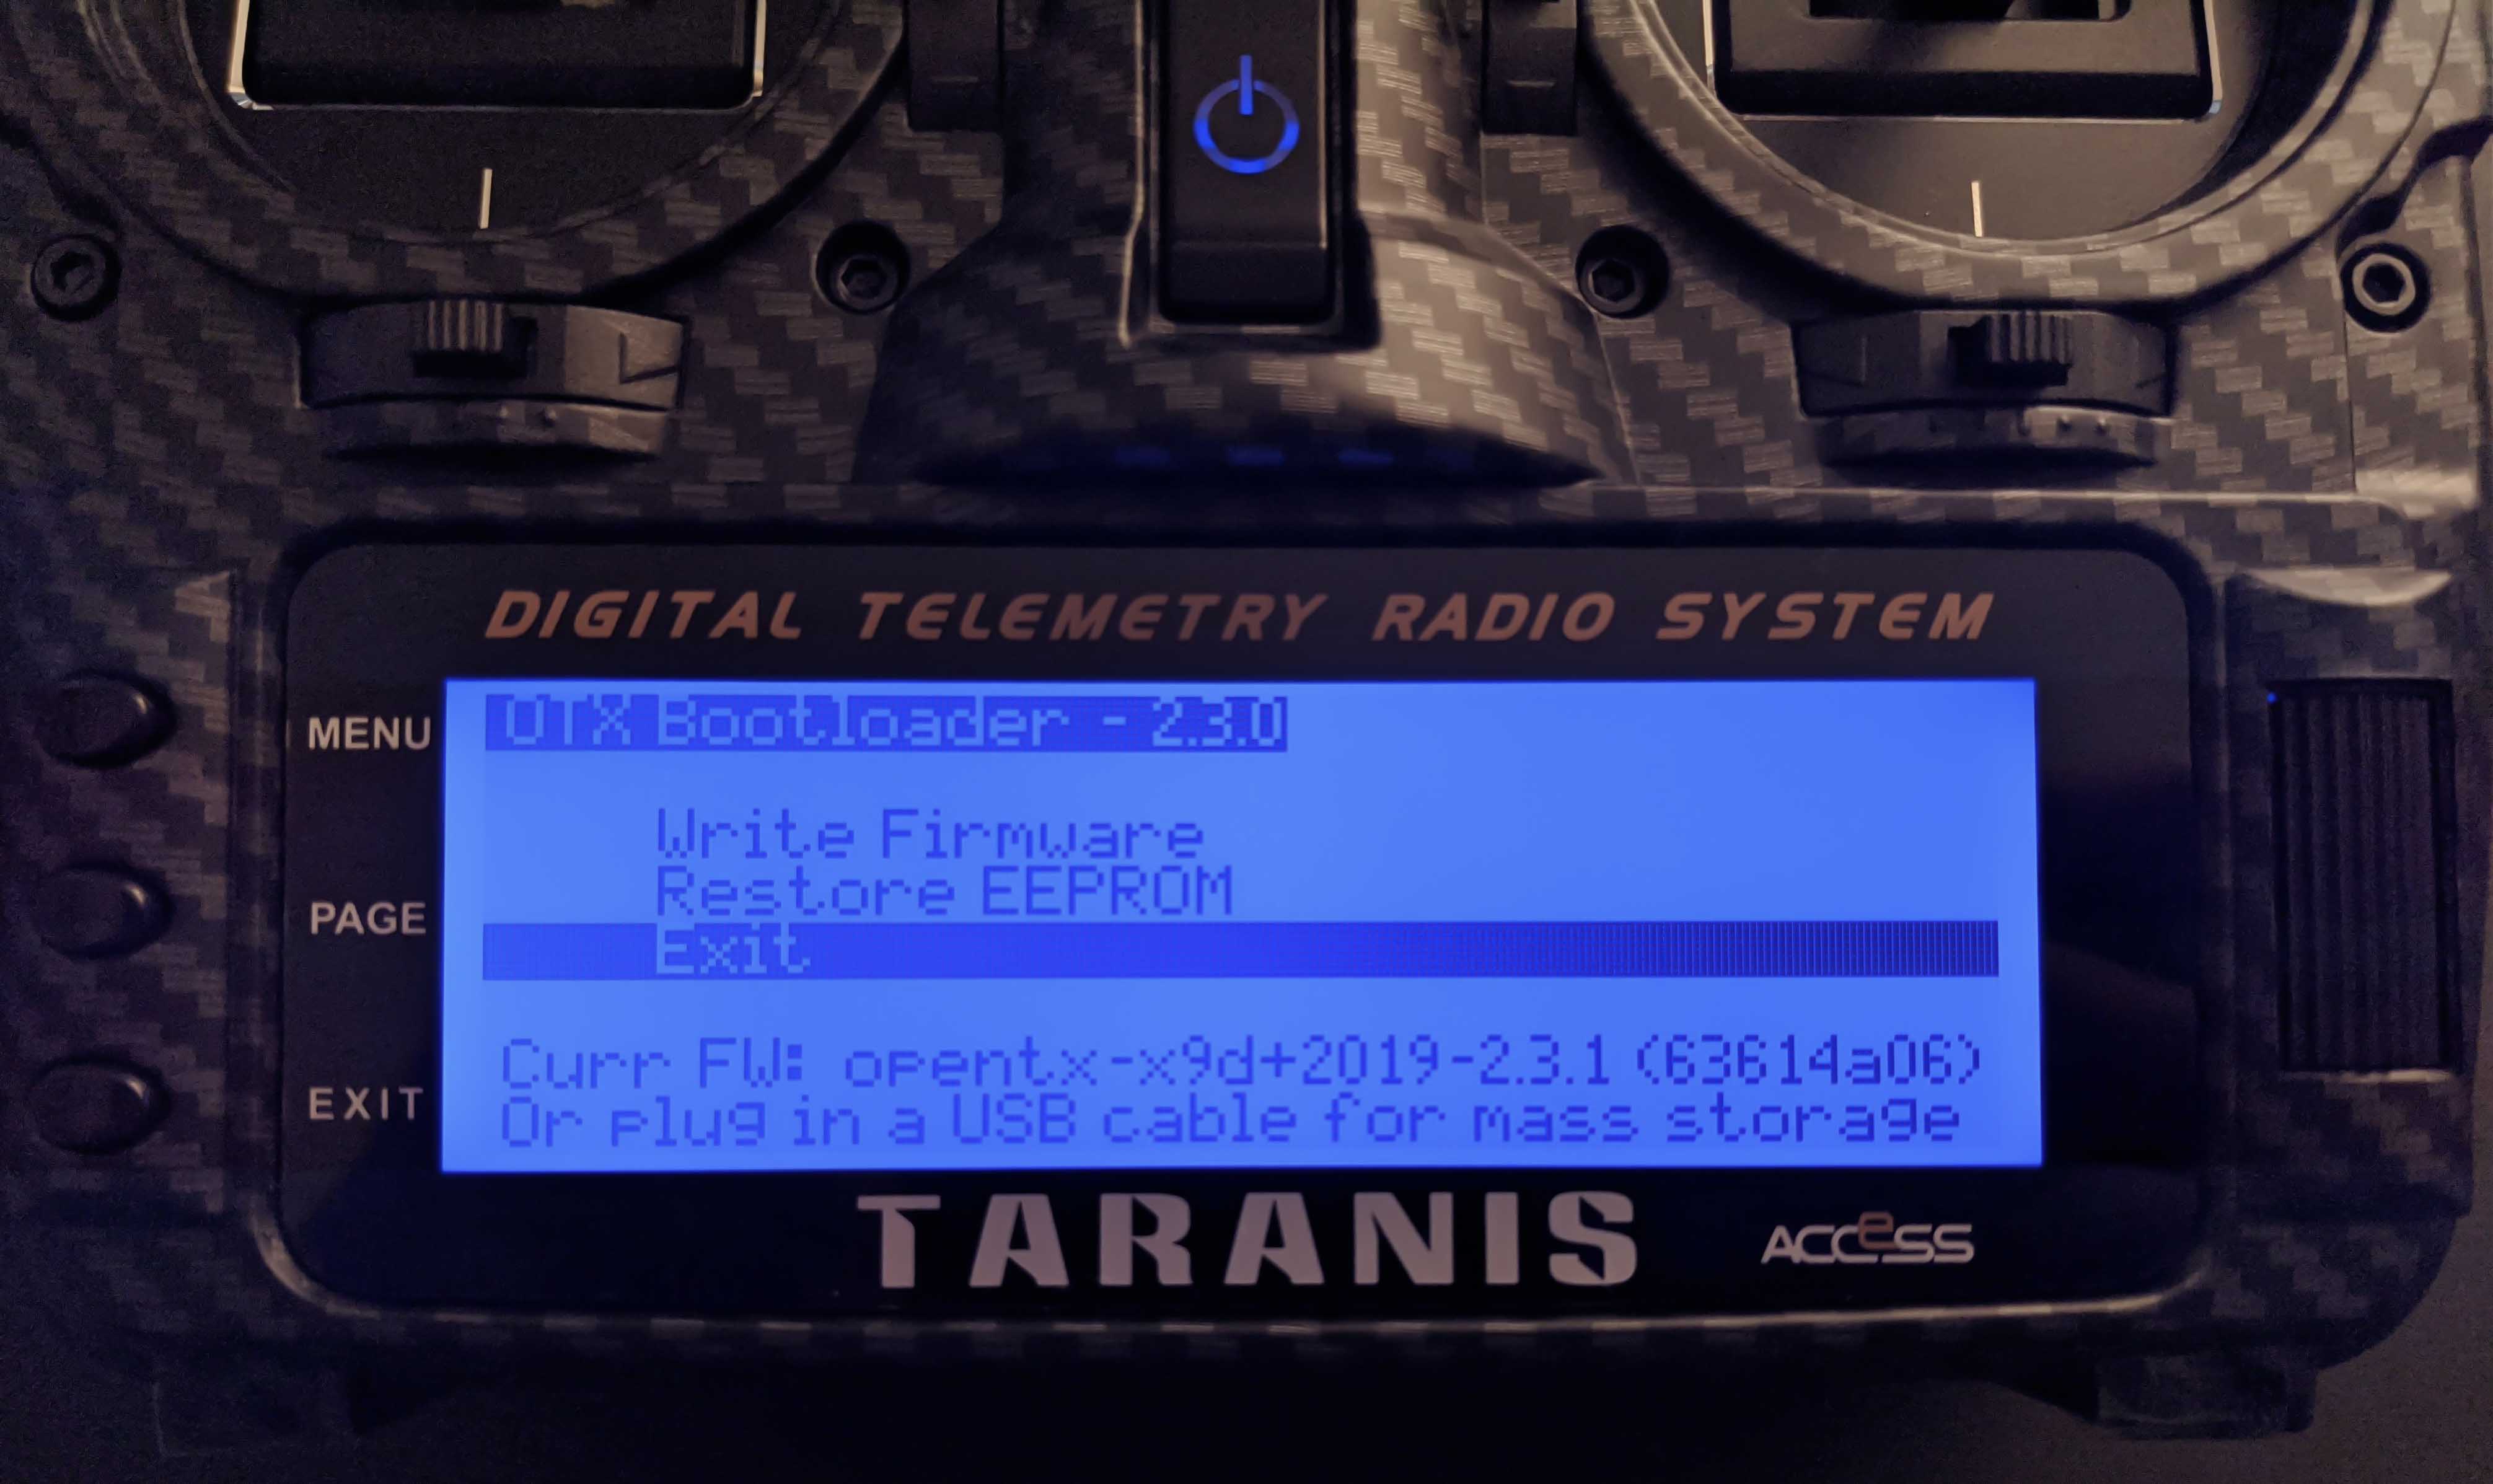
Enter the Bootloader of Taranis X9D Plus
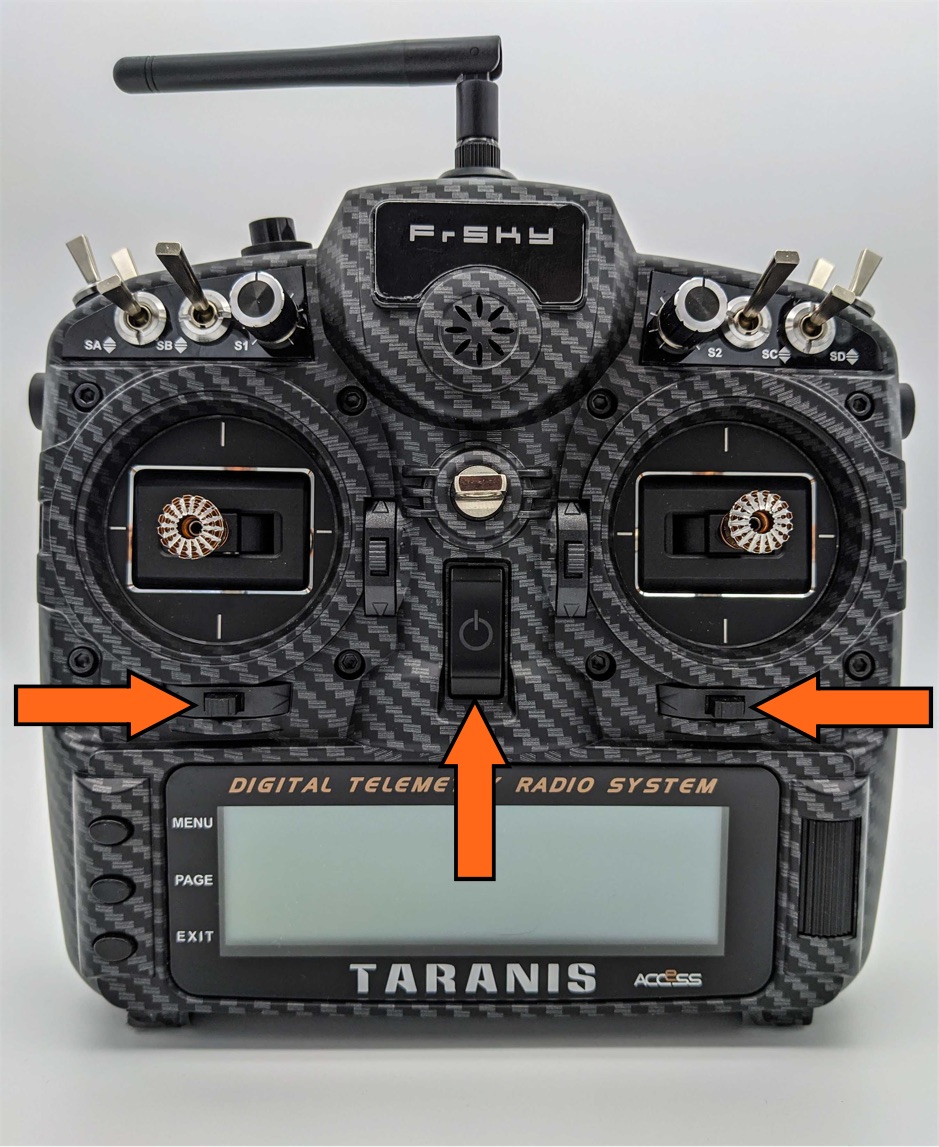
Now that we are done with the settings of the firmware that will be flashed on the radio we need to enter the bootloader. To do that, press both horizontal trim switches to the middle while powering the transmitter.
Note: Don’t press the power button for too long in order to enter the bootloader and not booting into the currently installed firmware.
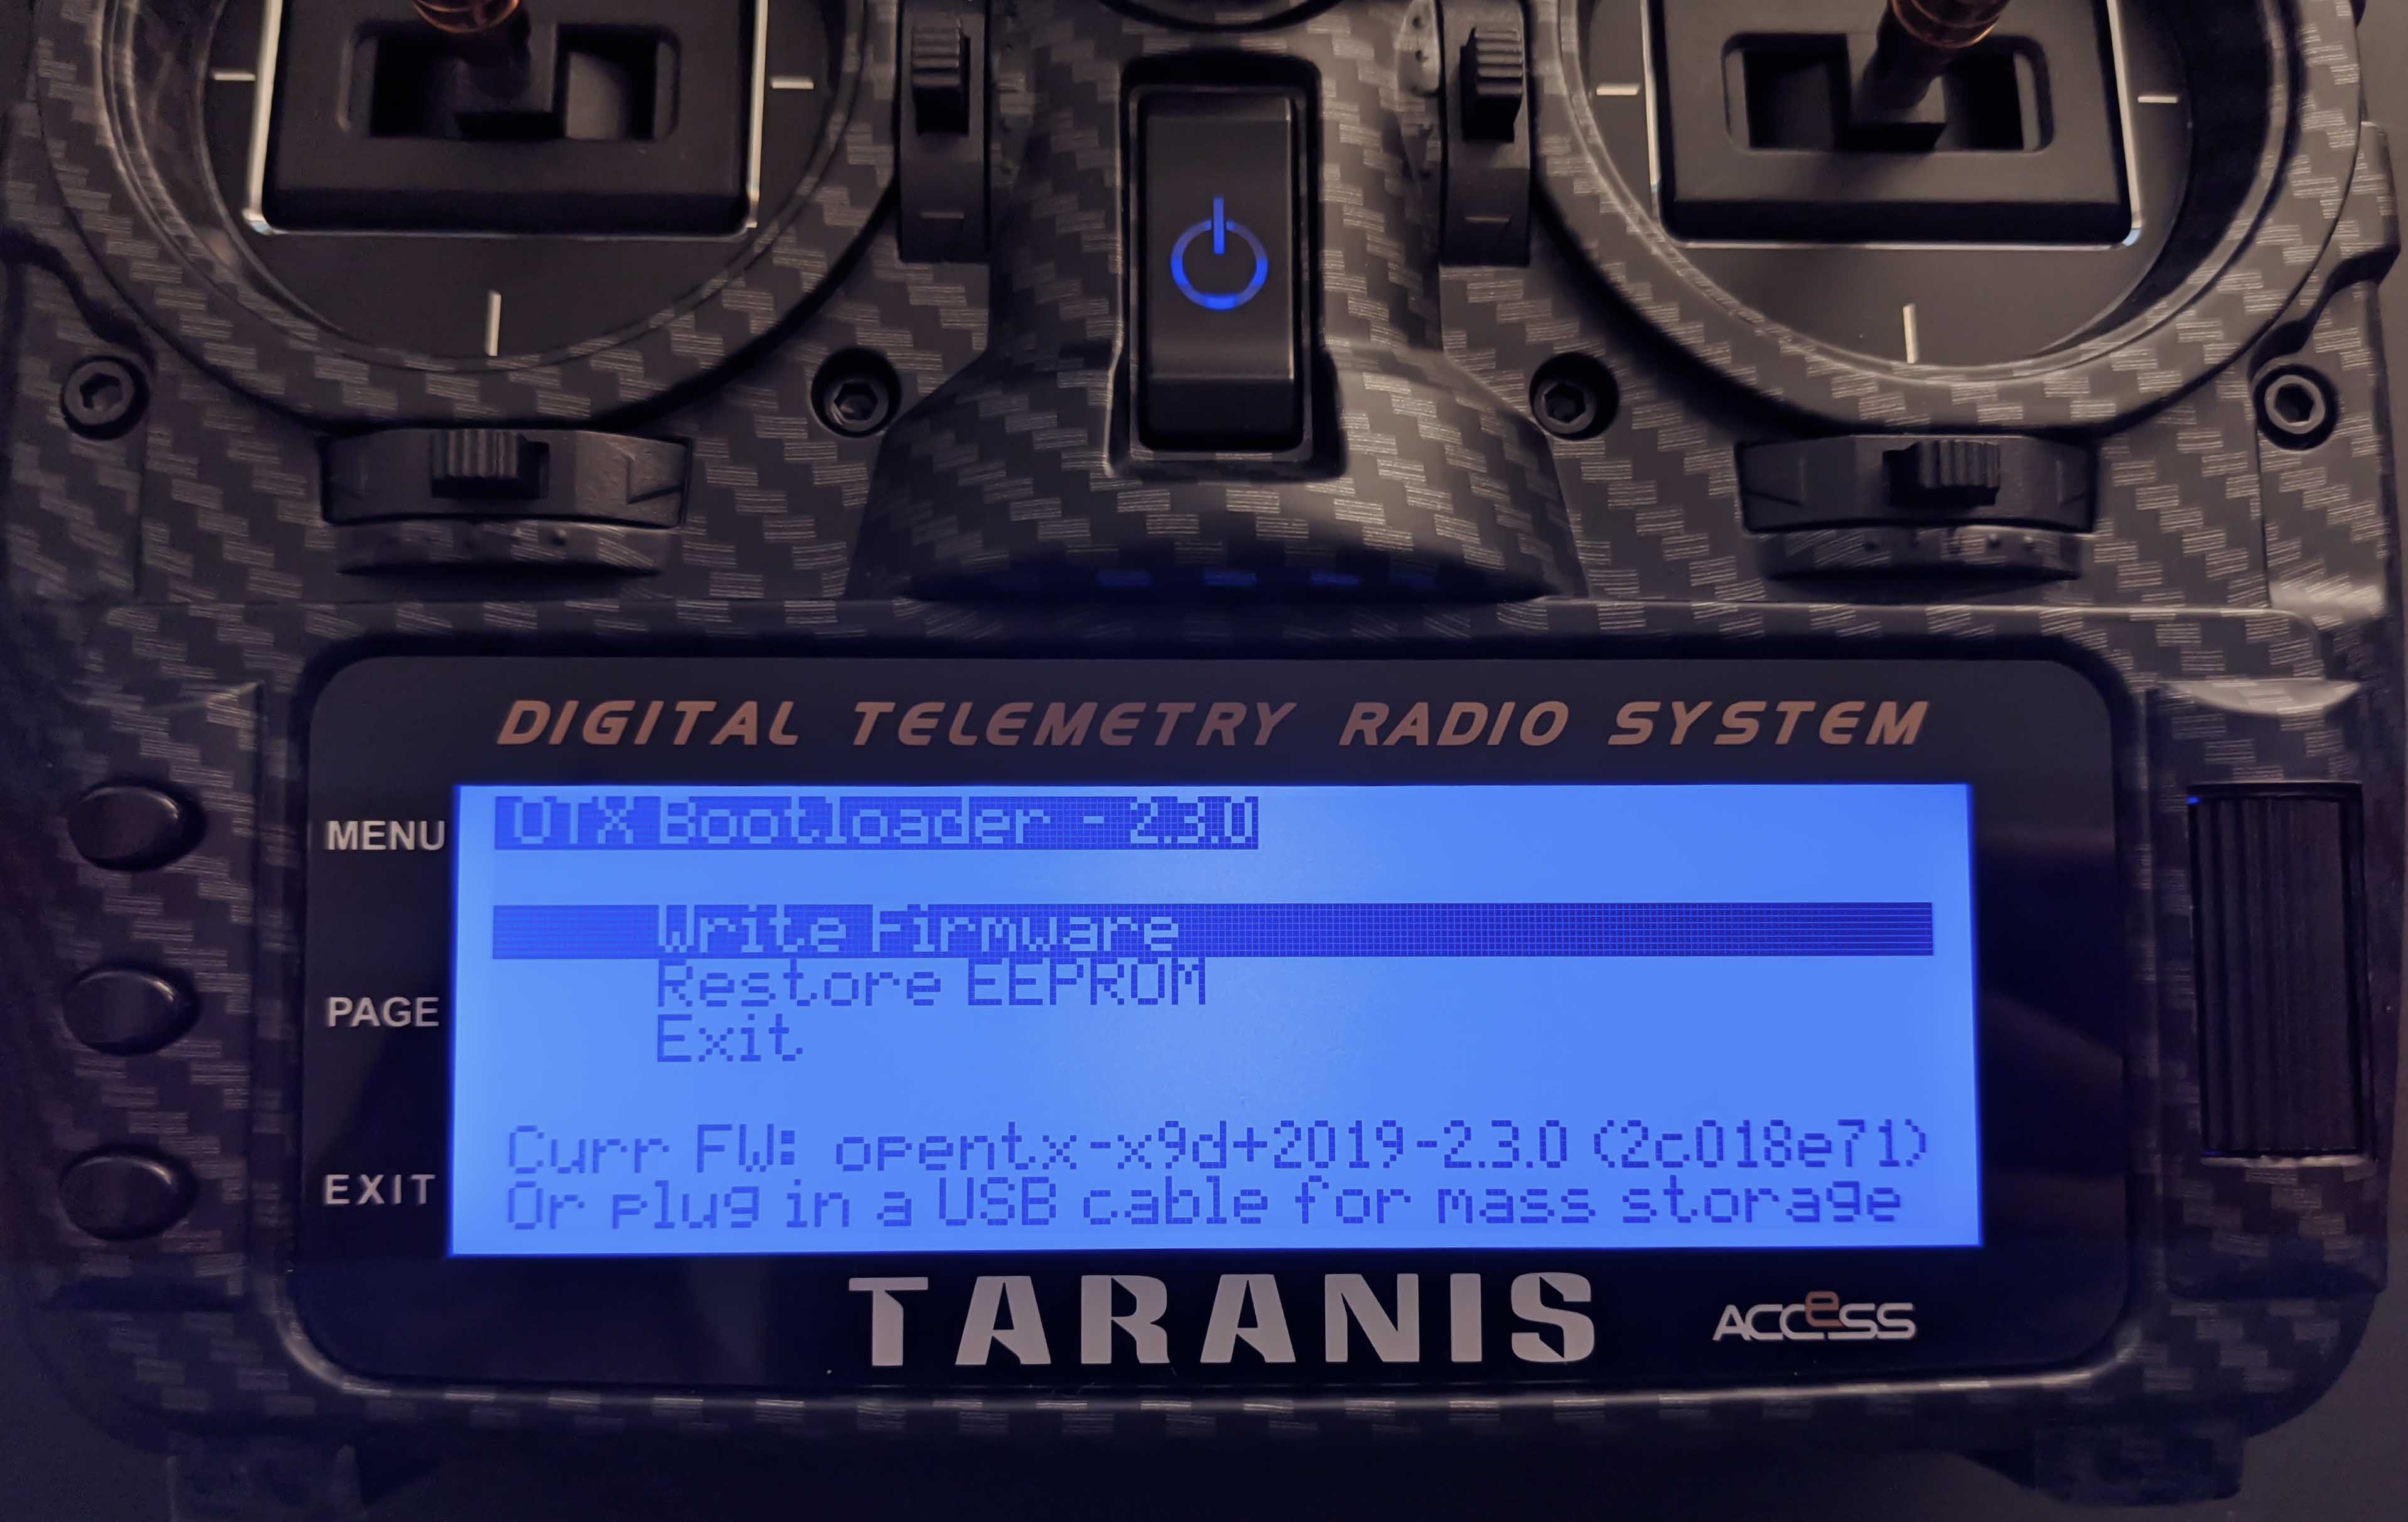
On the bootloader screen above you can also check the bootloader version which is important if you want to update the bootloader. The optional update procedure is explained at the end of this post Update Bootloader (Optional).
Flash OpenTX
Once in the bootloader menu, connect the Taranis with the computer via the provided USB cable, which will change the screen to the following mask:
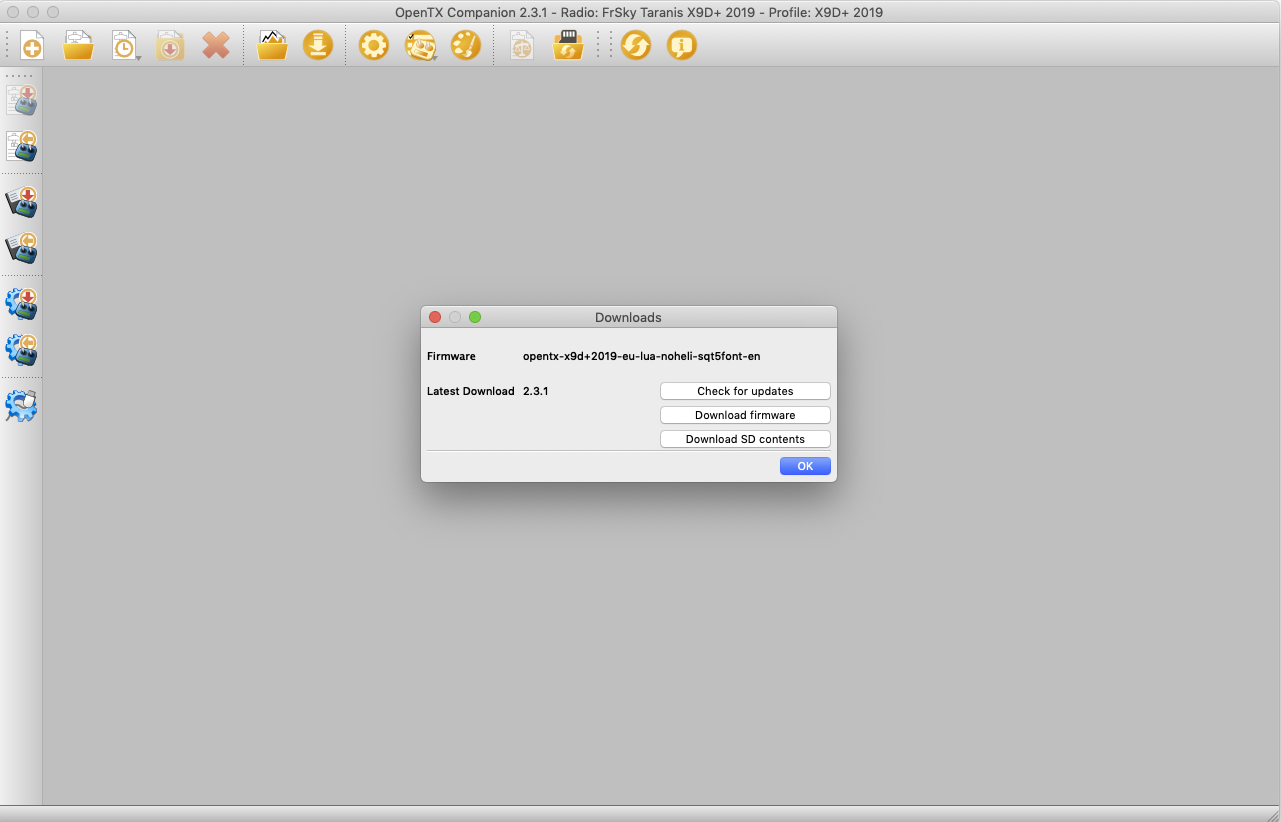
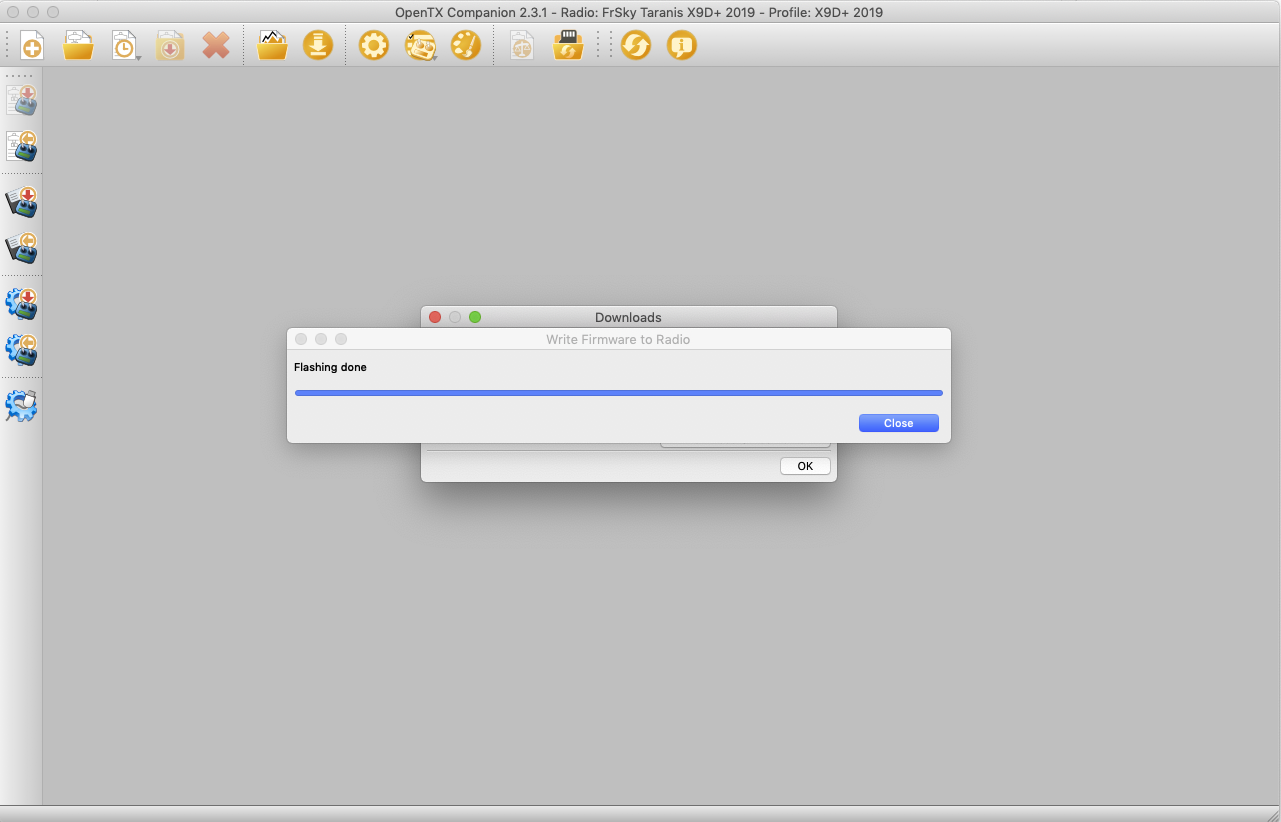
Back in the OpenTX Companion application click the Download button, then do the following steps in the new Dialog that pops up:
Check for UpdatesDownload firmwarewhich downloads the OpenTX firmware (this will be a*.binfile) with the settings you selected previously.- Write the downloaded and stored firmware to the Taranis

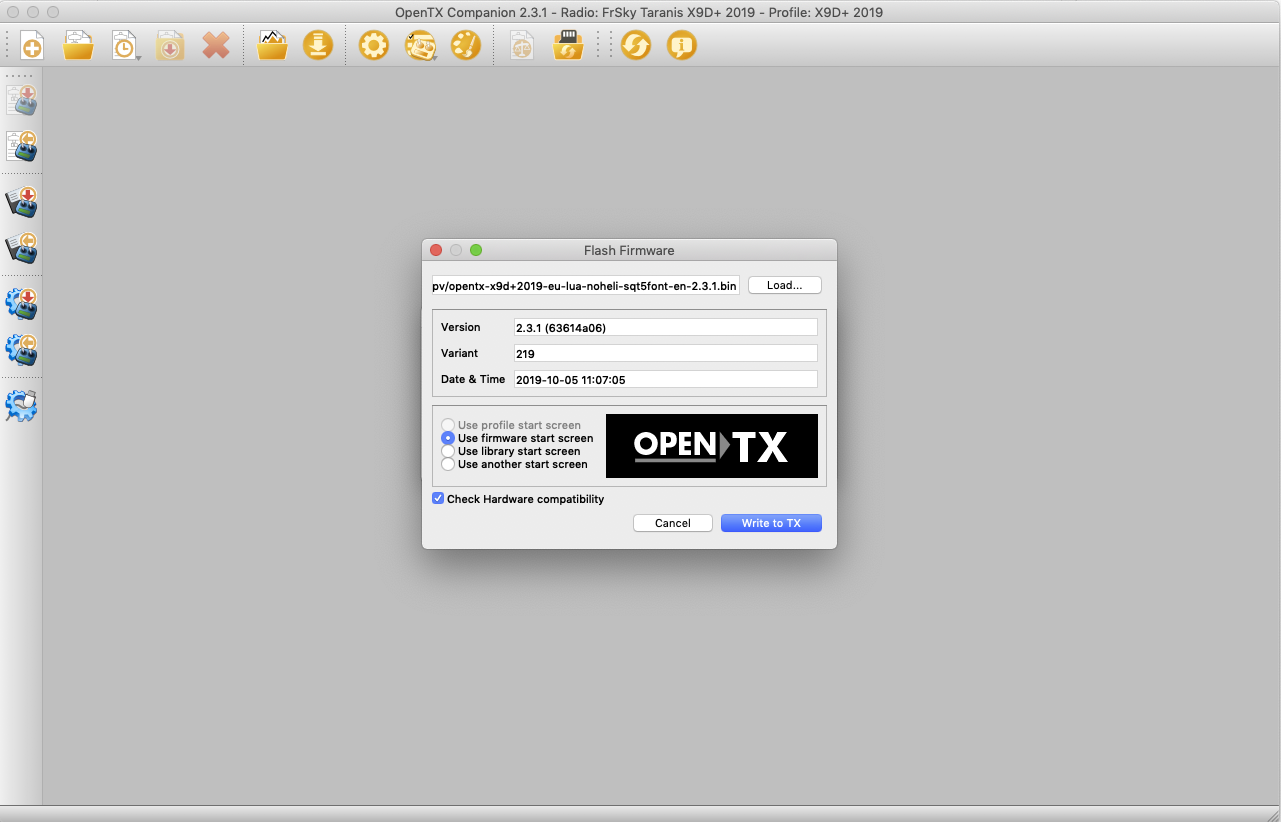
After the flashing procedure, your Taranis is updated to the latest version of OpenTX (currently 2.3.1).
Exit the bootloader, which will restart your Taranis. Power it off for the next step.
SD Card Content
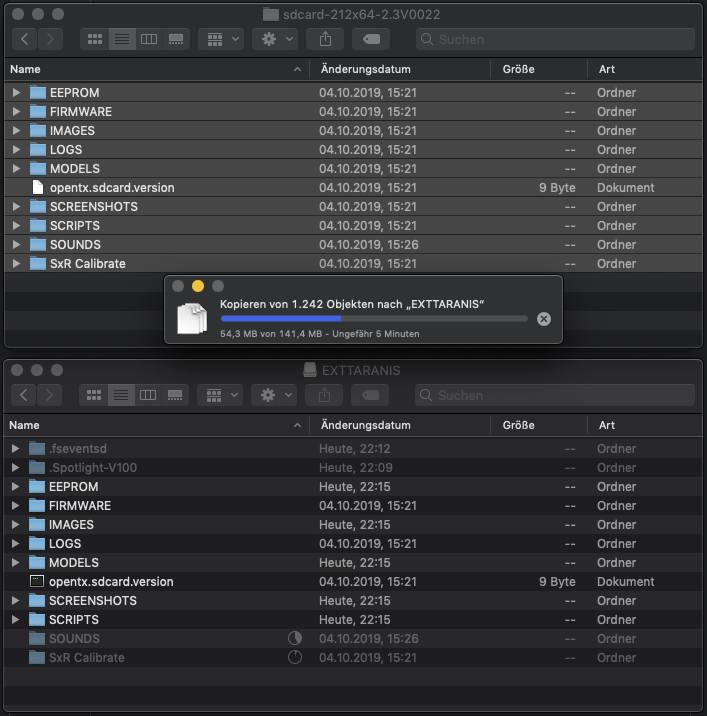
It is required to prepare an external sd card with the content downloaded from the OpenTX website. For the preperation put an empty sd card in the back tray of your Taranis.
In this post it is called EXTTARANIS.
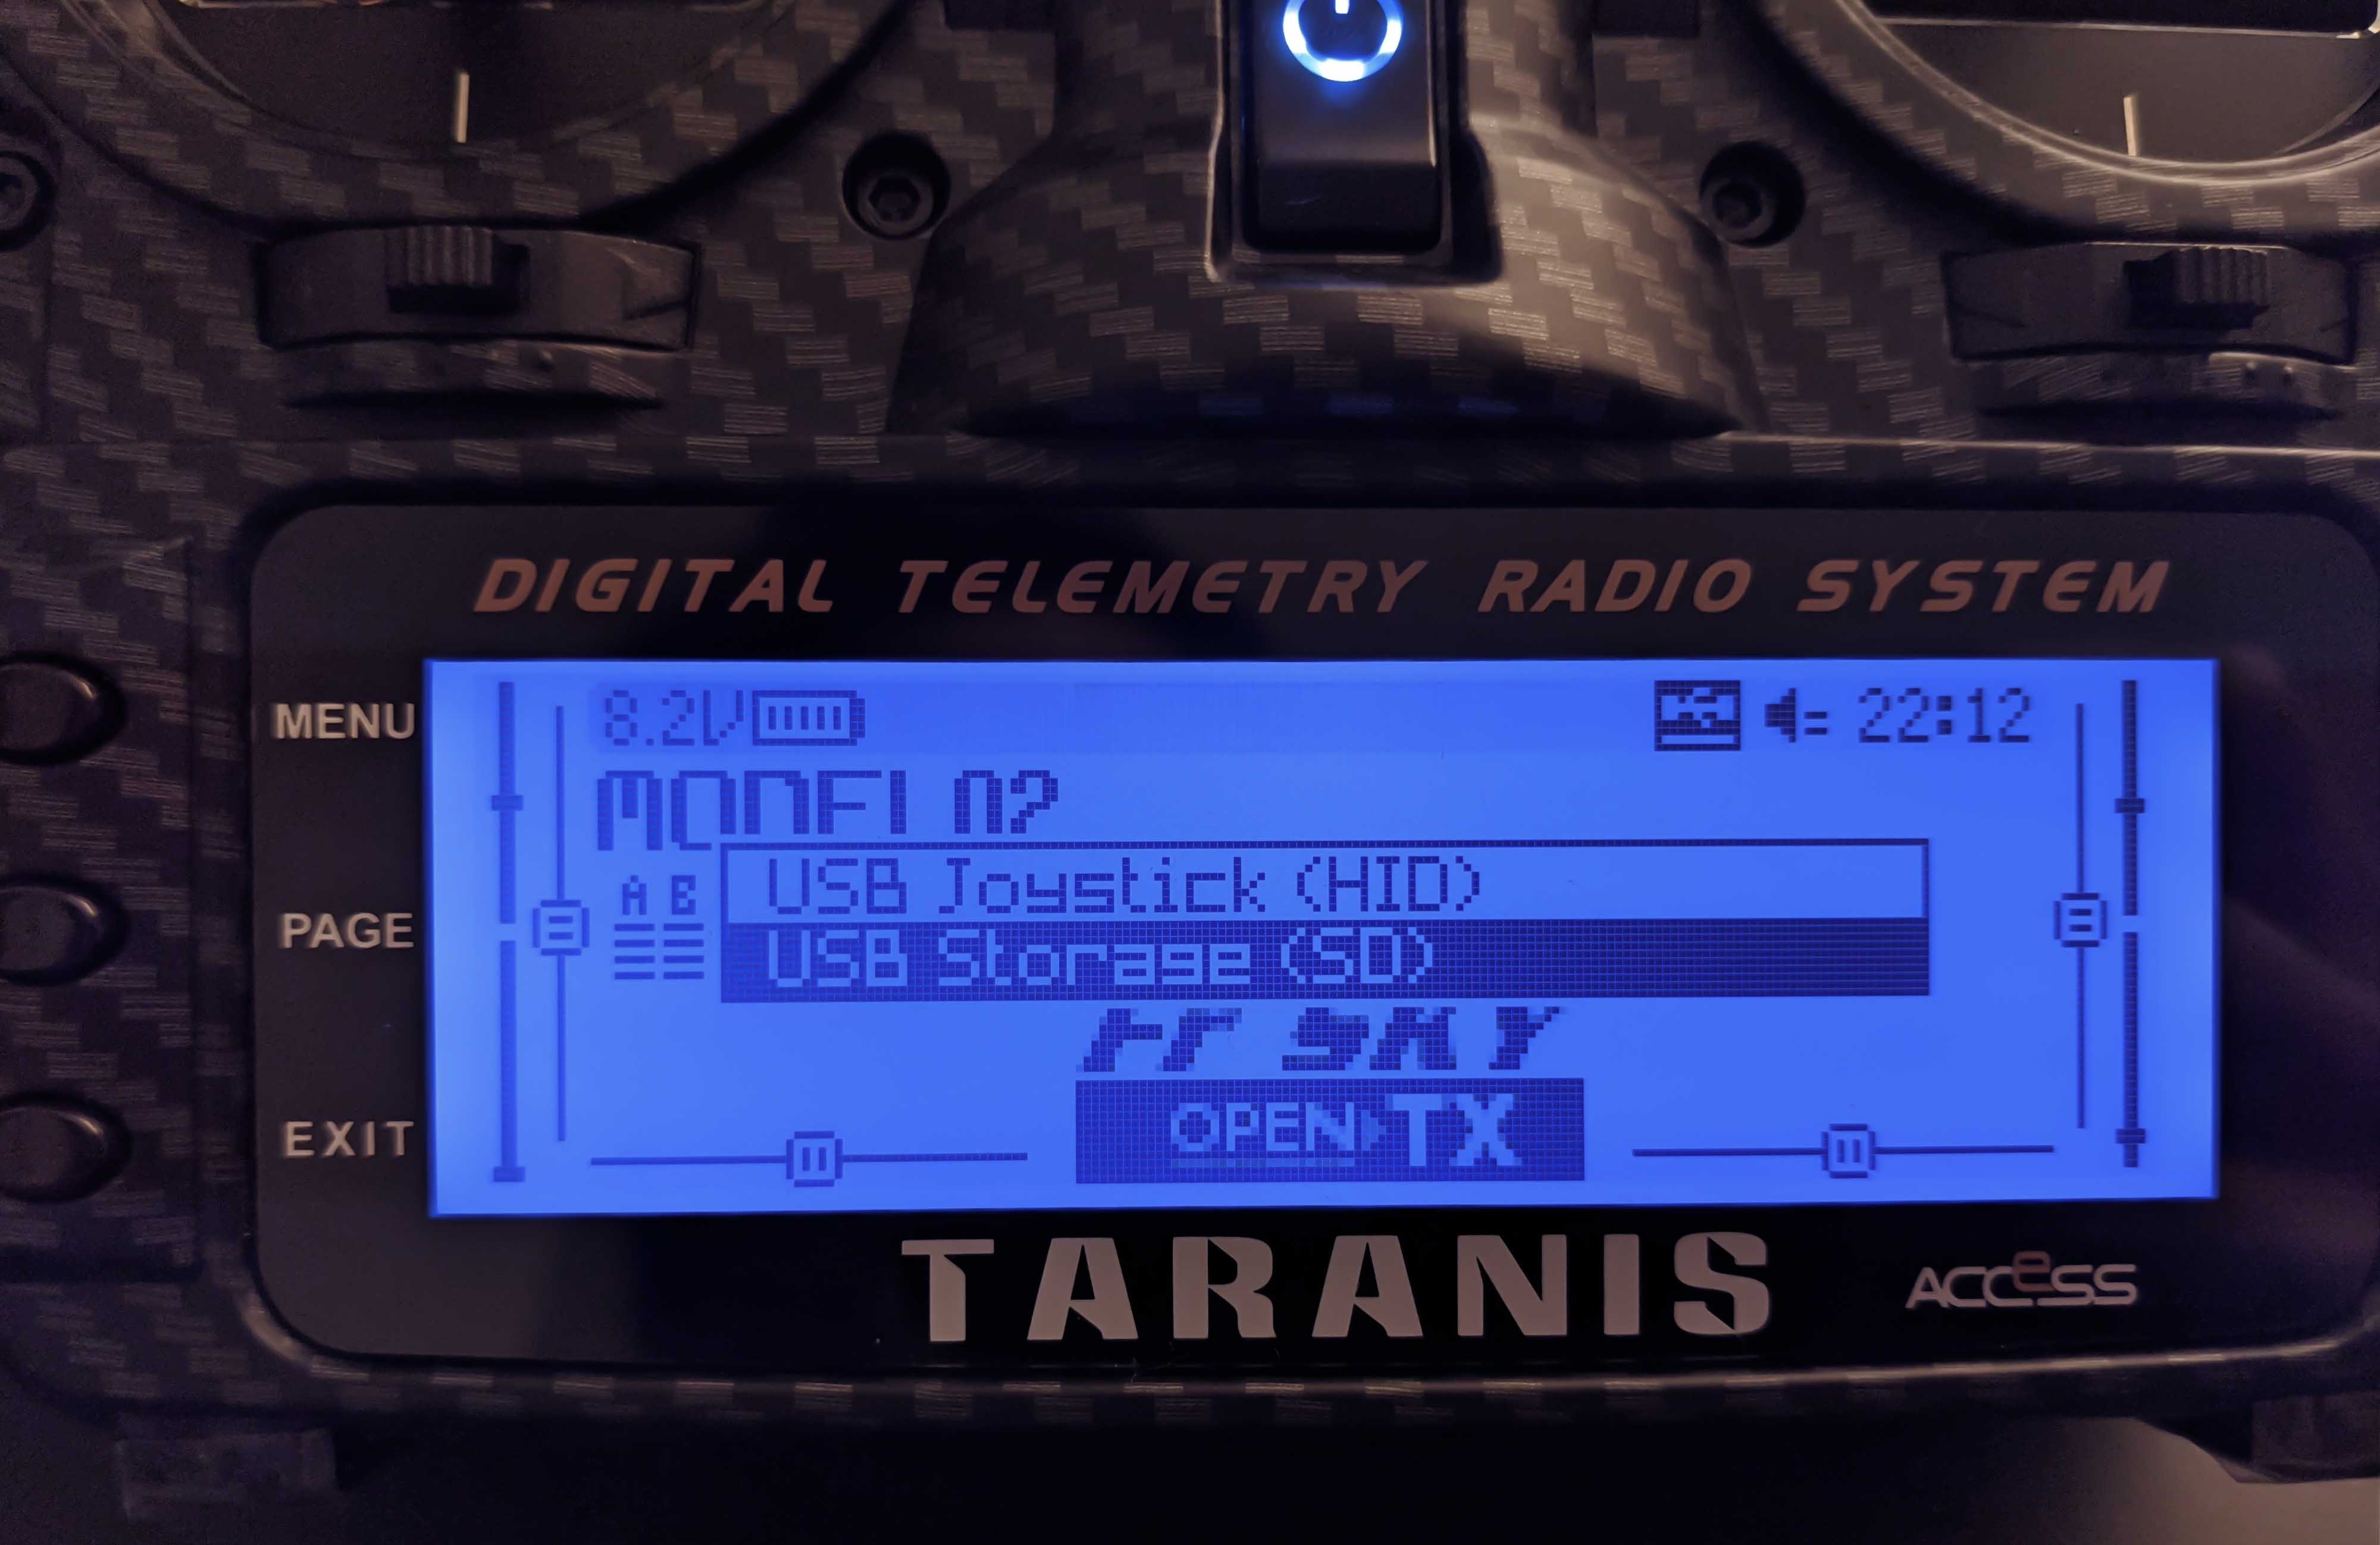
When you’ve inserted the sd card, power on the Taranis and connect it with the USB cable to your computer.
A message will pop up on your Taranis, where you should select USB Storage (SD), as shown in the following image:
Scripts Folder for ISRM lua Script
Next, place the content of the downloaded sd card zip file on the empty sd card and open the SCRIPTS/TOOLS folder
where you copy the lua script for changing the internal module into the FCC or EU-LBT mode.
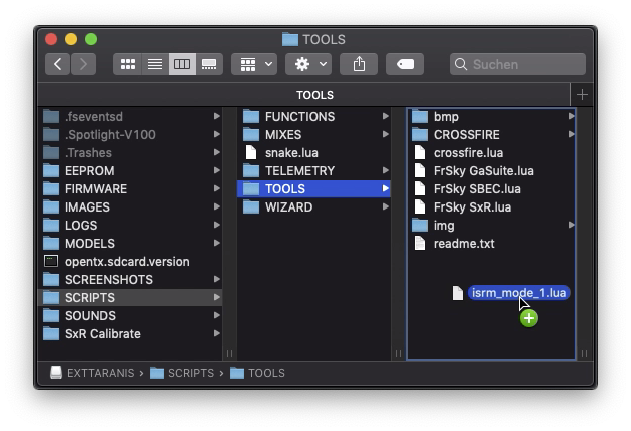
The mentioned lua script to switch the internal module into the FCC or EU-LBT mode can be obtained from the FrSky support.
Because it is not allowed to share this script, just write a mail to the FrSky support asking for the lua script. It is named isrm_mode_1.lua. Using this script you must choose the correct firmware that is allowed in your area.
EEPROM Folder for Bootloader
If you would like to use the latest bootloader that comes with the OpenTX firmware then copy the *.bin file to the EEPROM folder of your external EXTARANIS sd card and rename it to something short opentx-2.3.1.bin. Remember that the *.bin firmware file was downloaded via OpenTX Companion.
Follow the steps at the end of this post to update the bootloader.
Update Internal Module Firmware (Optional)
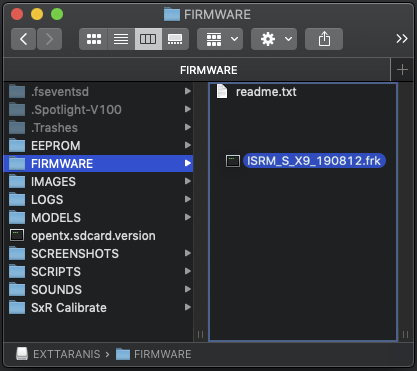
In case you want to update the firmware of the internal transmitter module also refered to as ISRM,
download the latest firmware from the FrSky website.
Once downloaded, unzip the firmware file, for example ISRM_S_X9_190812.frk and place it in the FIRMWARE folder of
the external sd card of your Taranis.
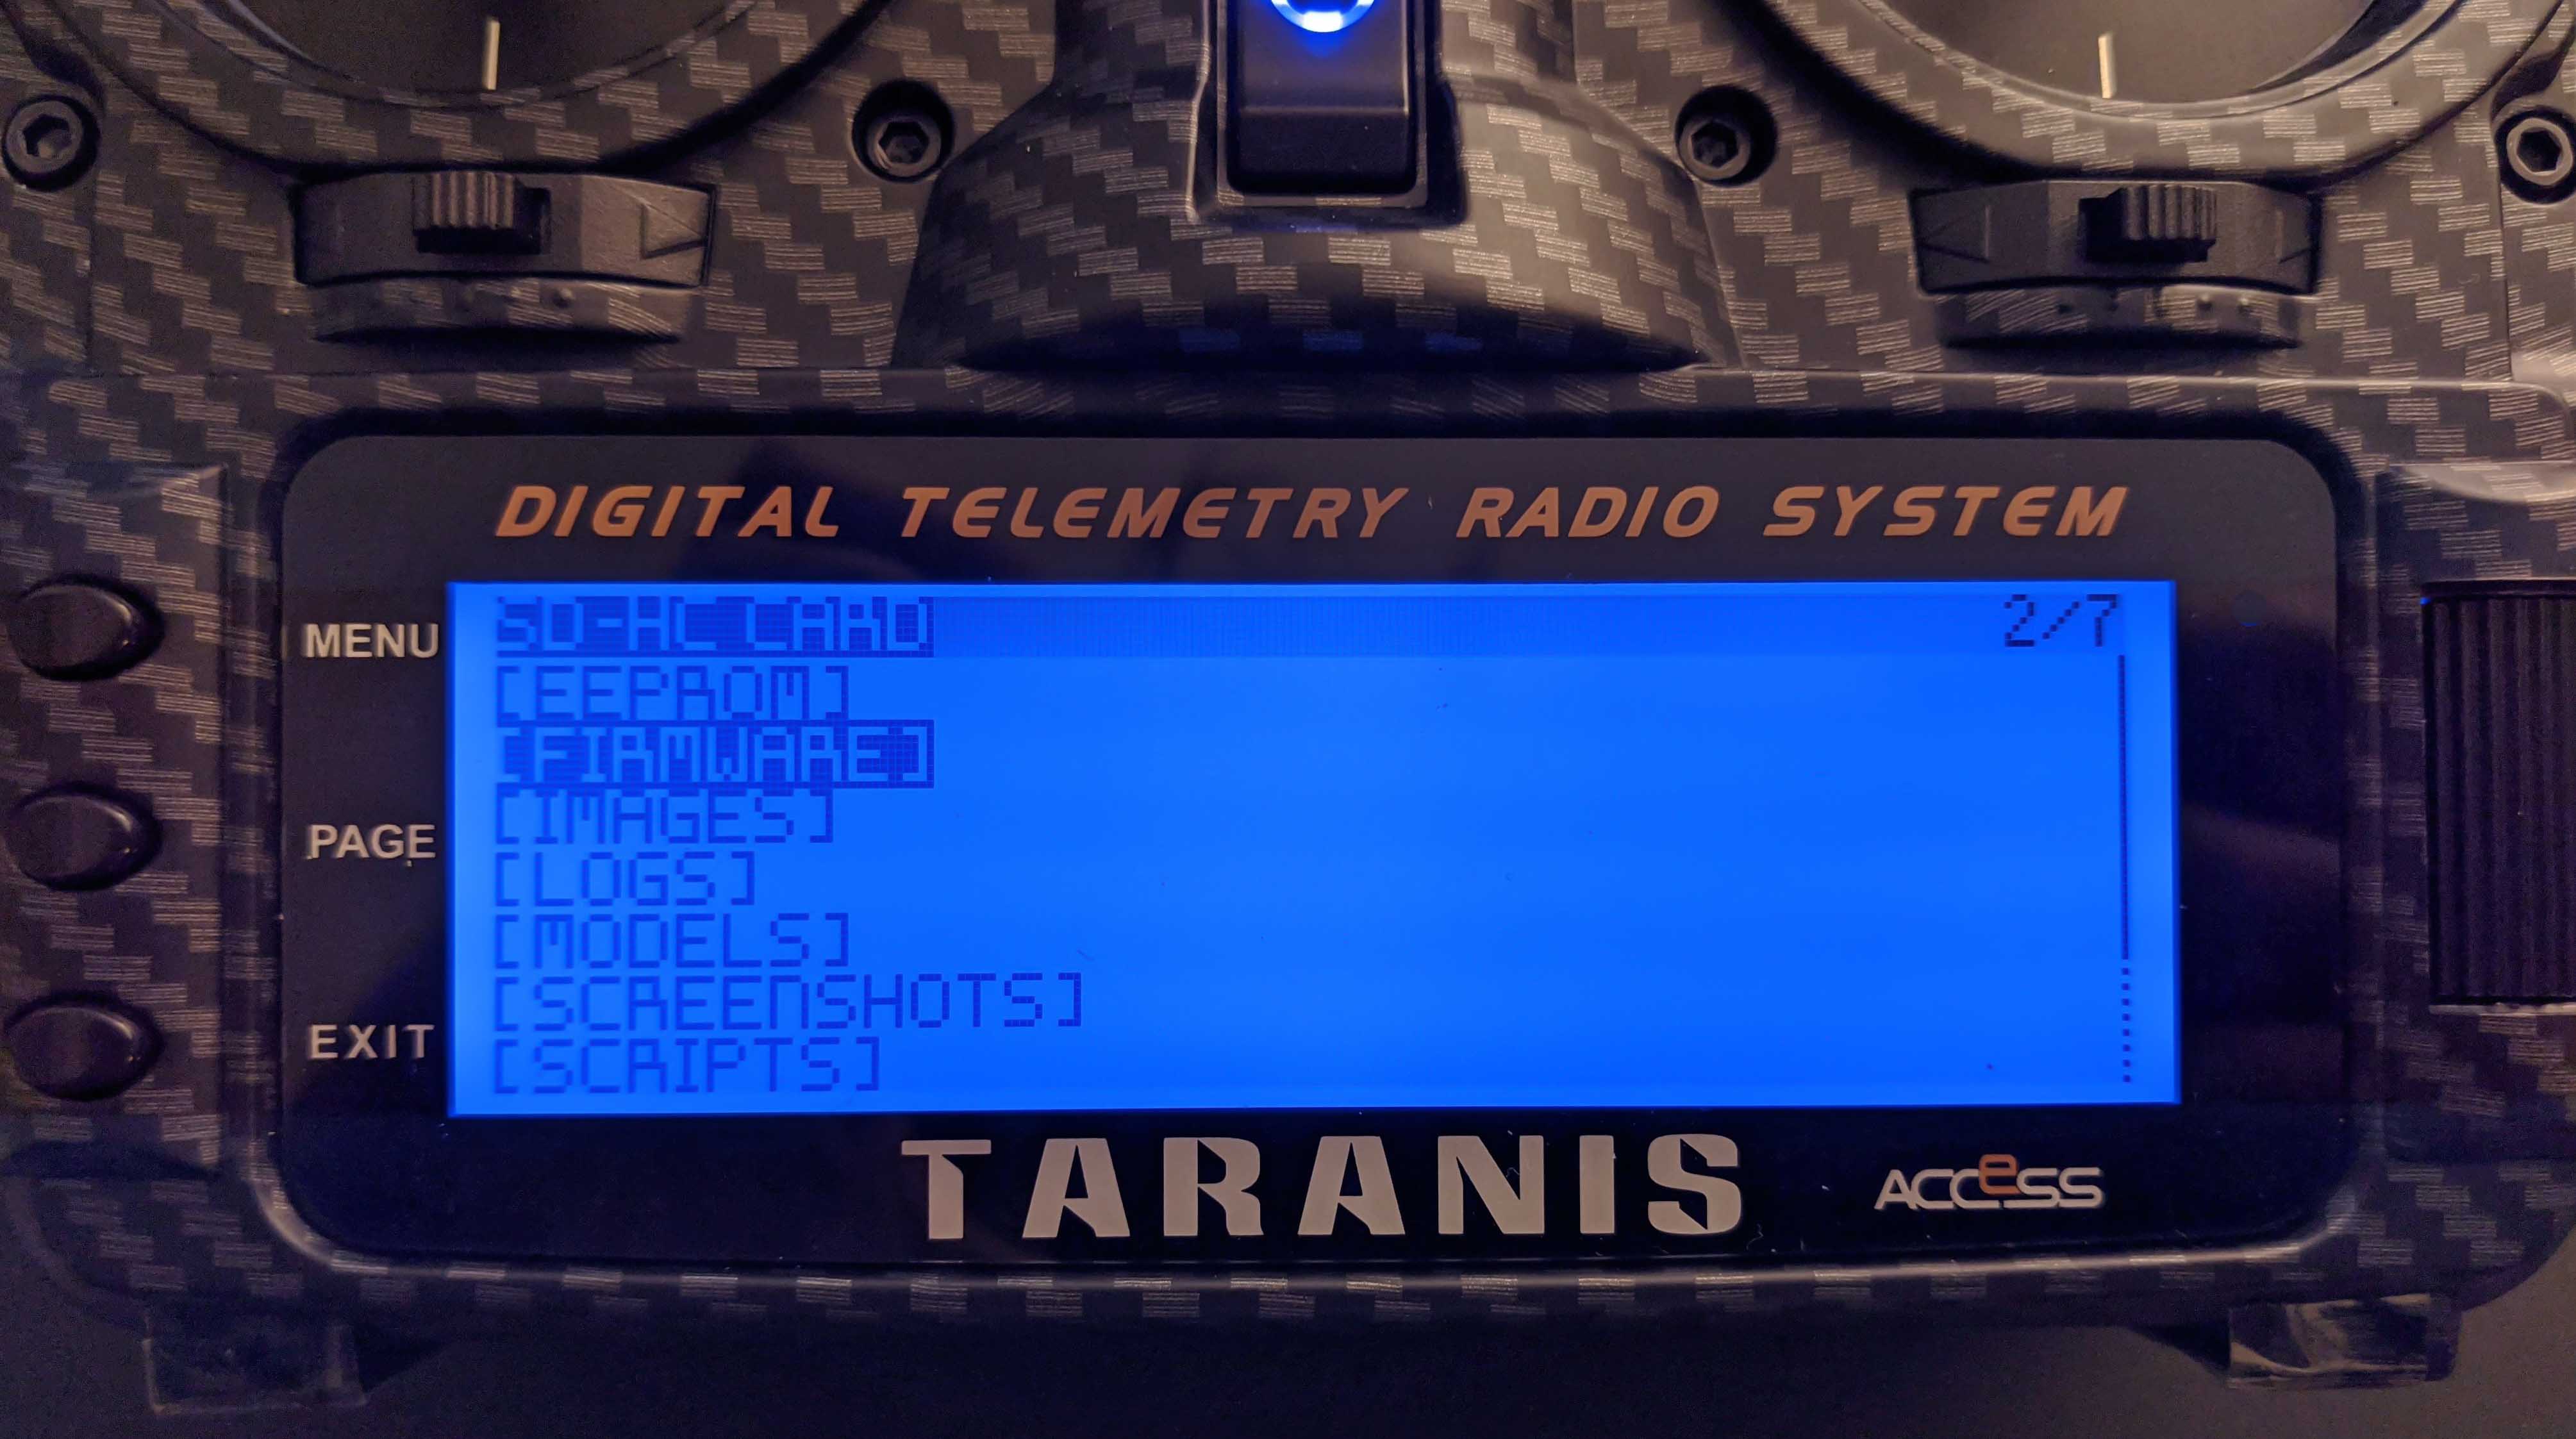
After ejecting the Taranis and EXTTARANIS from you computer, unplug the usb cable.
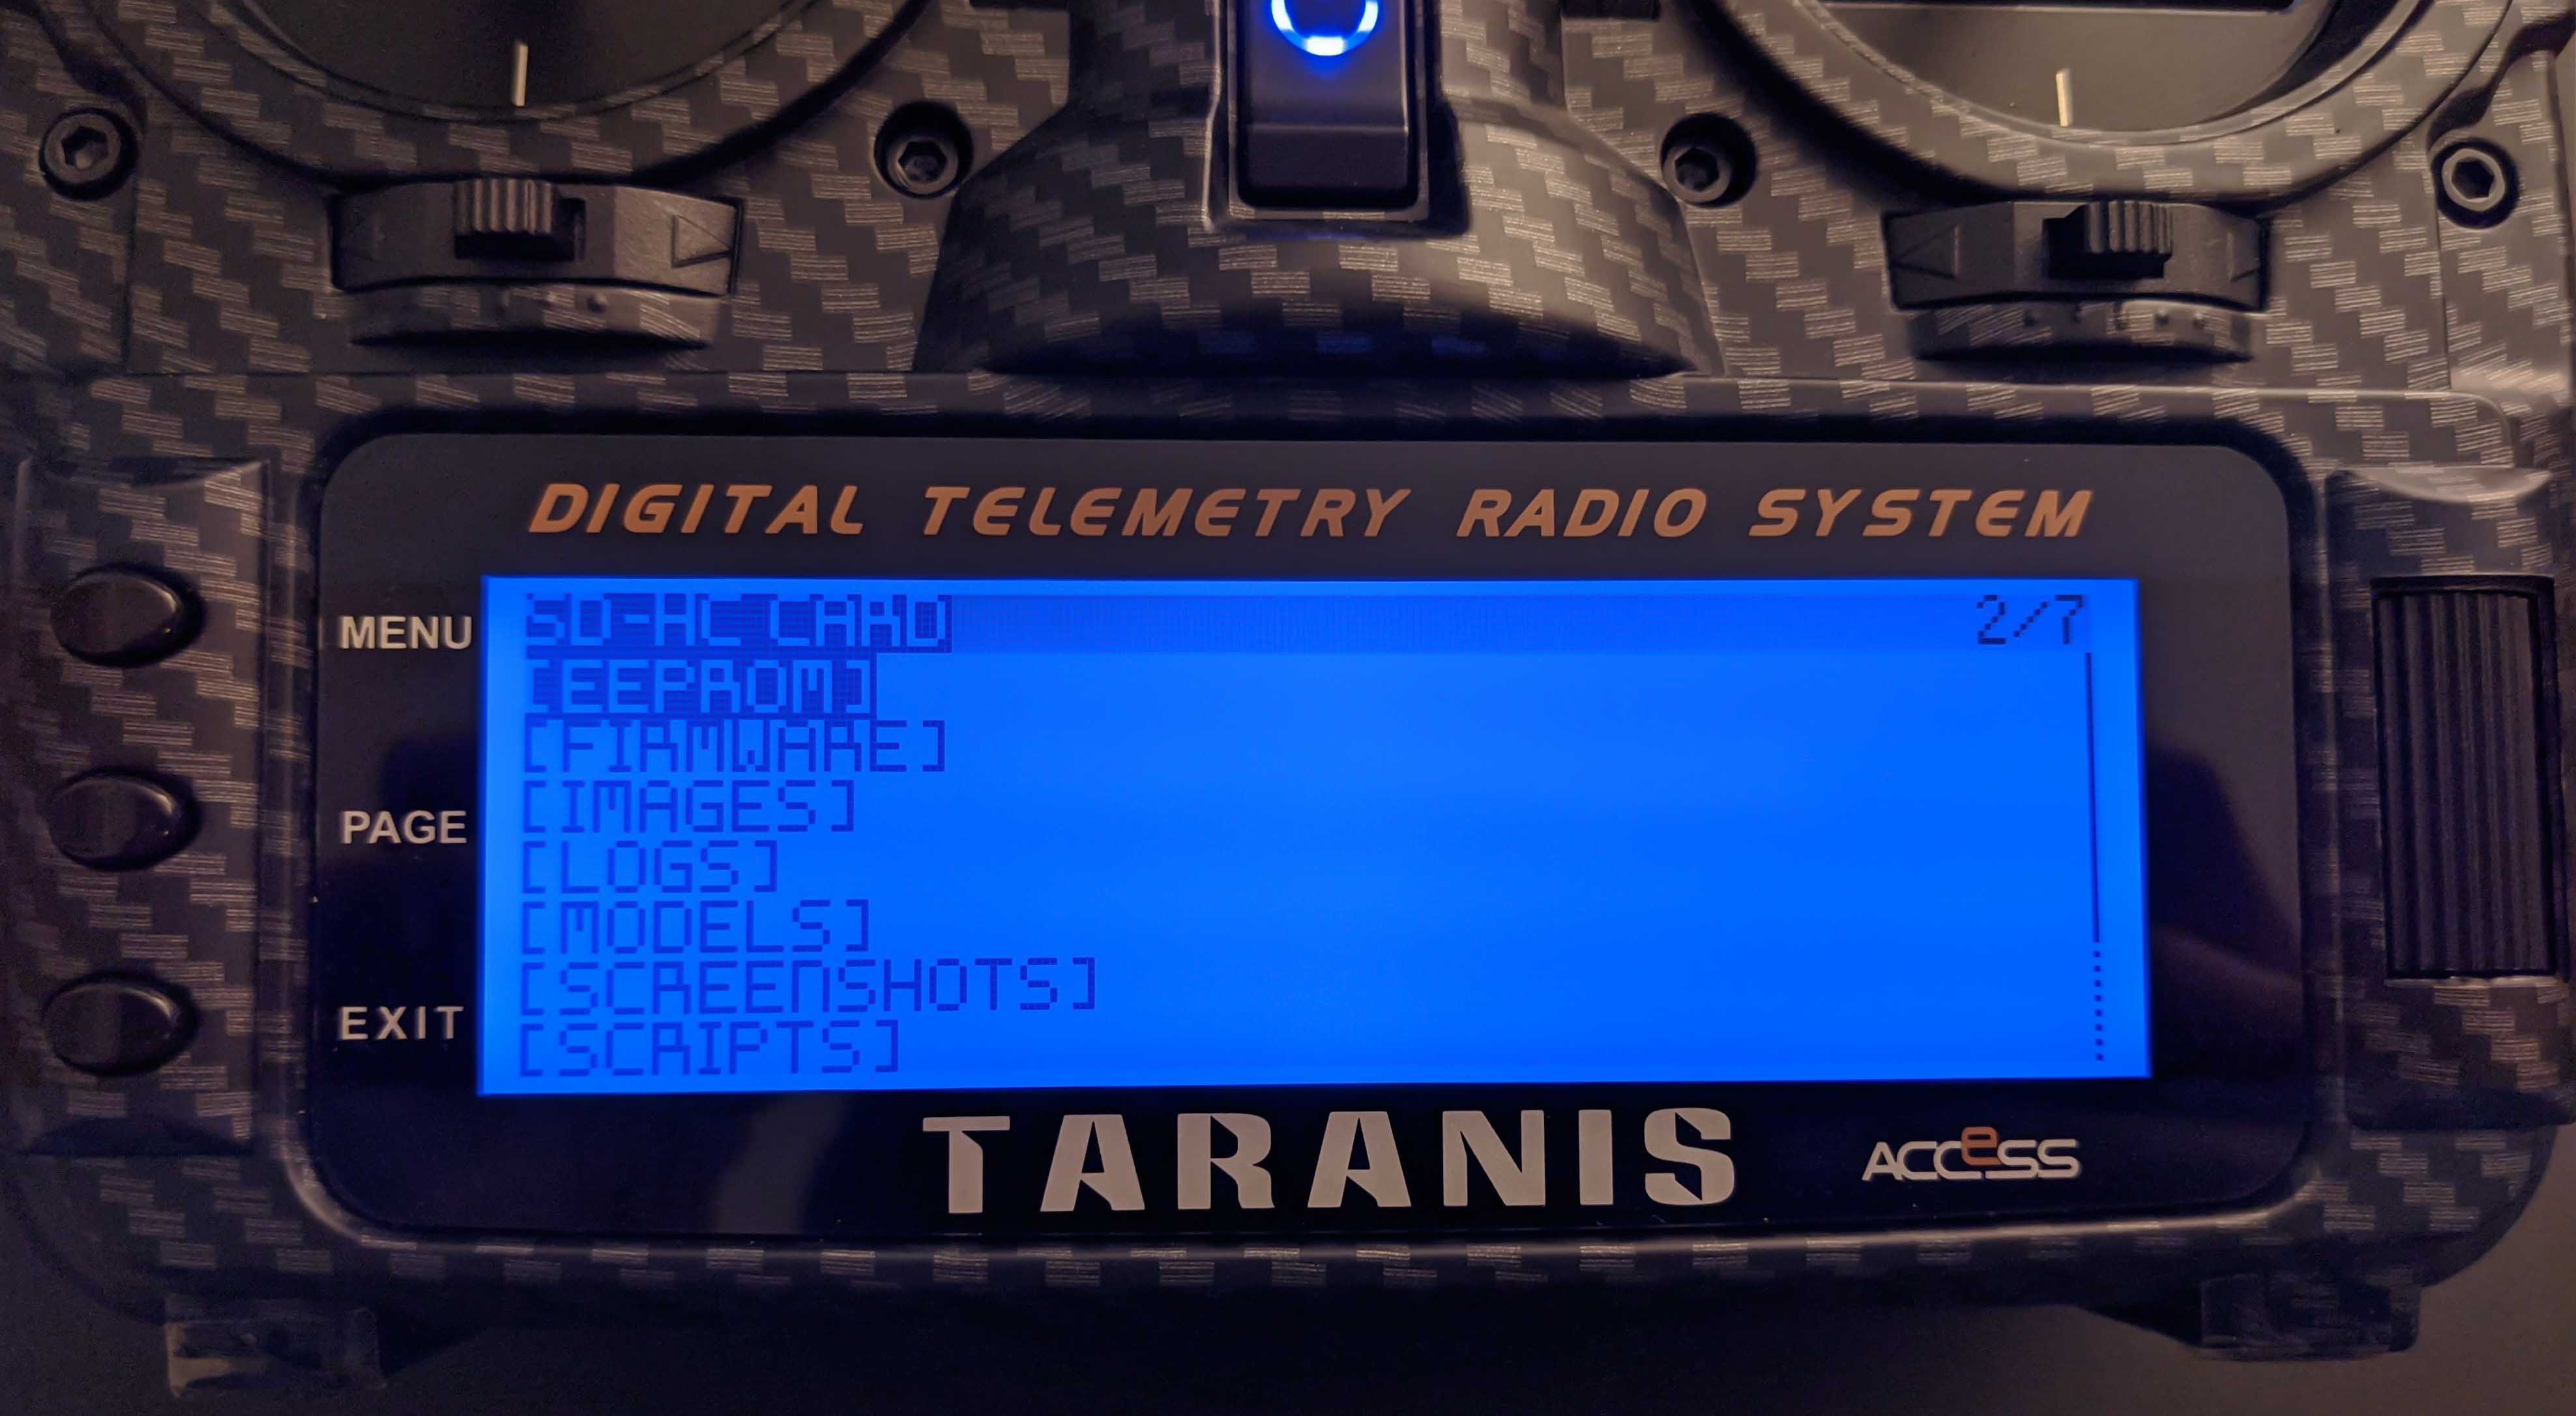
Then, long press the MENU button and press PAGE to switch to the SD-HC CARD page. Here, enter the [FIRMWARE] folder.
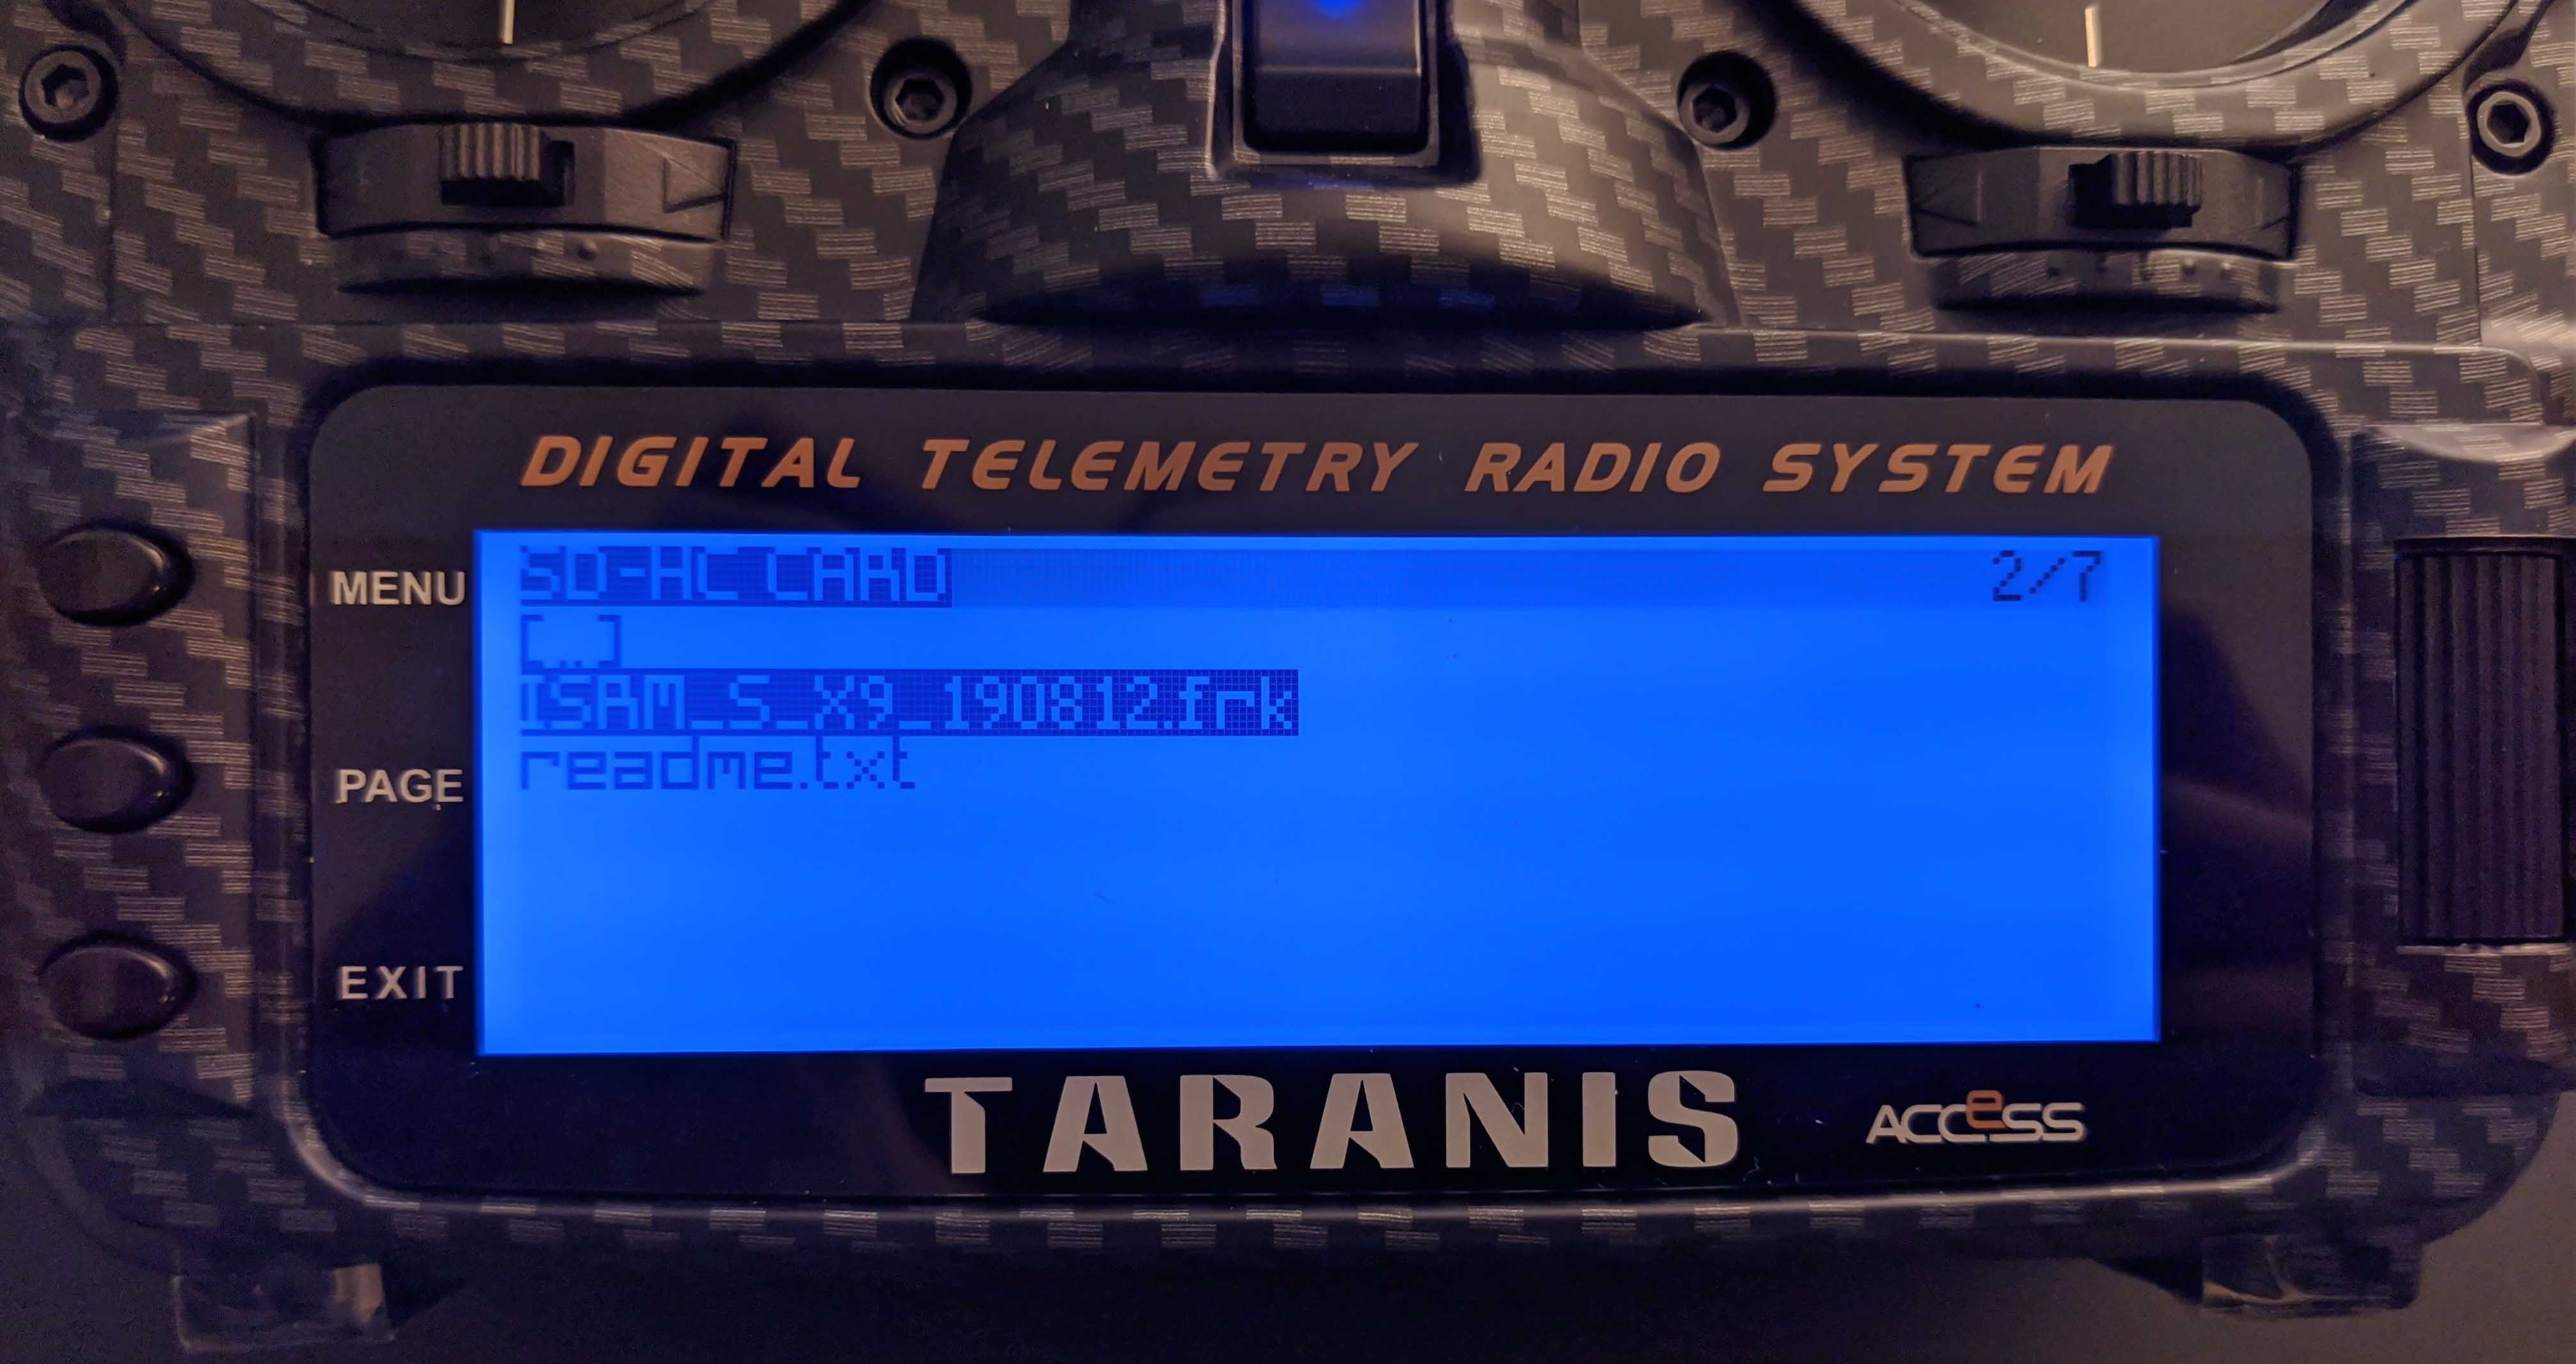
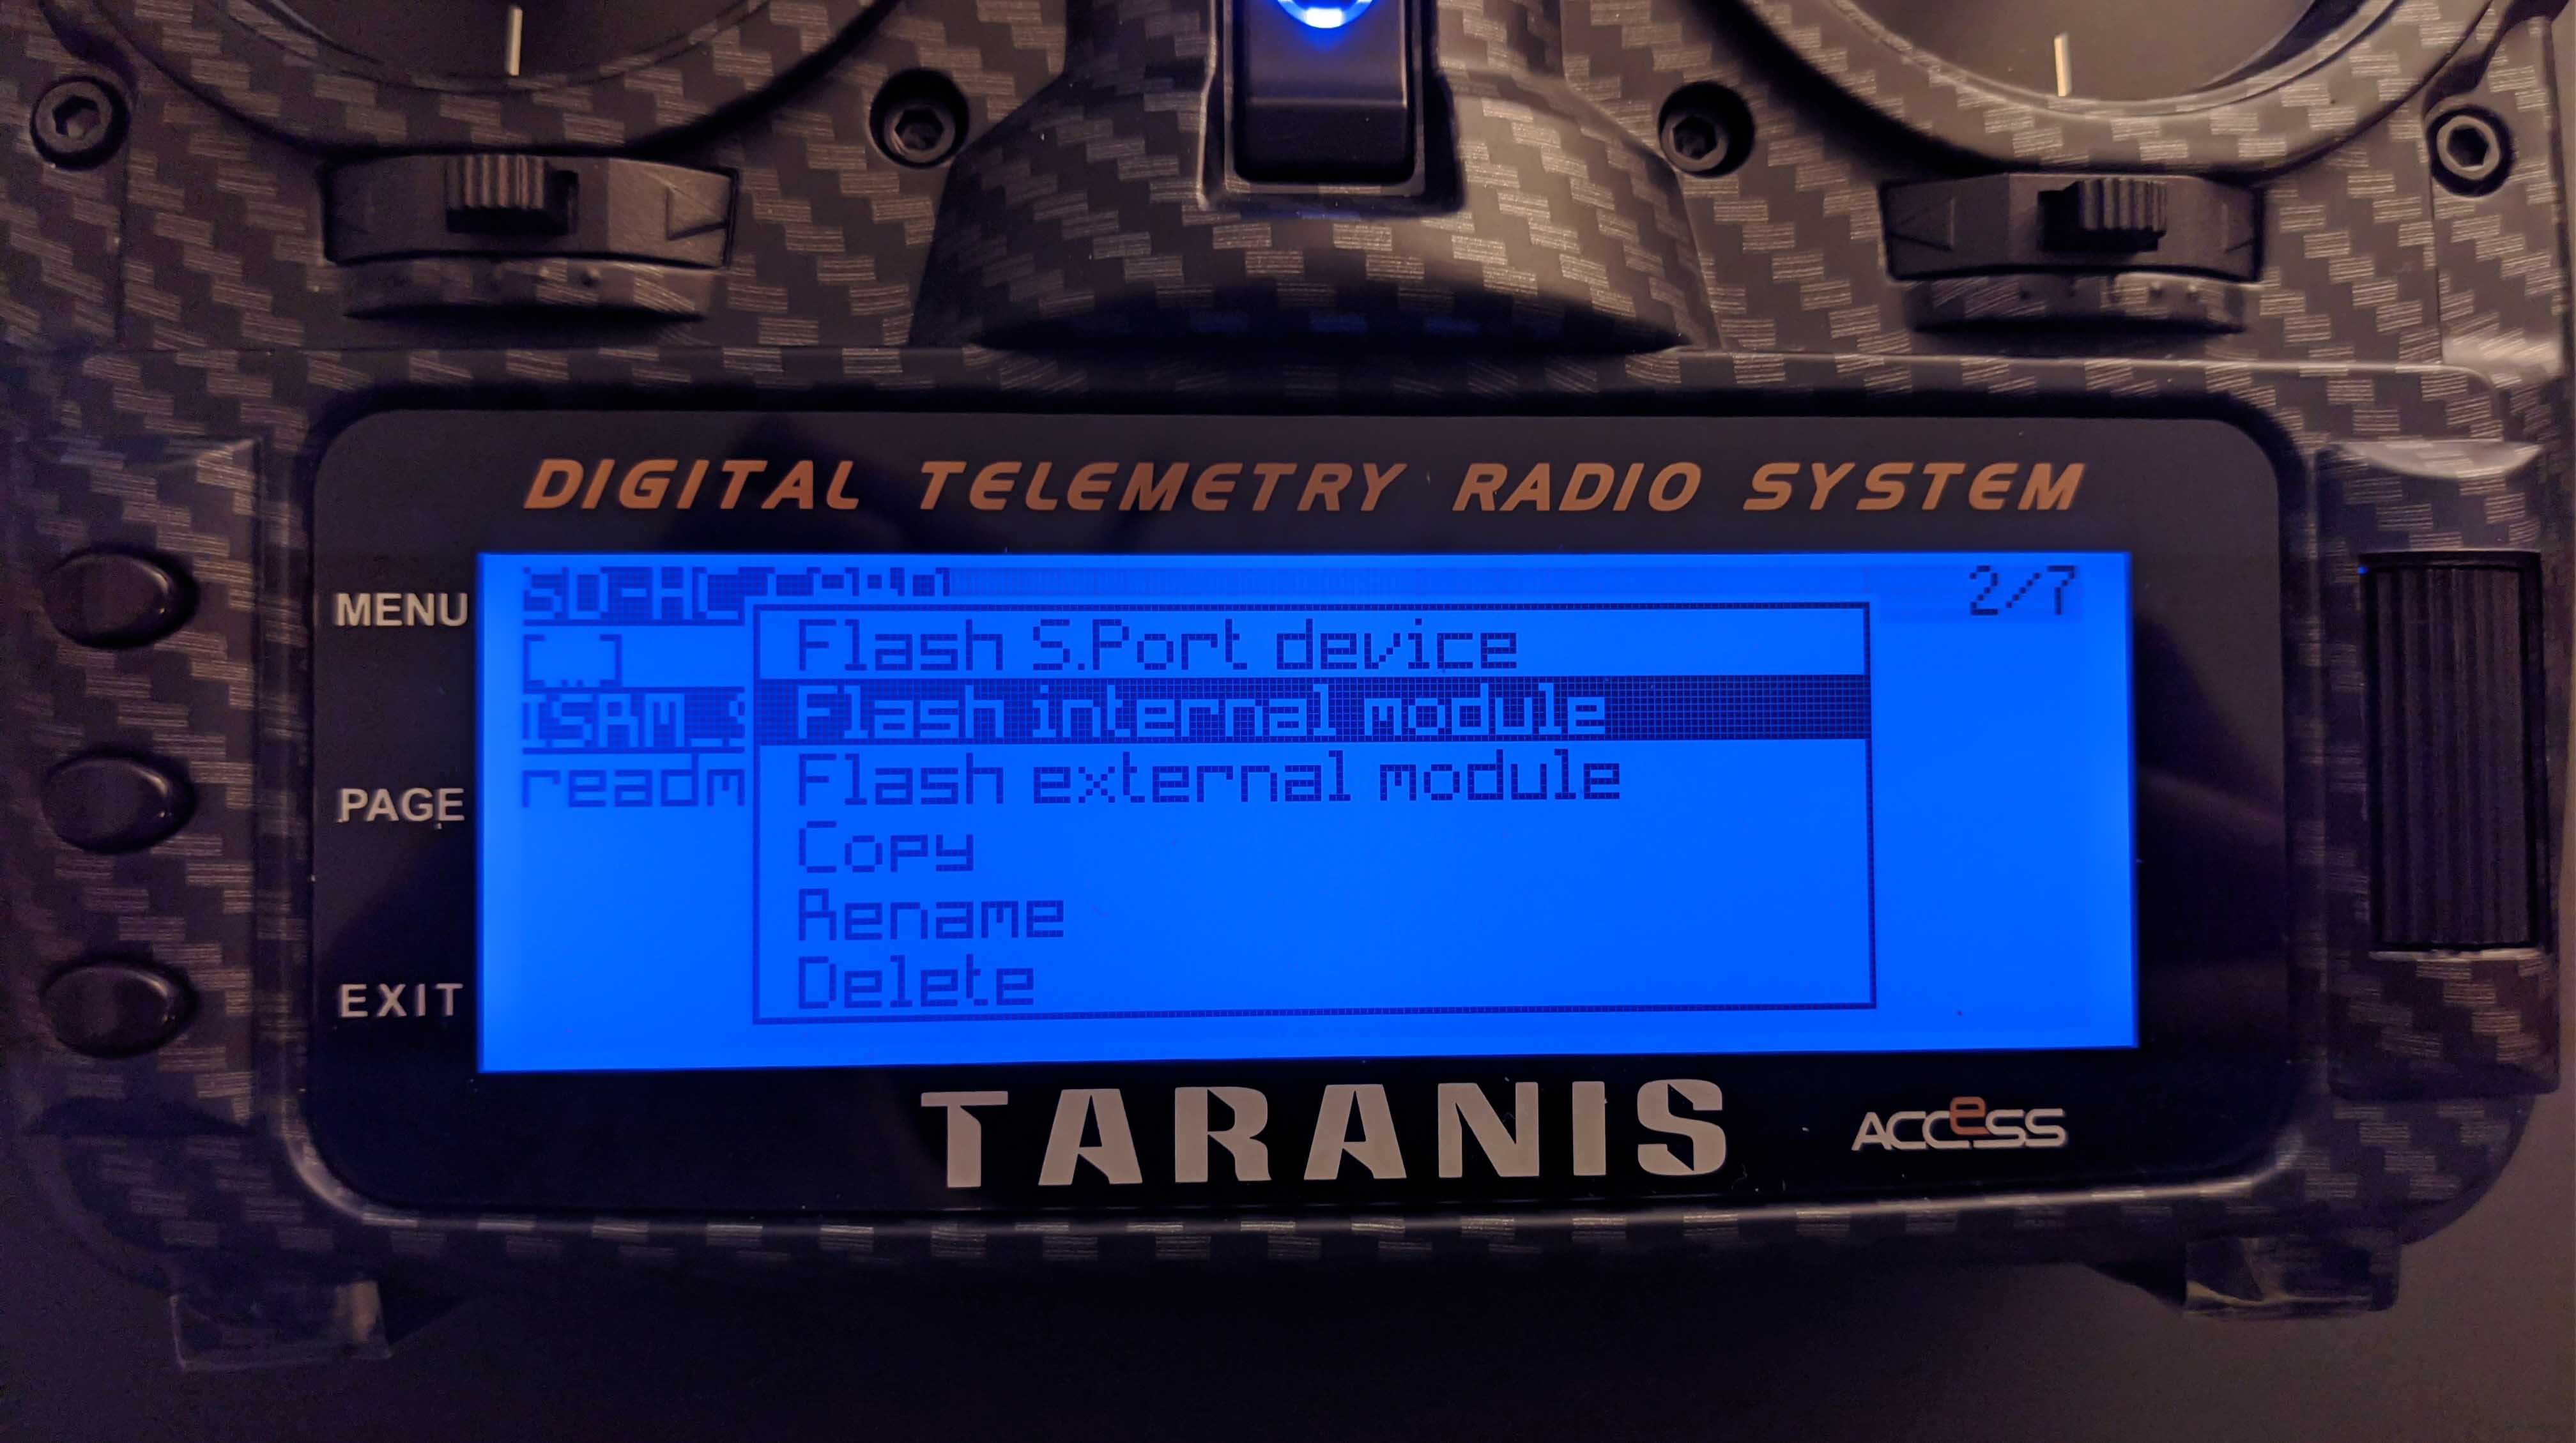
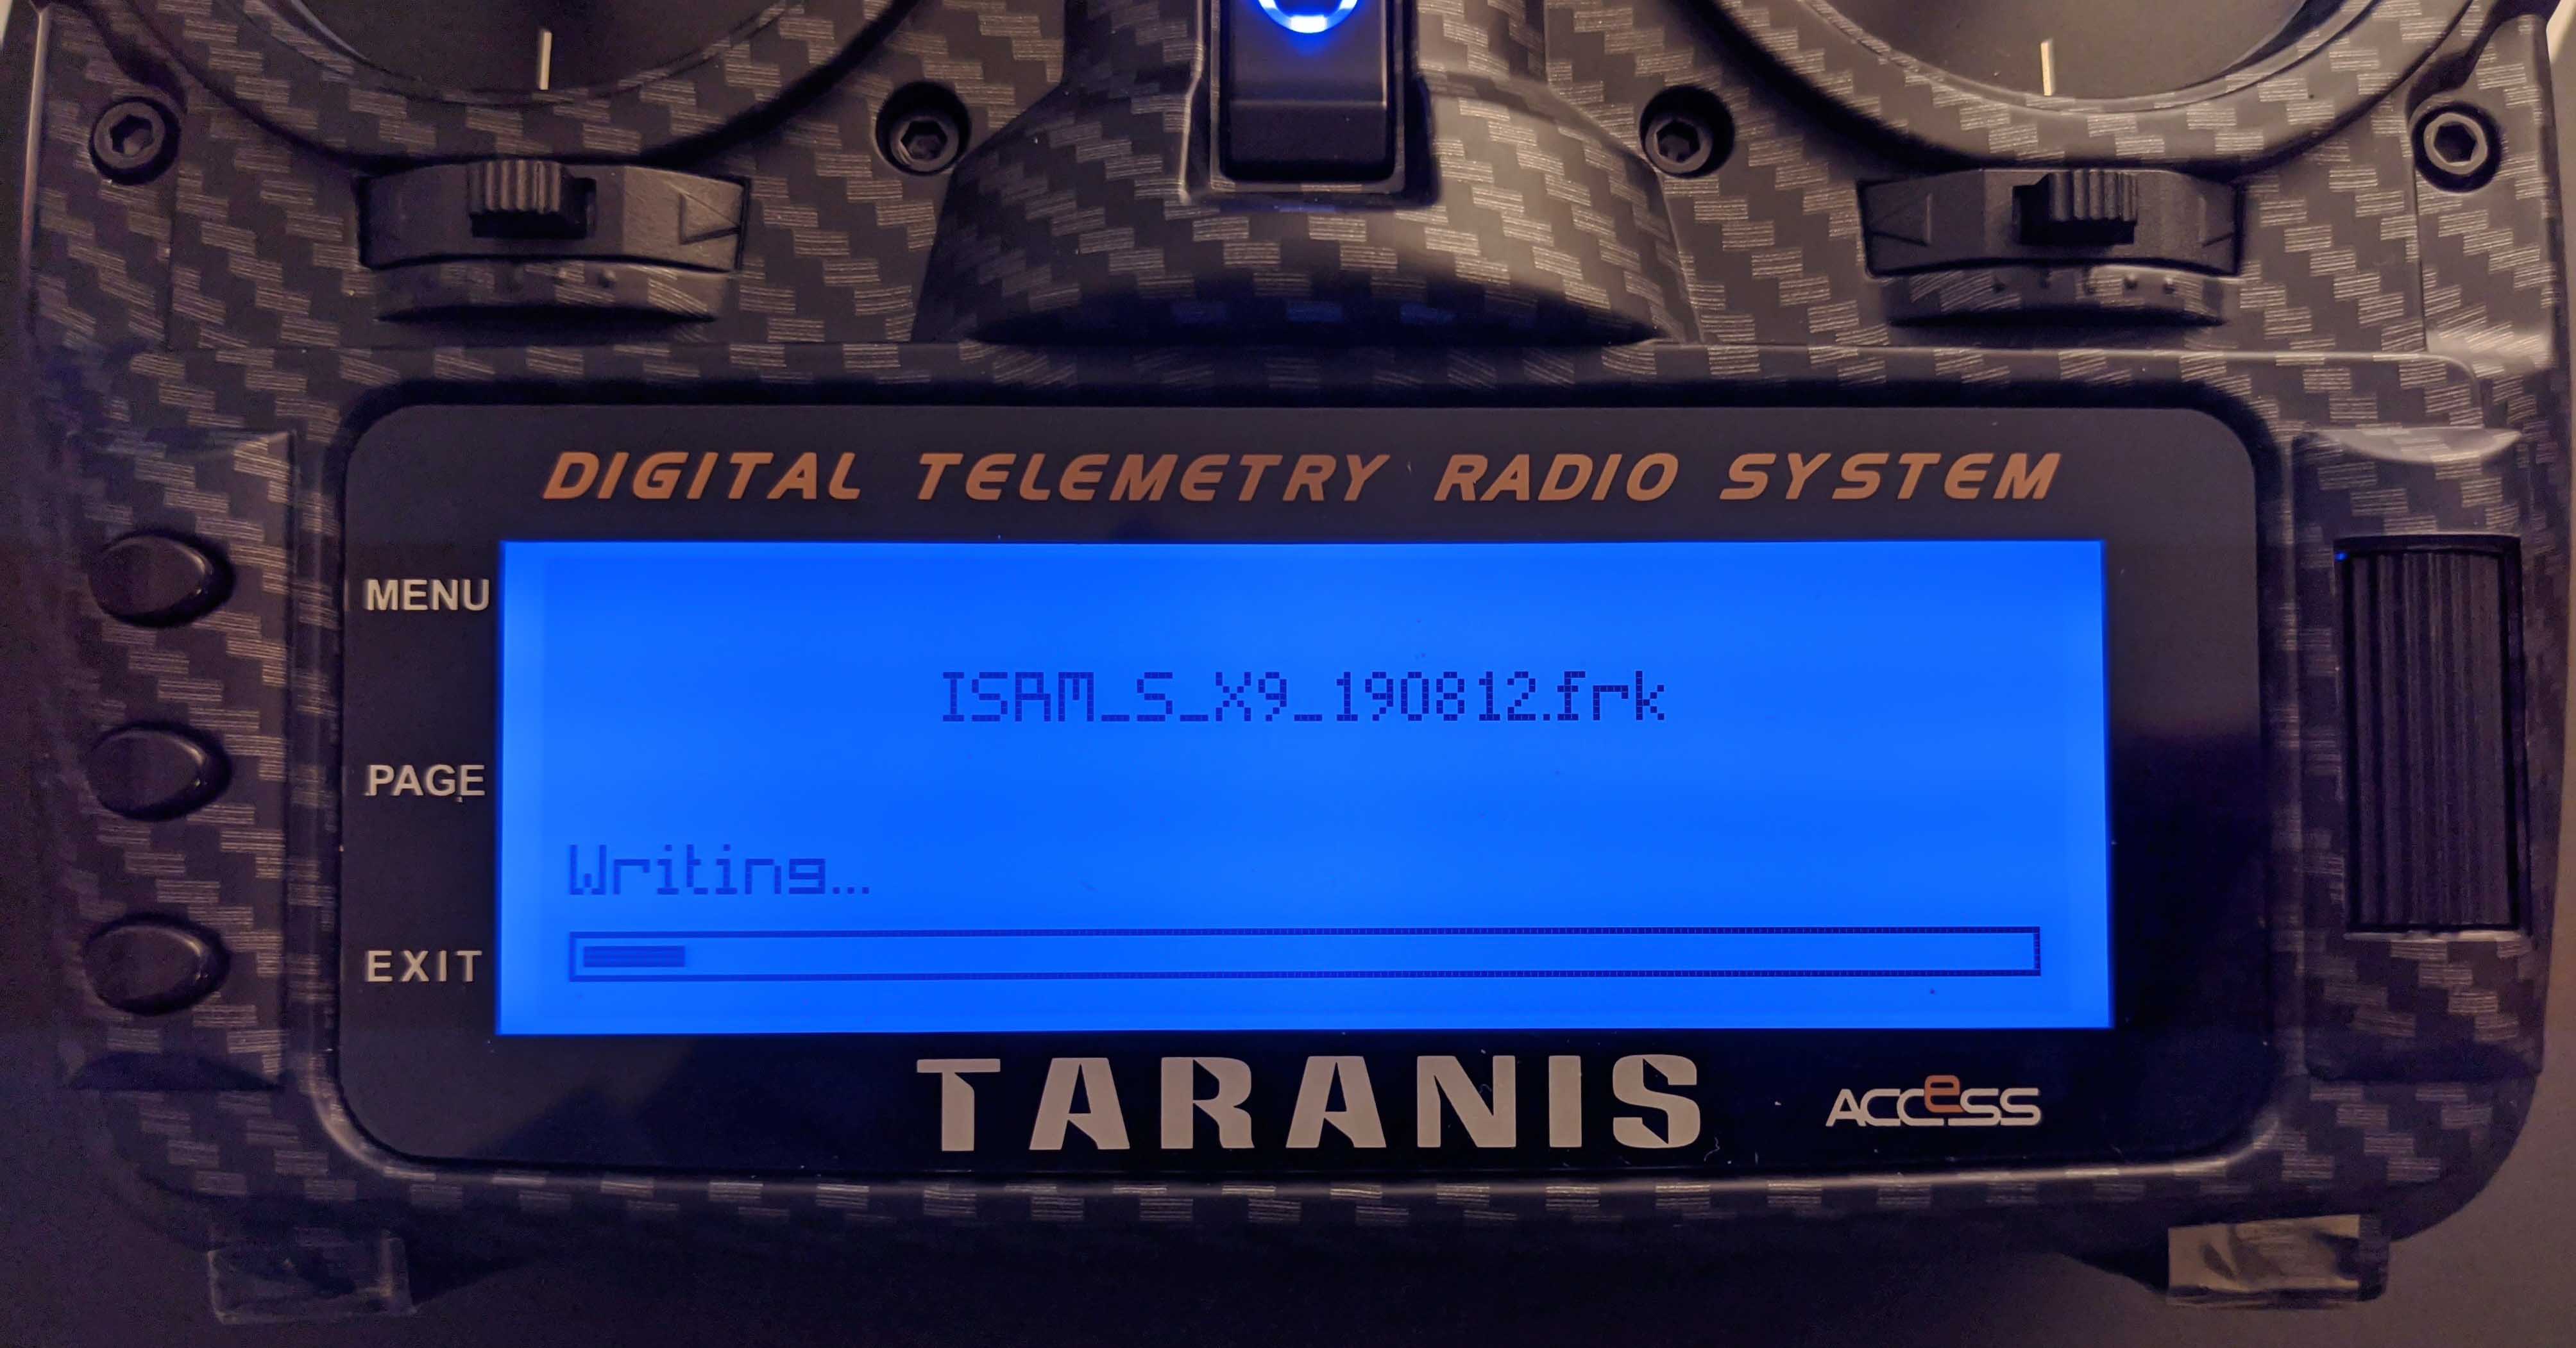
Long press the *.frk firmware file, for example ISRM_S_X9_190812.frk, to get the following pop up screen,
where you select Flash internal module:
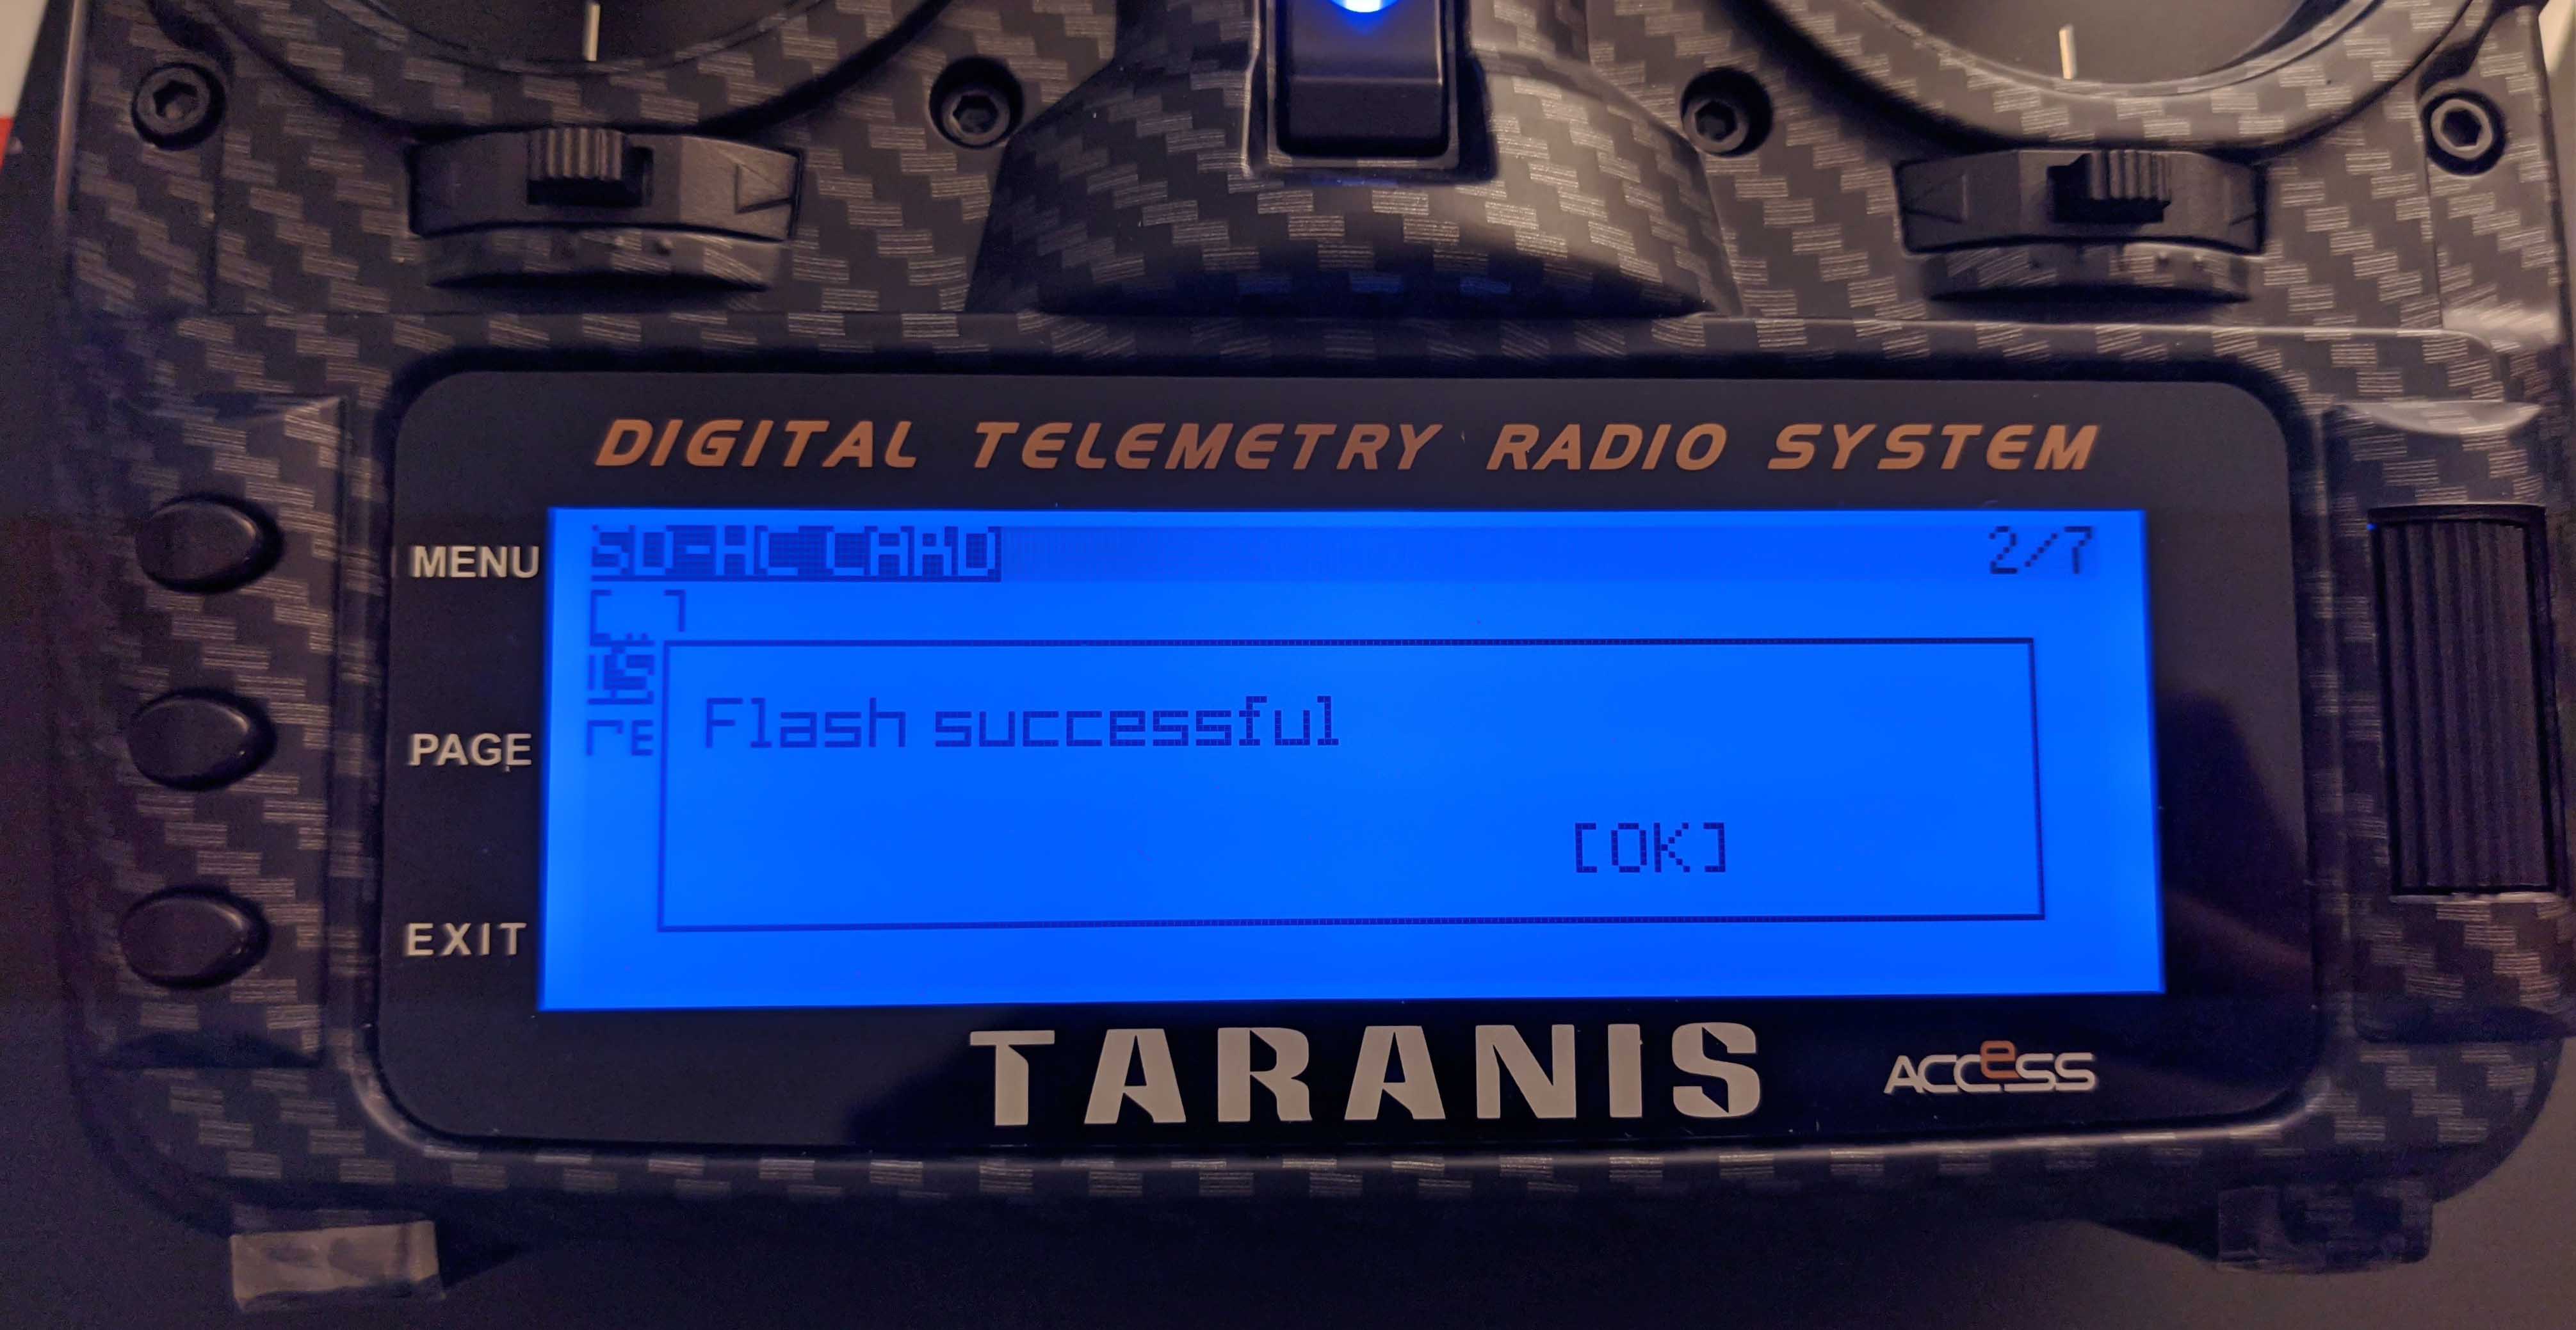
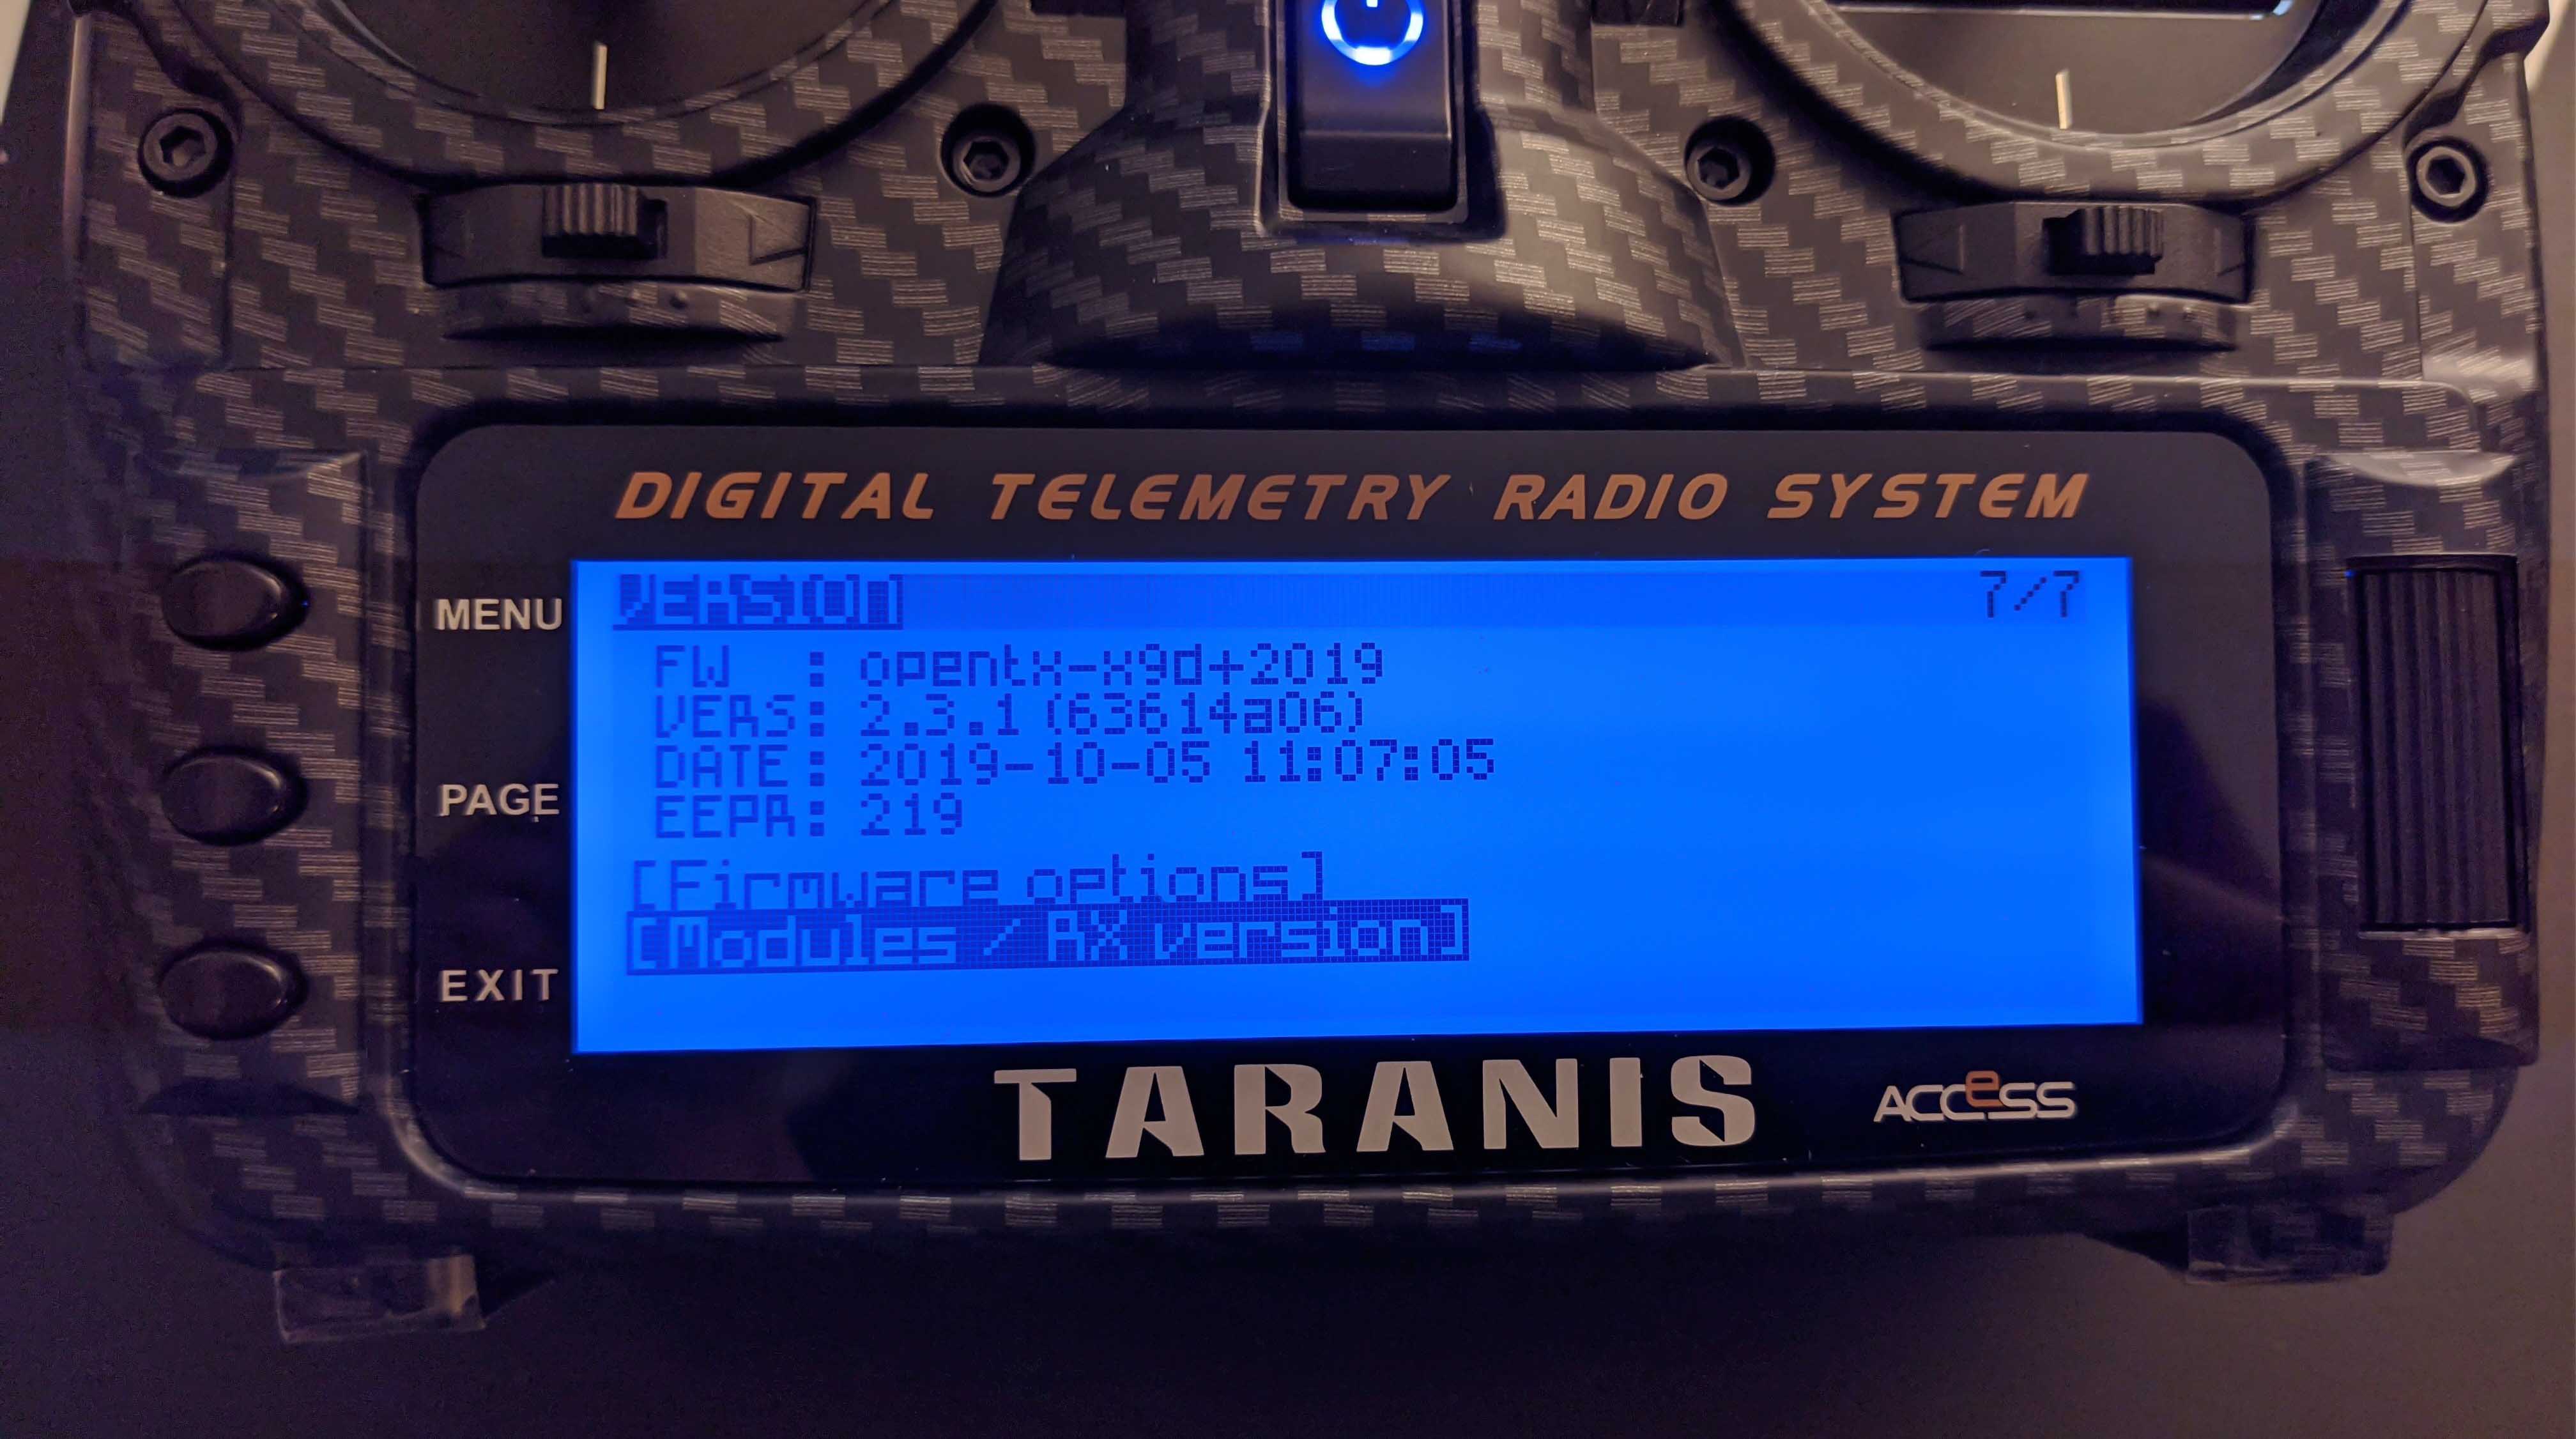
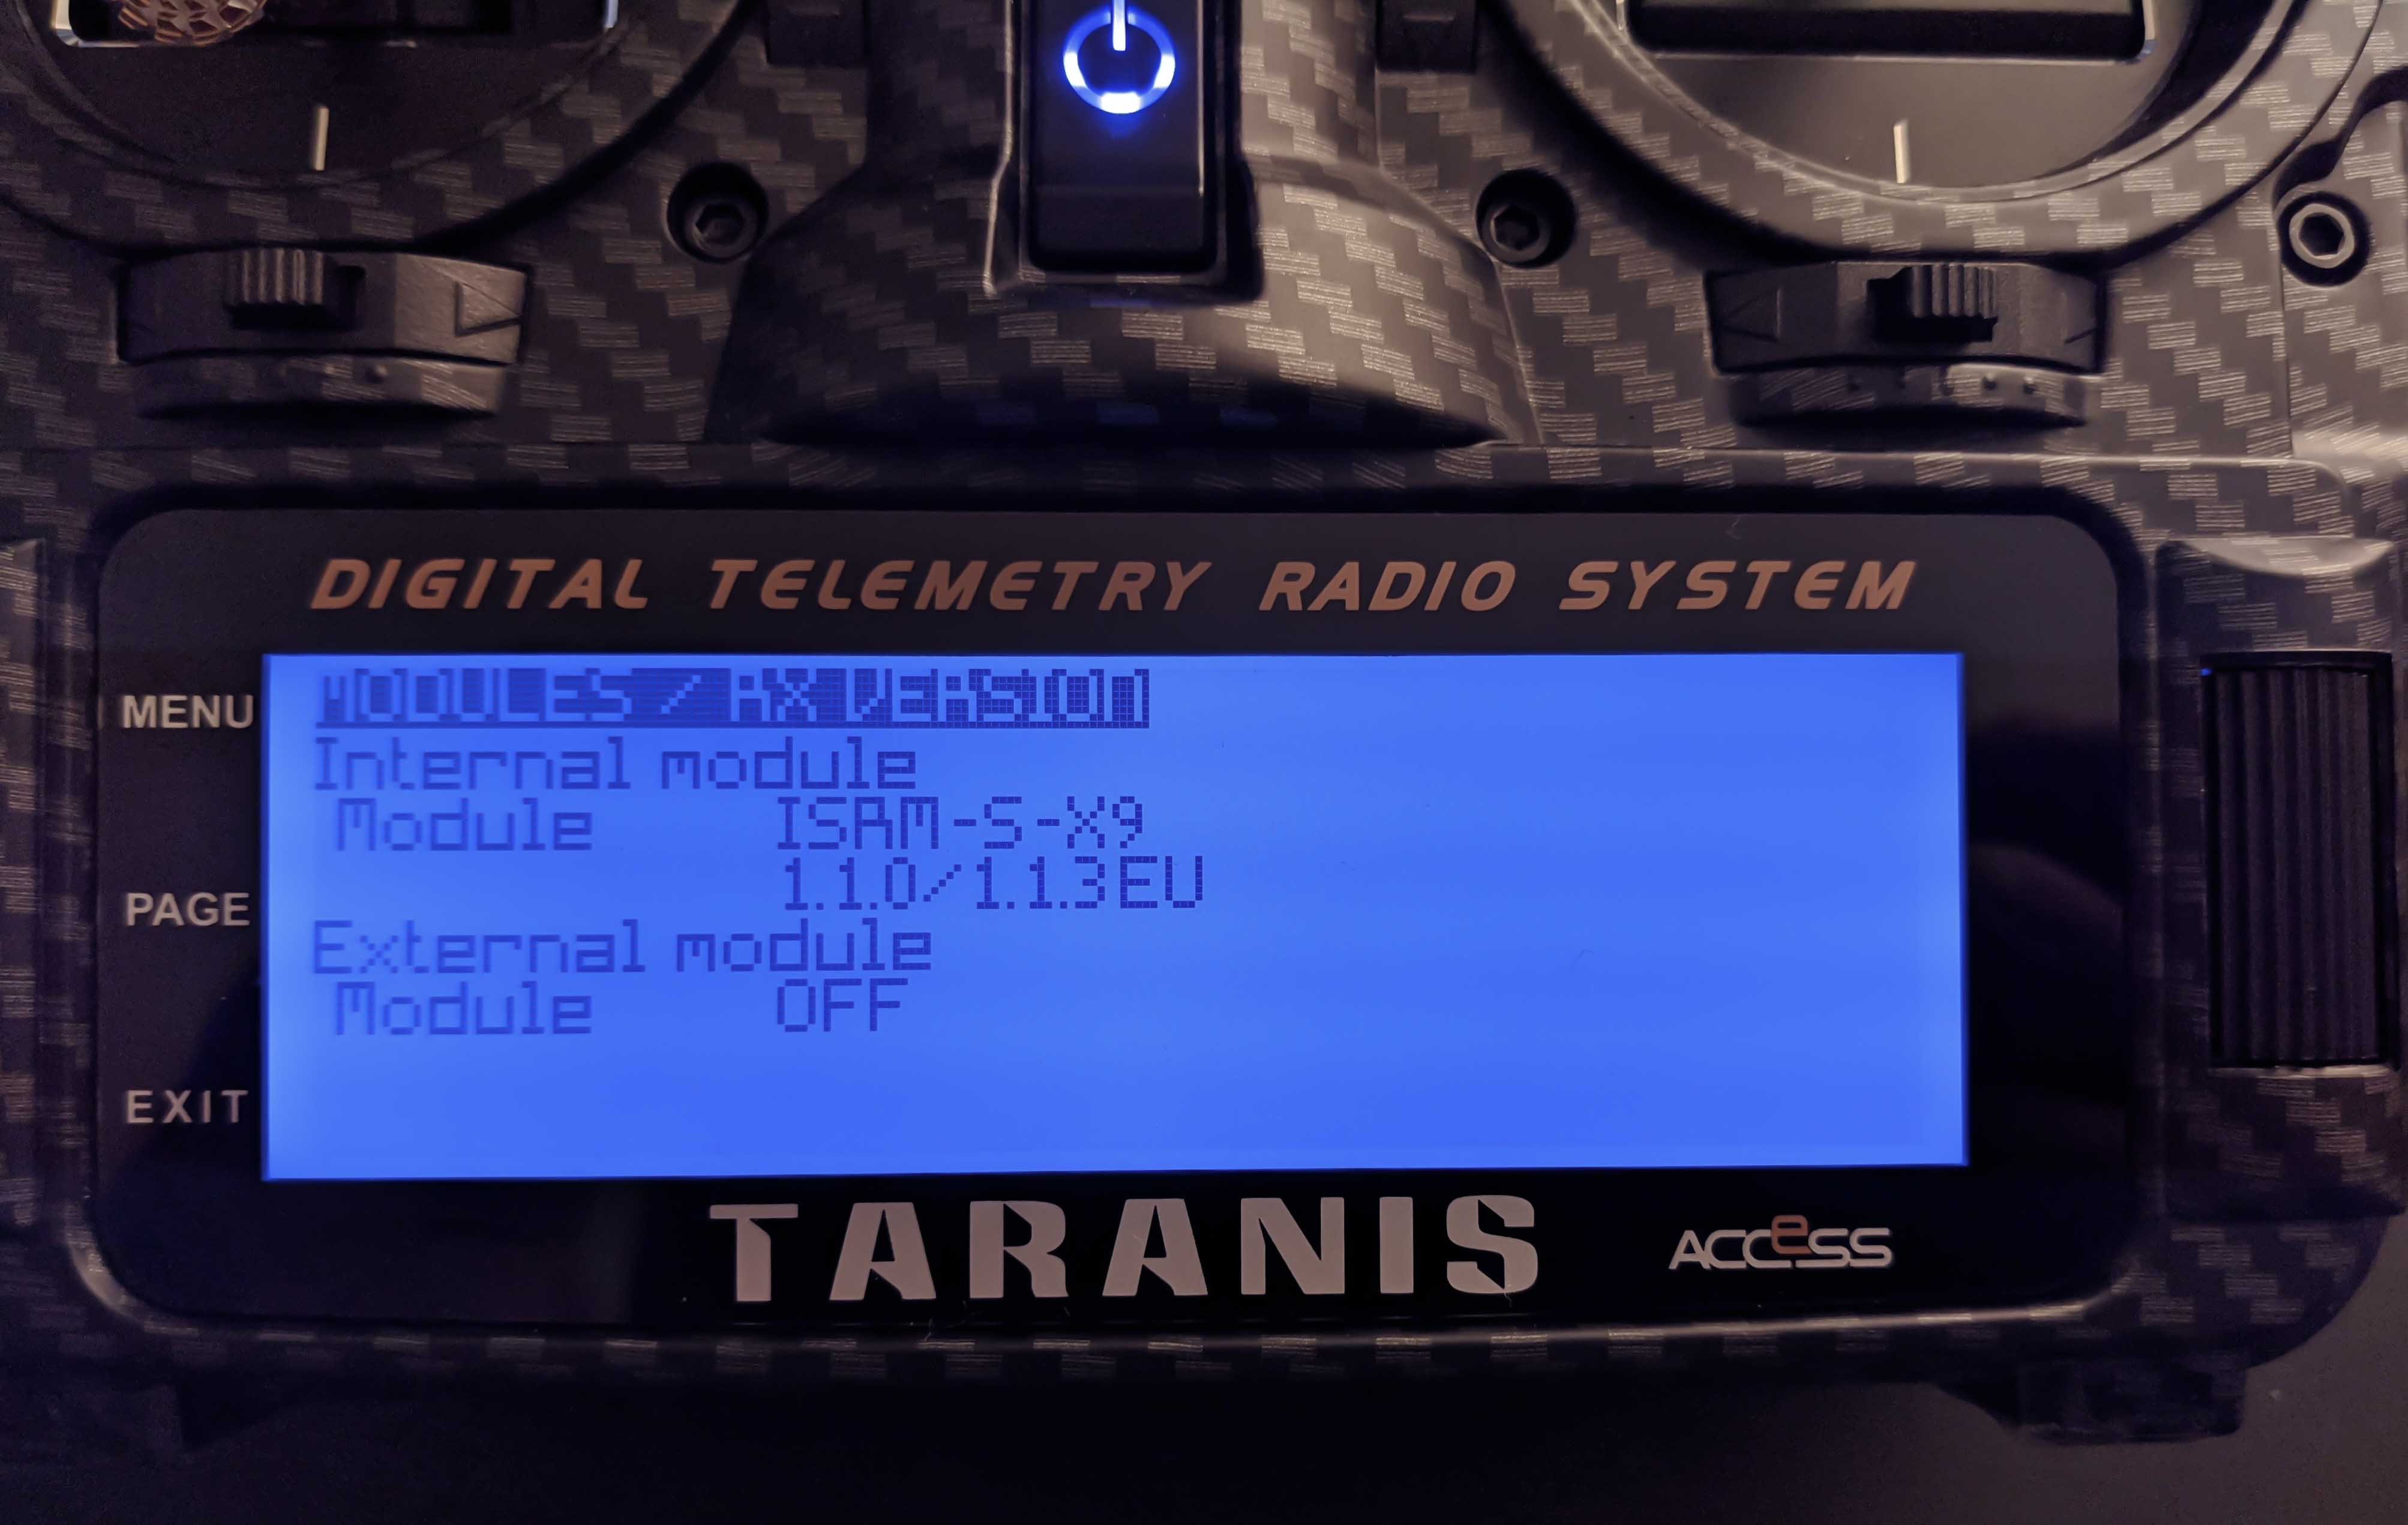
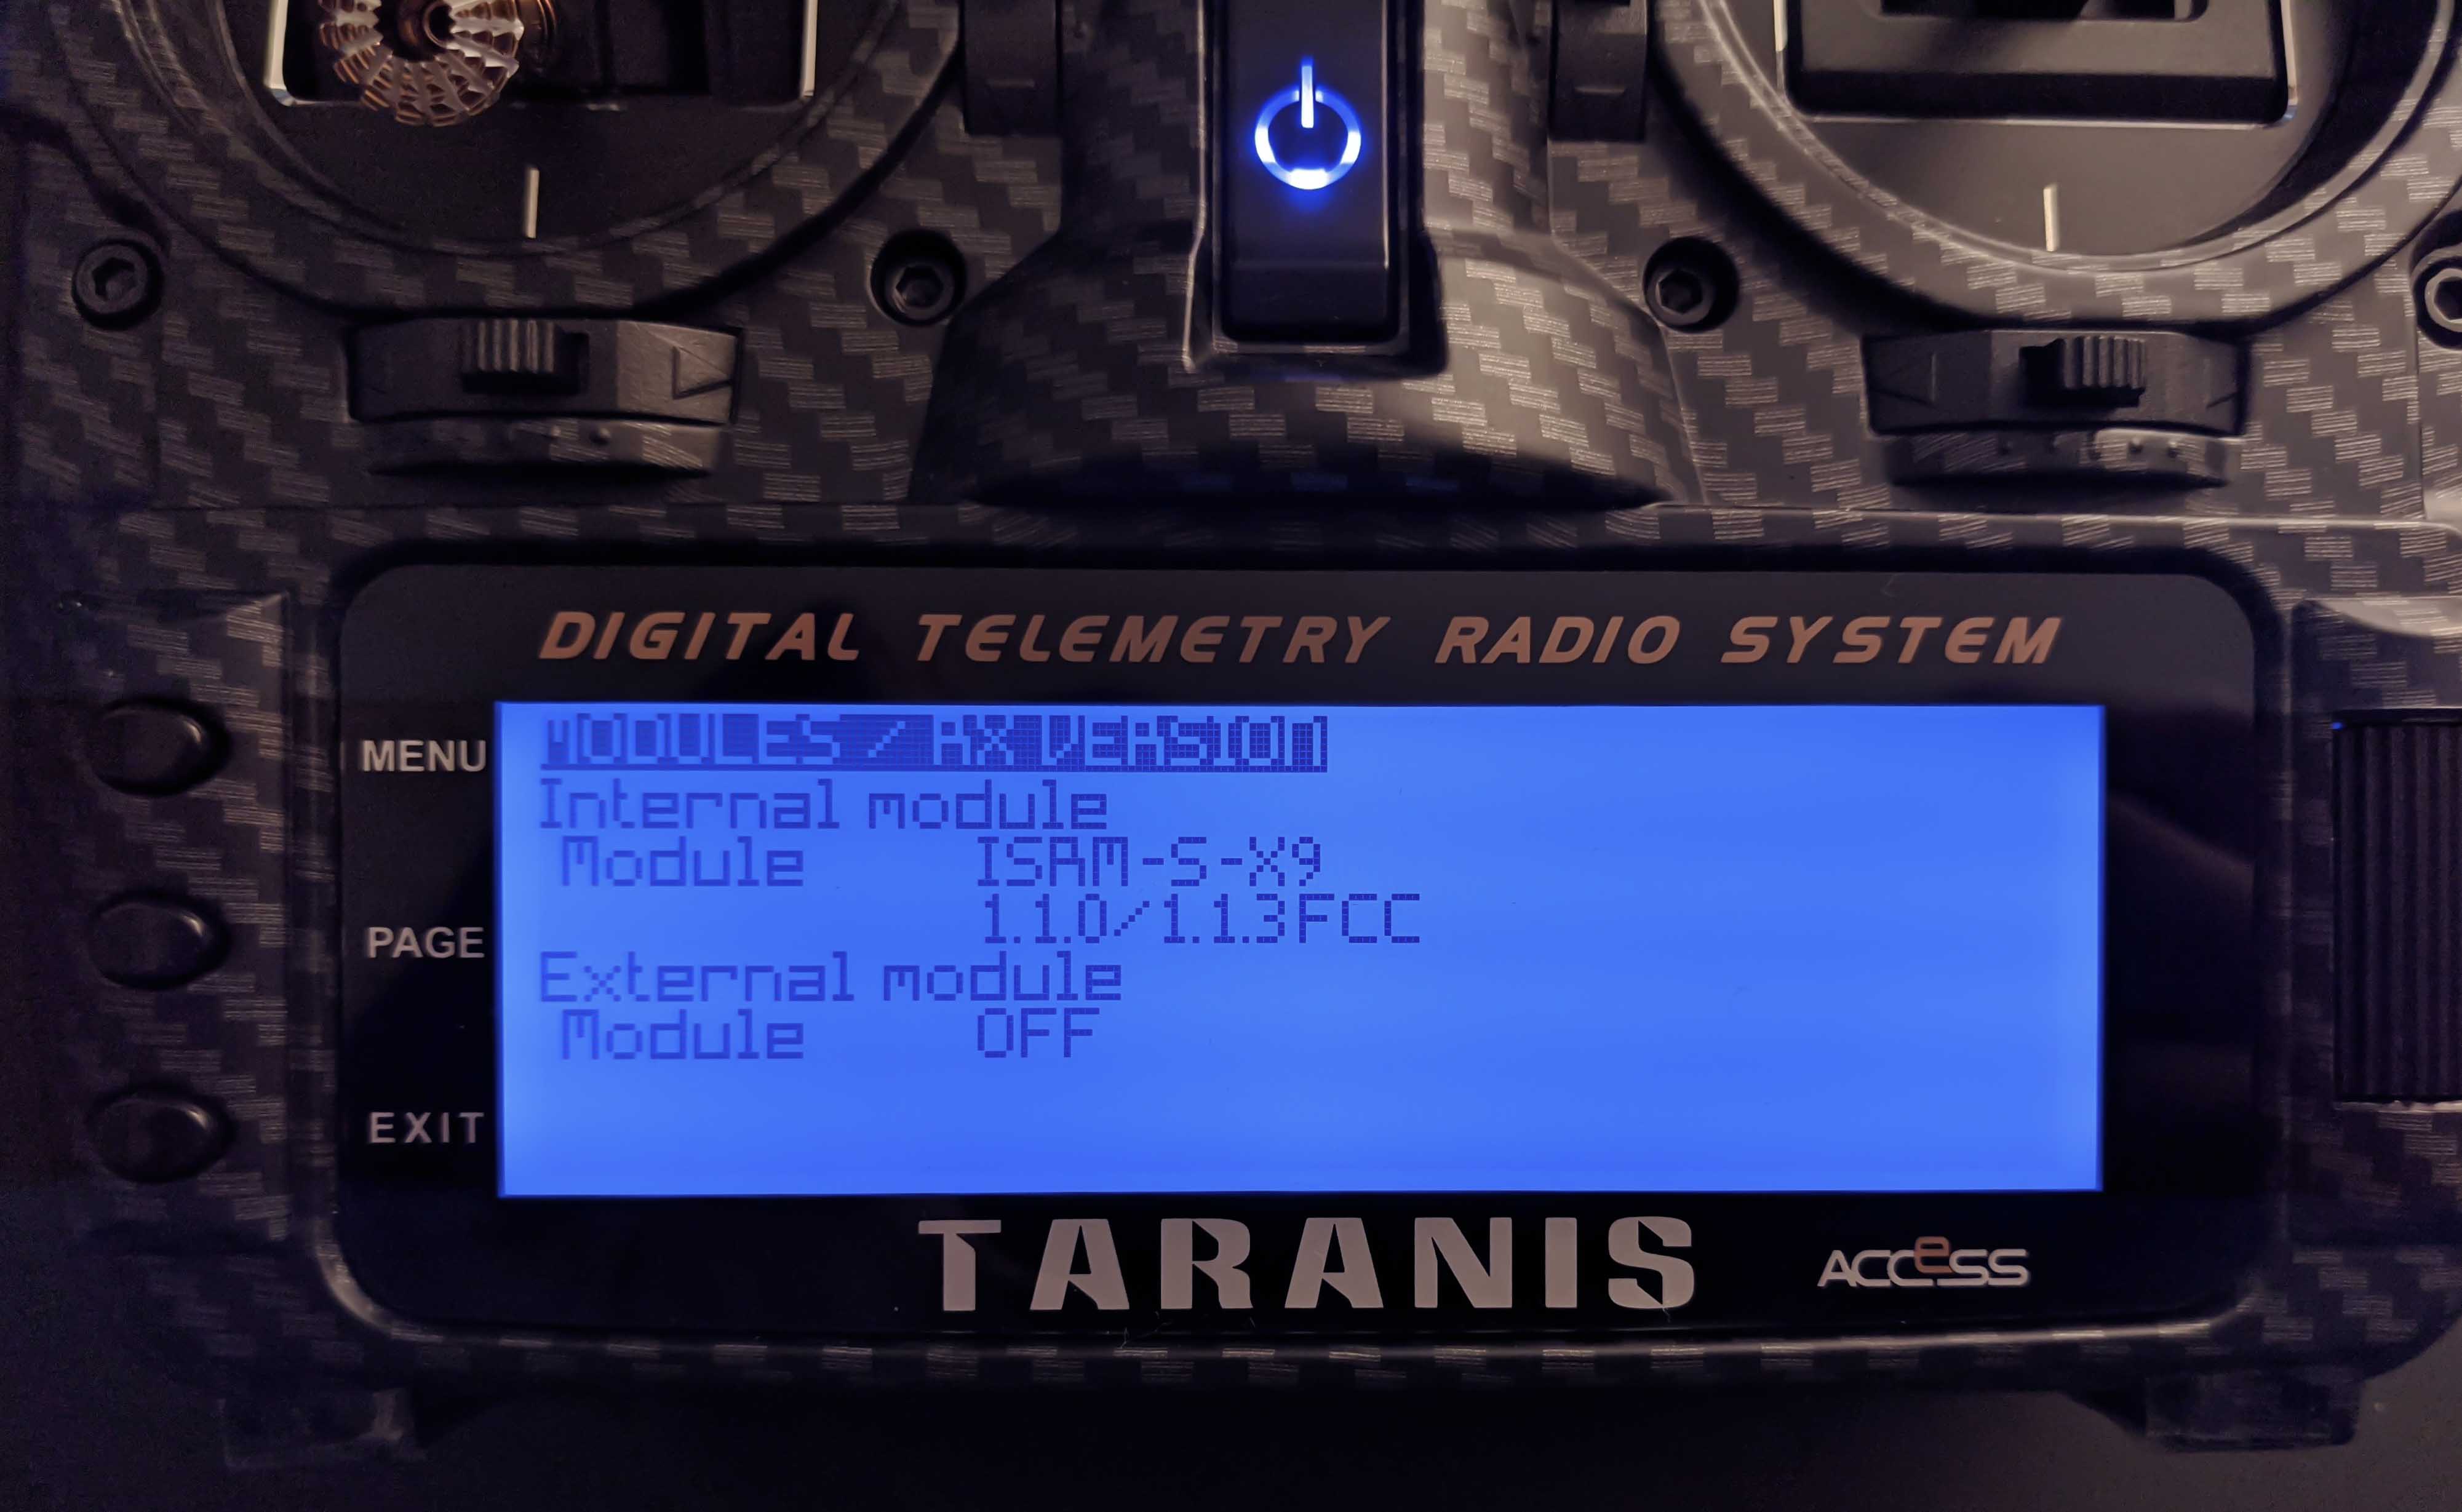
After writing the new firmware, you can verify the version in the VERSION page, which you can get to by long pressing the MENU button followed by repeatedly pressing PAGE until you get there. Selecting [Modules / RX version]
will show you the isrm version and its currently set mode.
Switching Internal Module between EU-LBT Mode and FCC Firmware
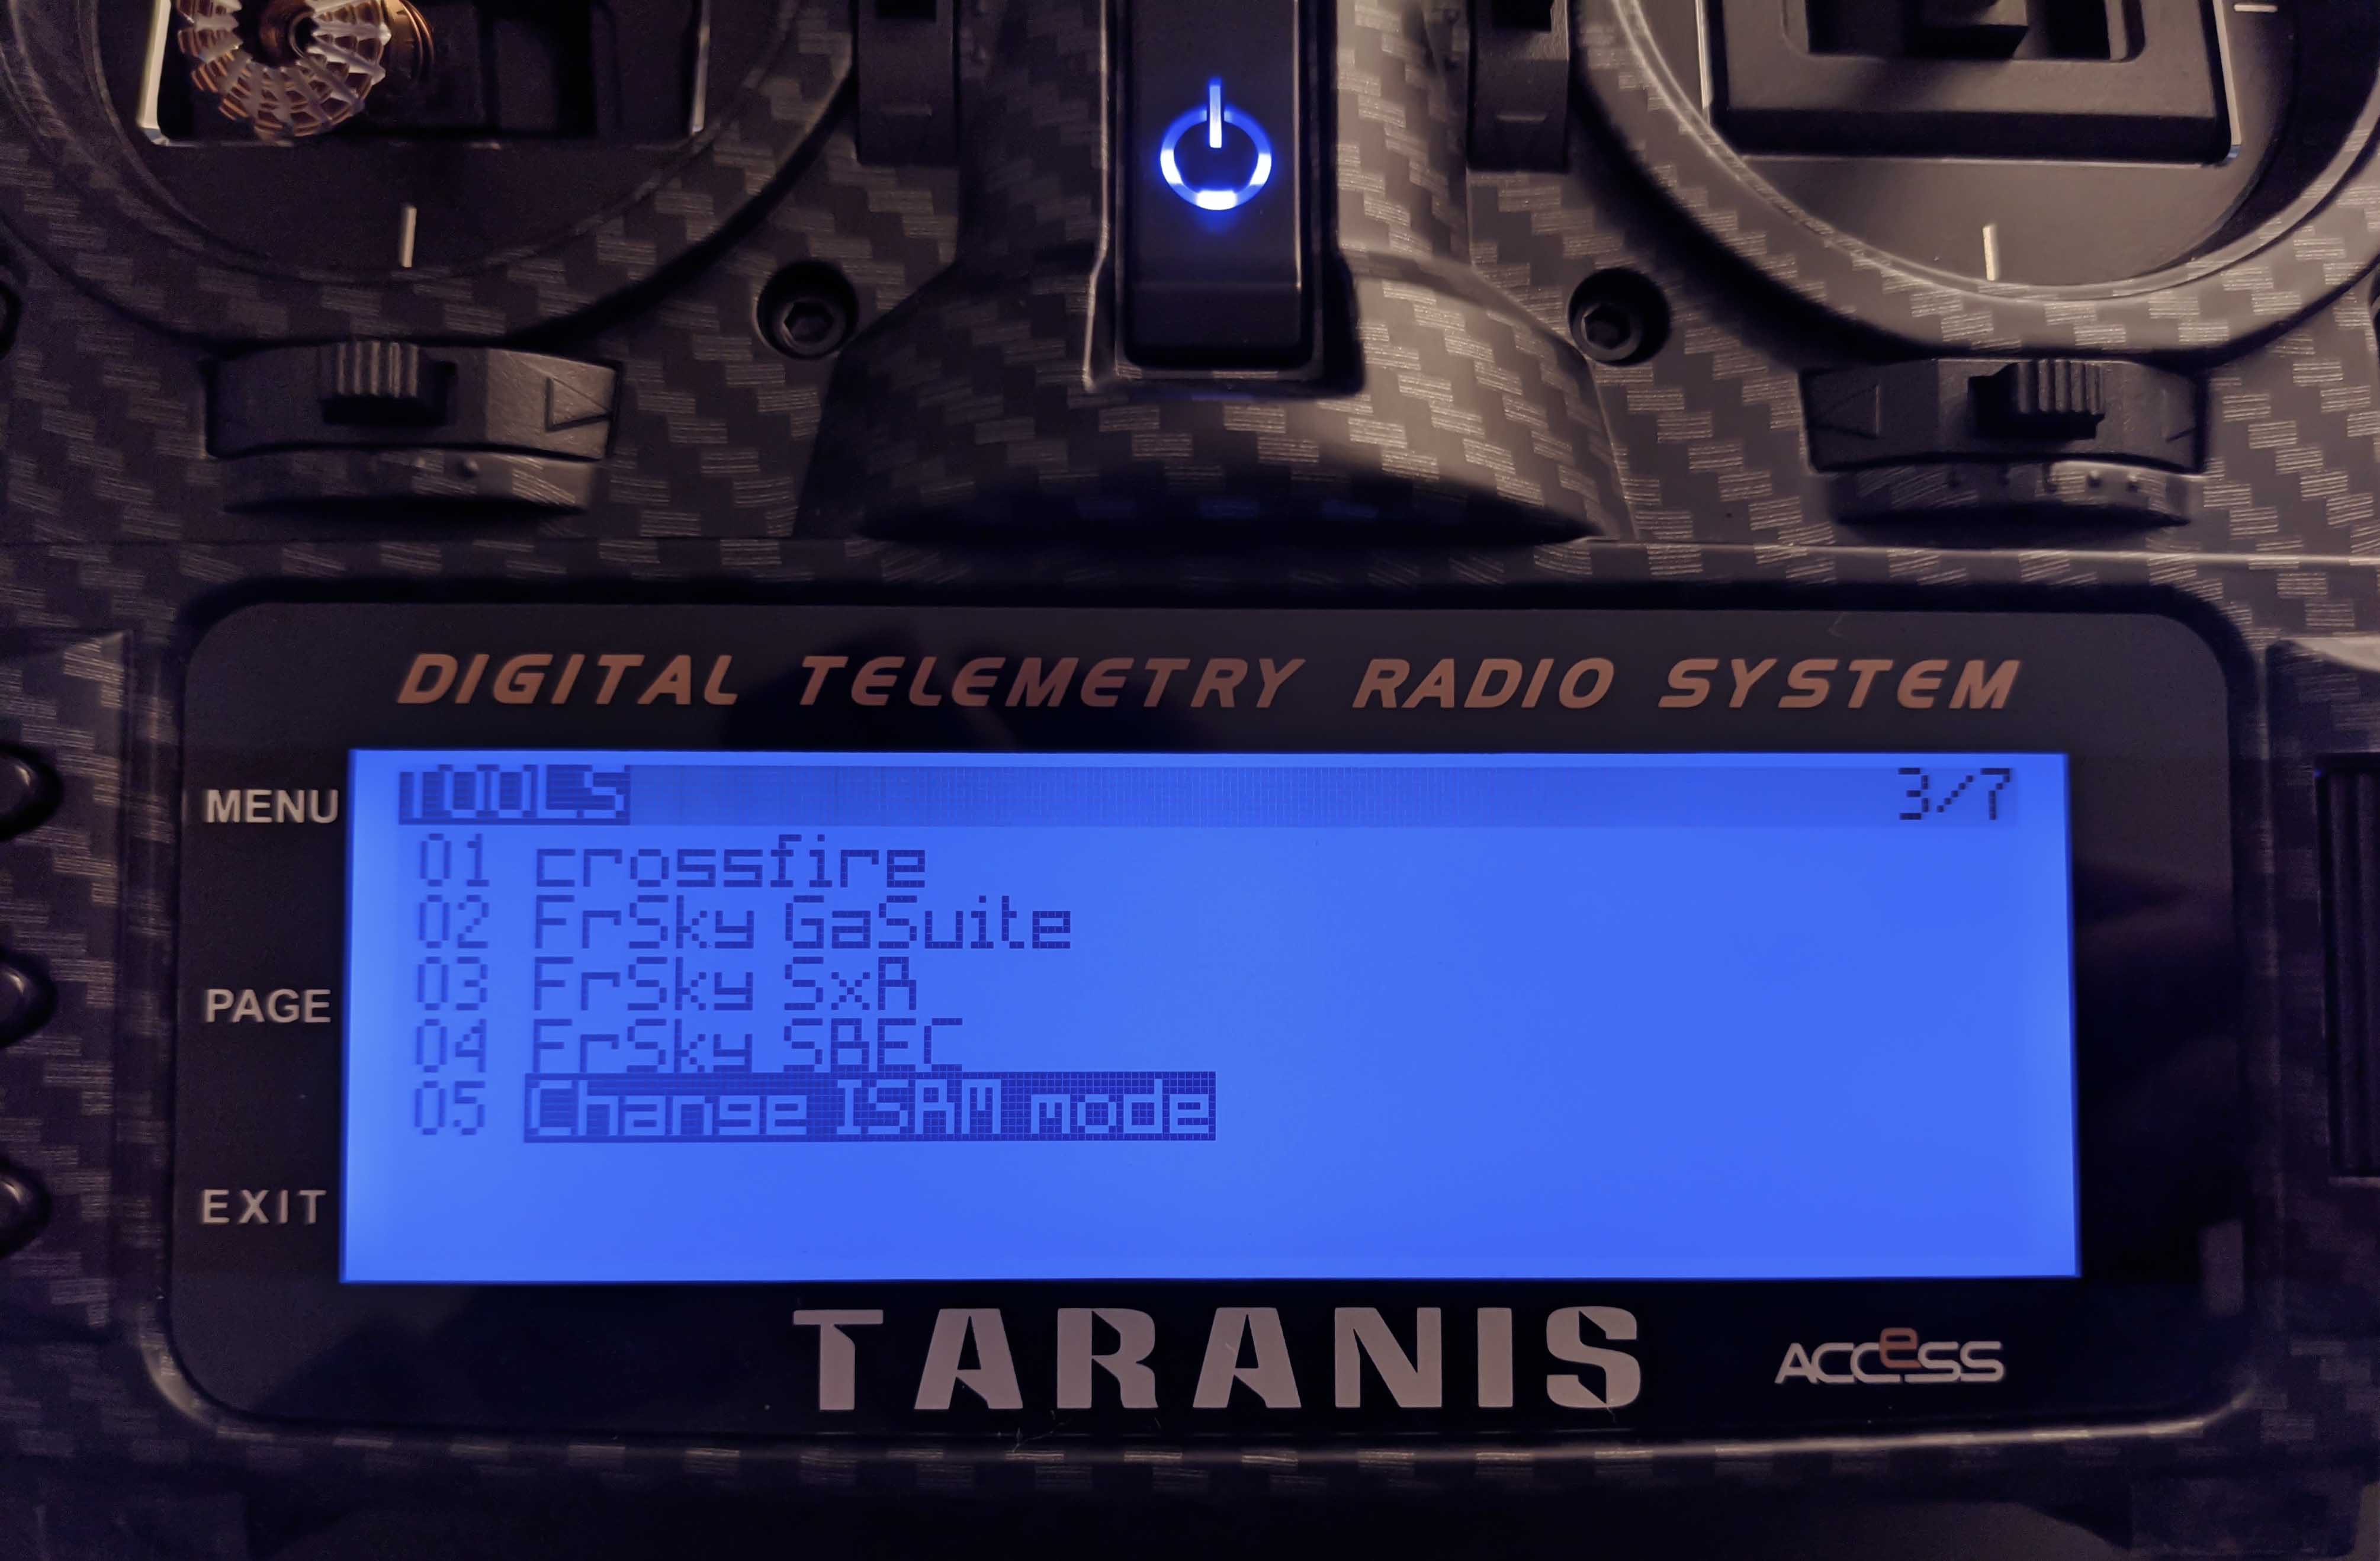
After preparing the external sd card of the Taranis unplug the USB cable (after ejecting both storage locations TARANIS and EXTTARANIS from your computer). Then power on your Taranis and enter the RADIO SETUP menu by long pressing the
MENU button of your Taranis. Press PAGE repeatedly until you get to the TOOLS menu, where you select Change ISRM mode
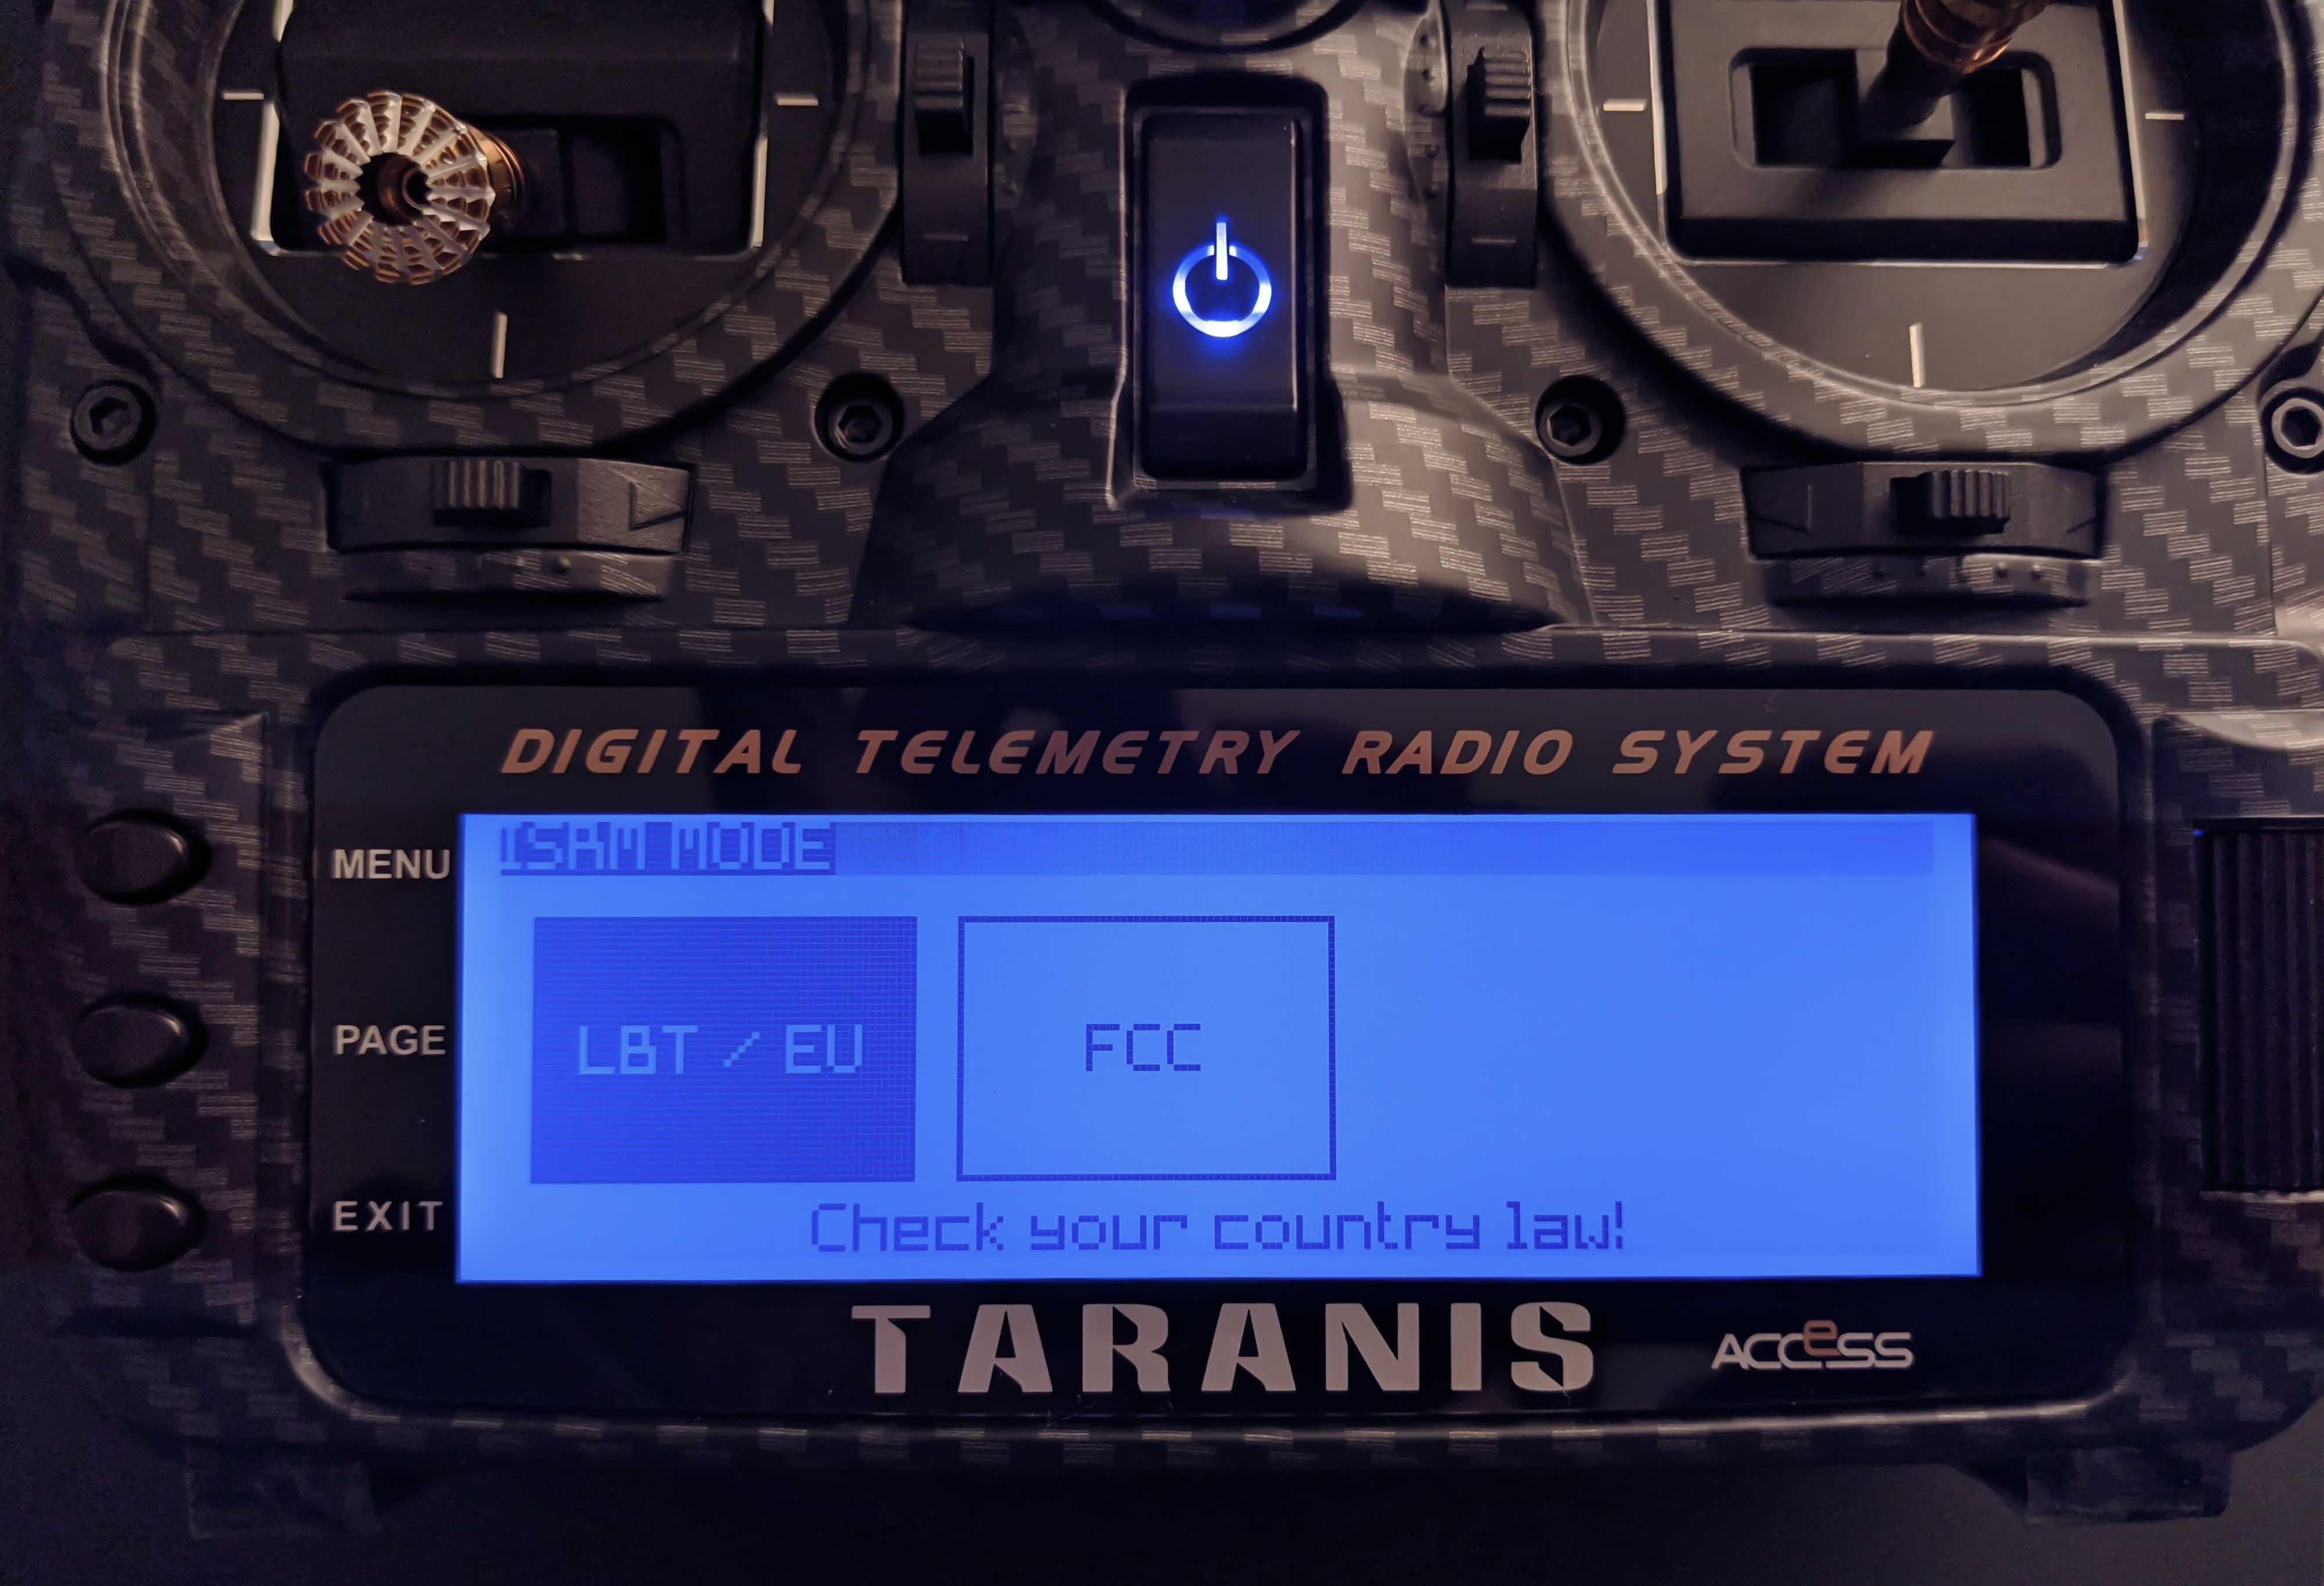
to change the internal transmitter module into the EU-LBT mode using the lua script.
On the VERSION page we can see firmware version of OpenTX, the options we set inside the Settings of the OpenTX Companion application and that internal module is now in EU-LBT mode.


The following two images show the different modes of the internal module. Once again, select the one appropriate for your region.
Update Bootloader (Optional)
If you have a new Taranis, you probably won’t need to update its bootloader in order to flash a new version of OpenTX. However, make sure that the version of OpenTX matches the bootloader by comparing the bootloader version with the version of OpenTX you want to flash. The bootloader version is apparent on top of the bootloader menu.
As mentioned perviously copy and renamed the OpenTX firmware
(downloaded via OpenTX Companion) to the EEPROM folder of your external sd card EXTTARANIS and rename it to something short, for example opentx-2.3.1.bin. Unplug the Taranis and enter the RADIO SETUP menu by long pressing the MENU button on your Taranis. Press PAGE to get to the SD-HC CARD page and enter the [EEPROM] folder.
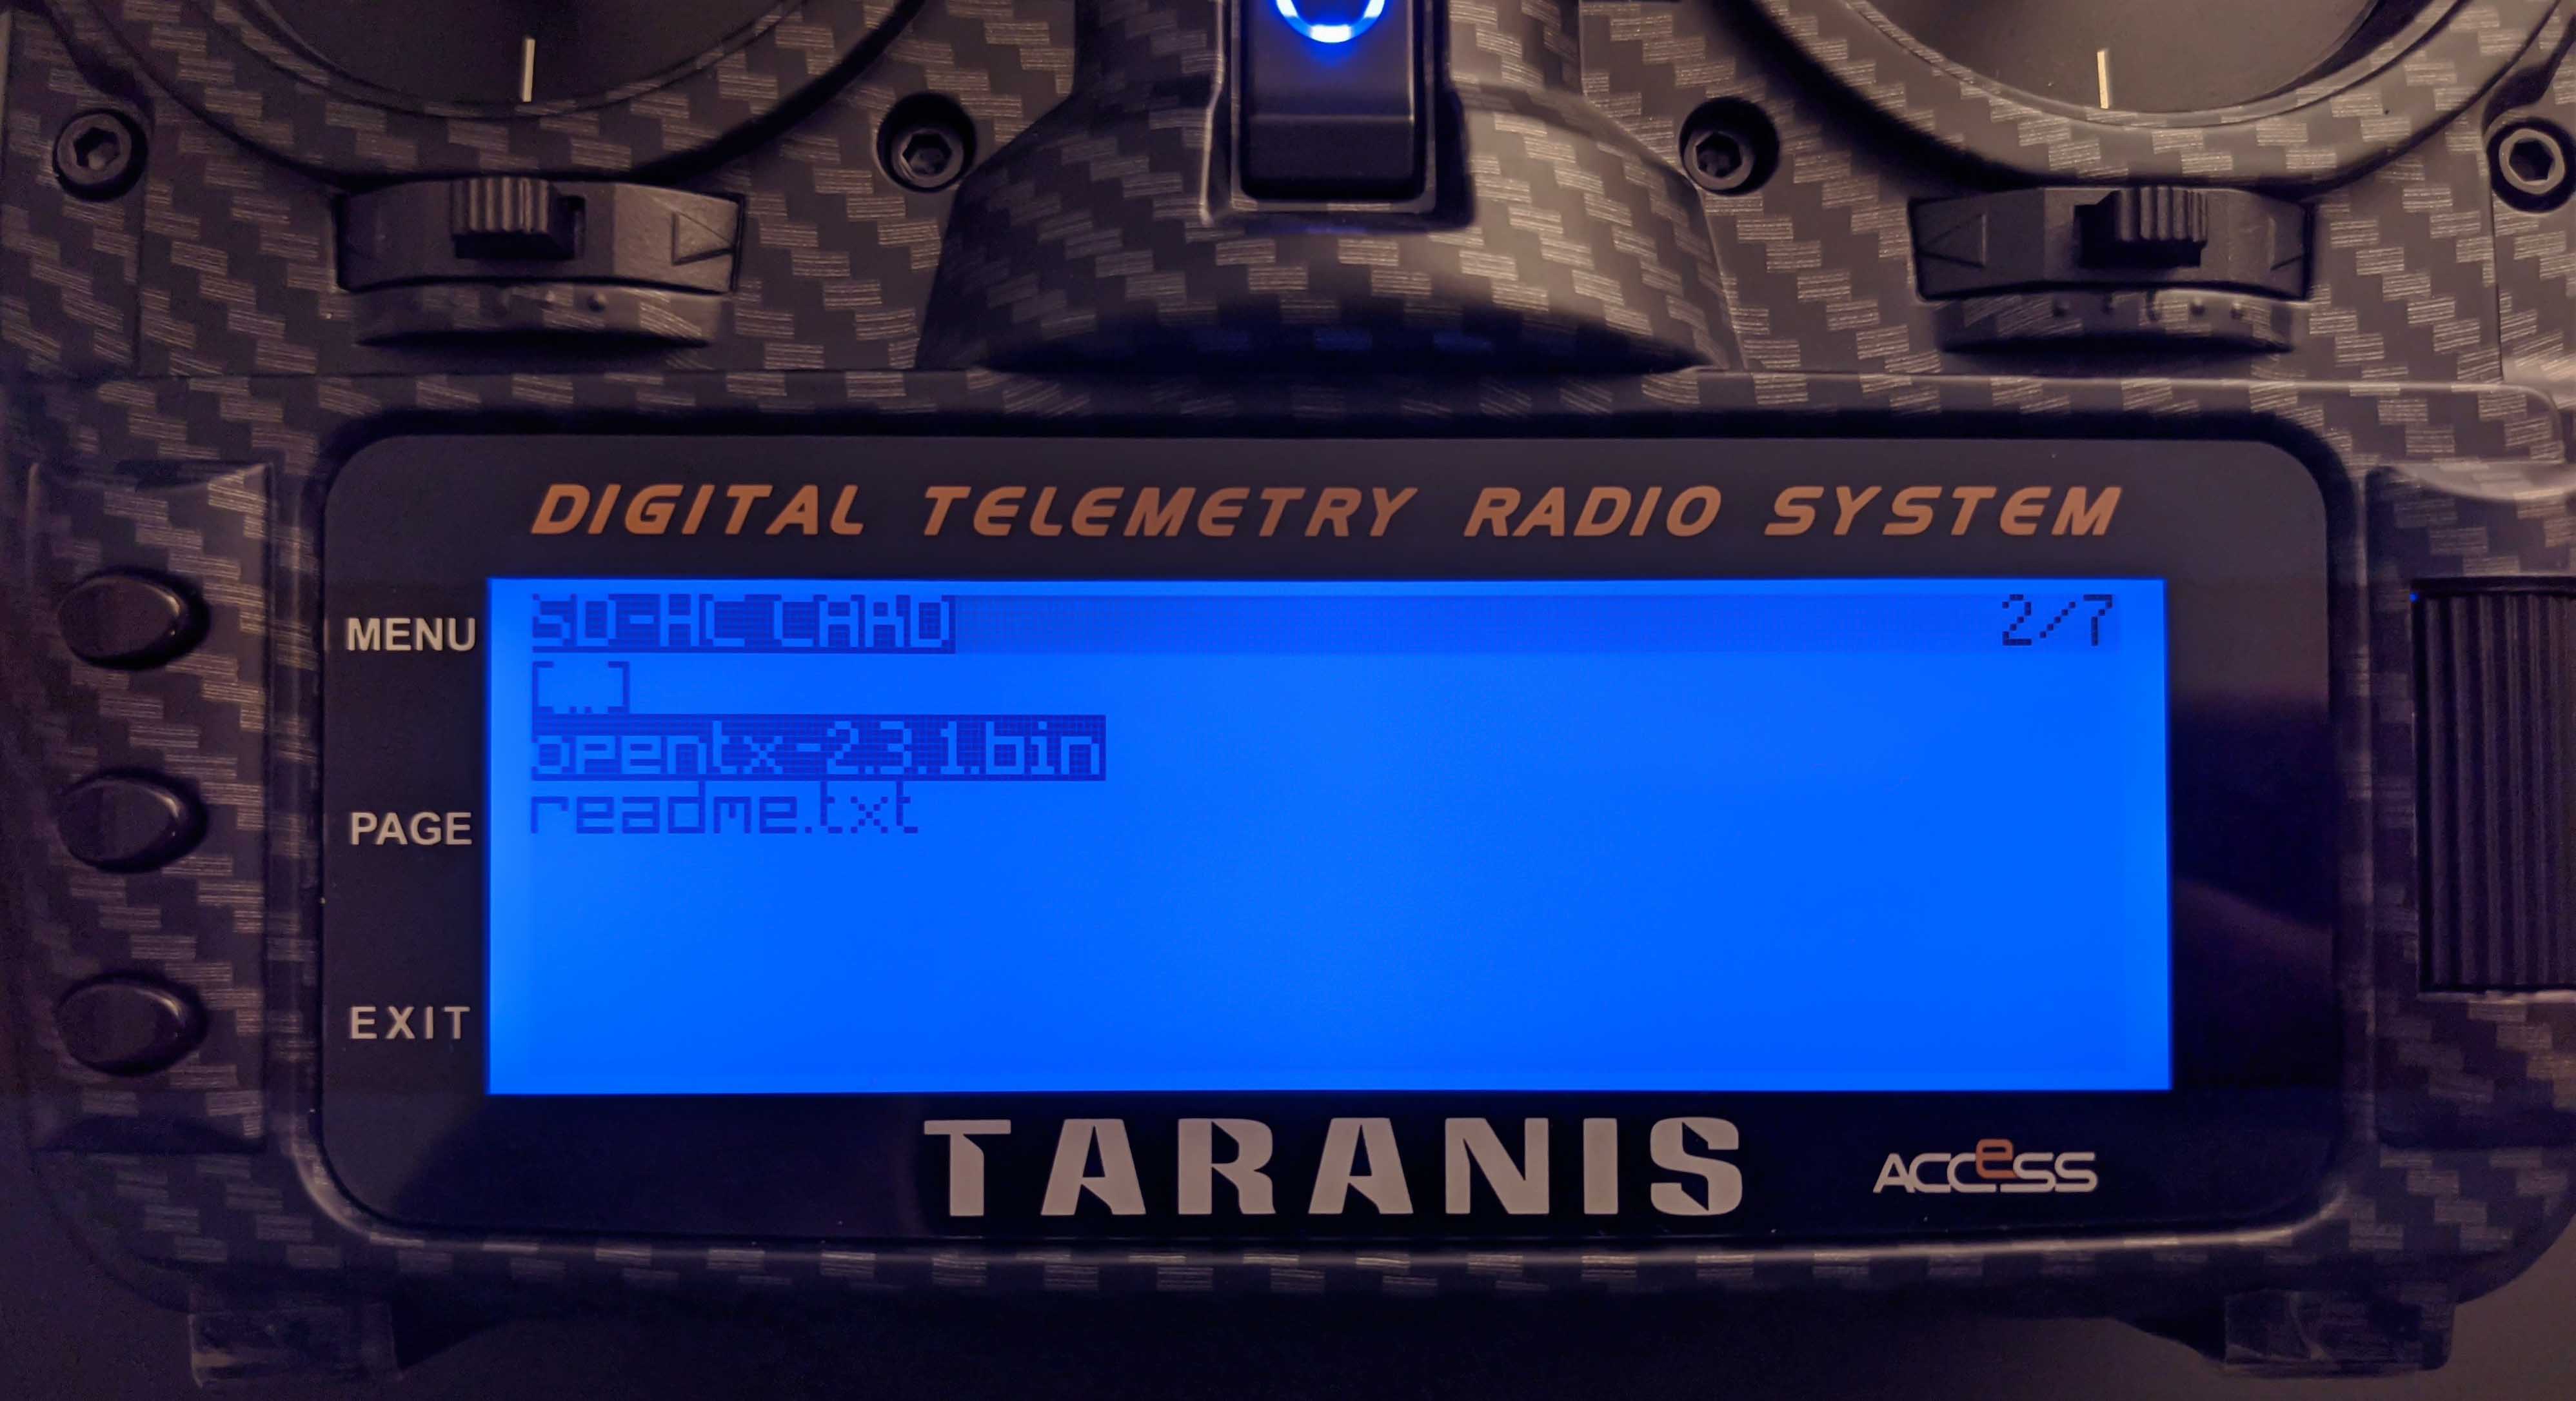
Inside the EEPROM folder you should see the opentx-2.3.1.bin firmware, which can be used to update the bootloader by long pressing the scroll button.
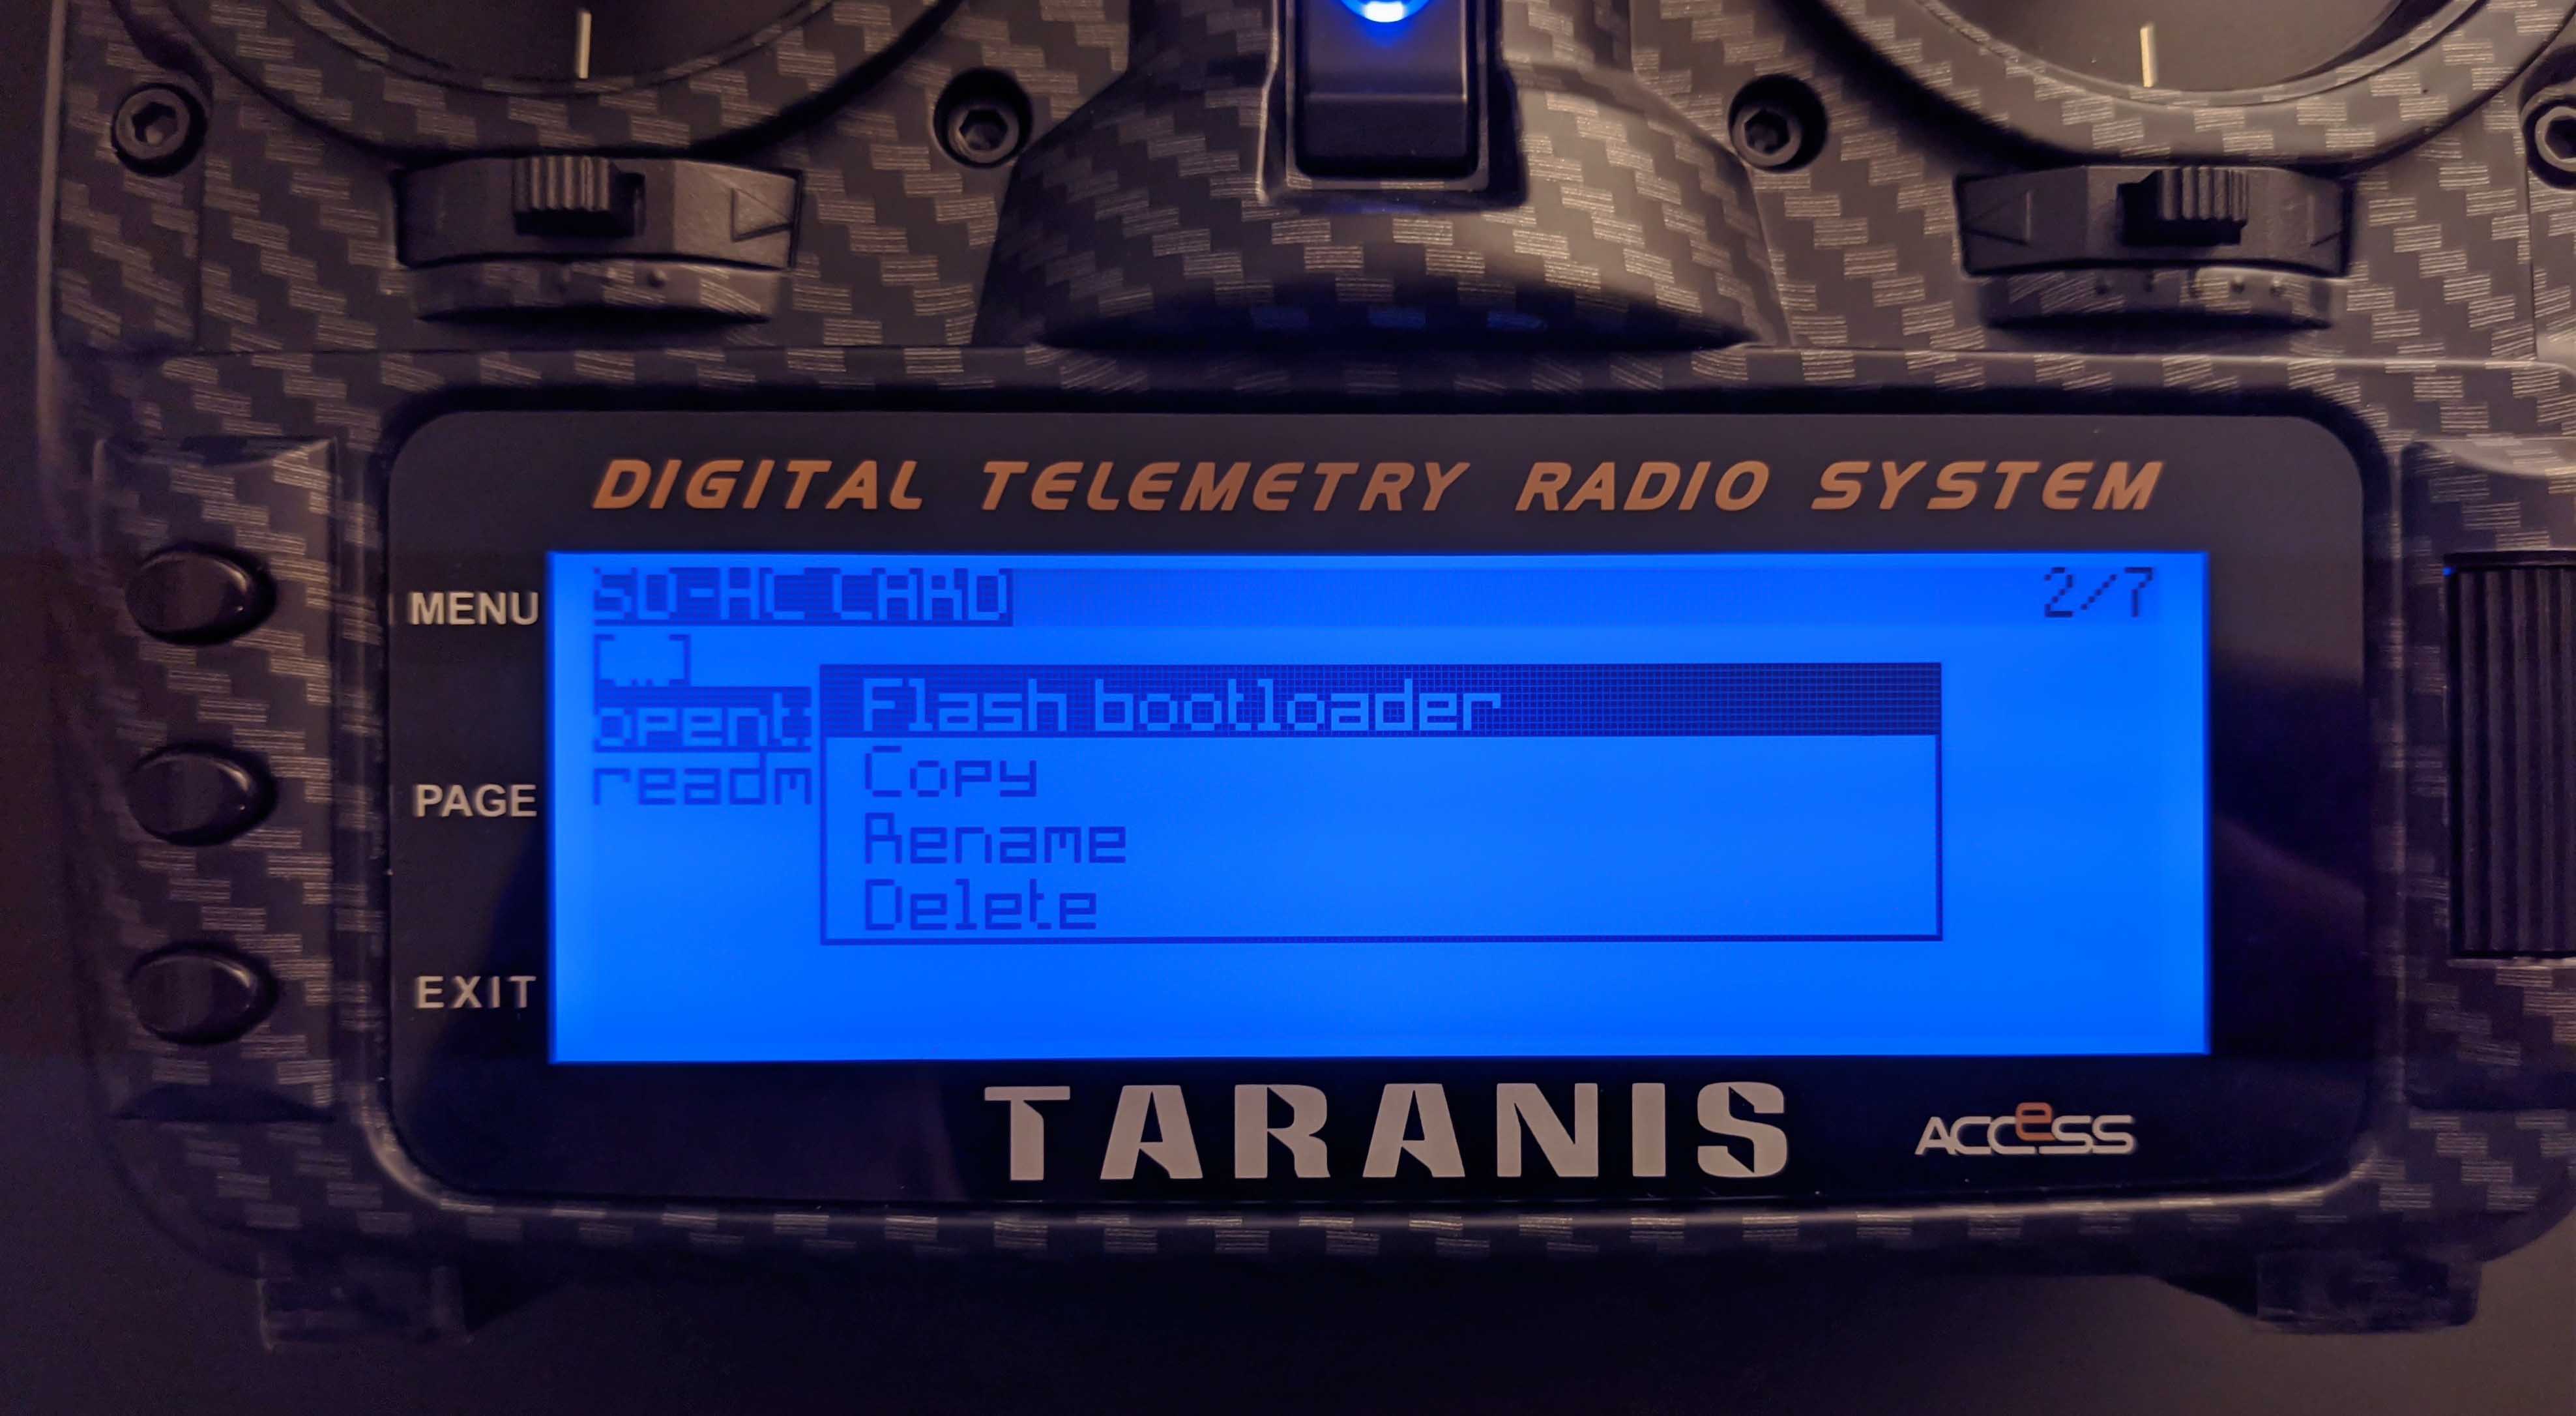
Select Flash bootloader in the menu that pops up and after the update finished,
boot into the bootloader to verify that the update succeeded.
Comments