To add new and change existing throttle curves in your Taranis X9D Plus short press the MENU button an navigate
to page 7 with the PAGE button. This will show the following dispaly:
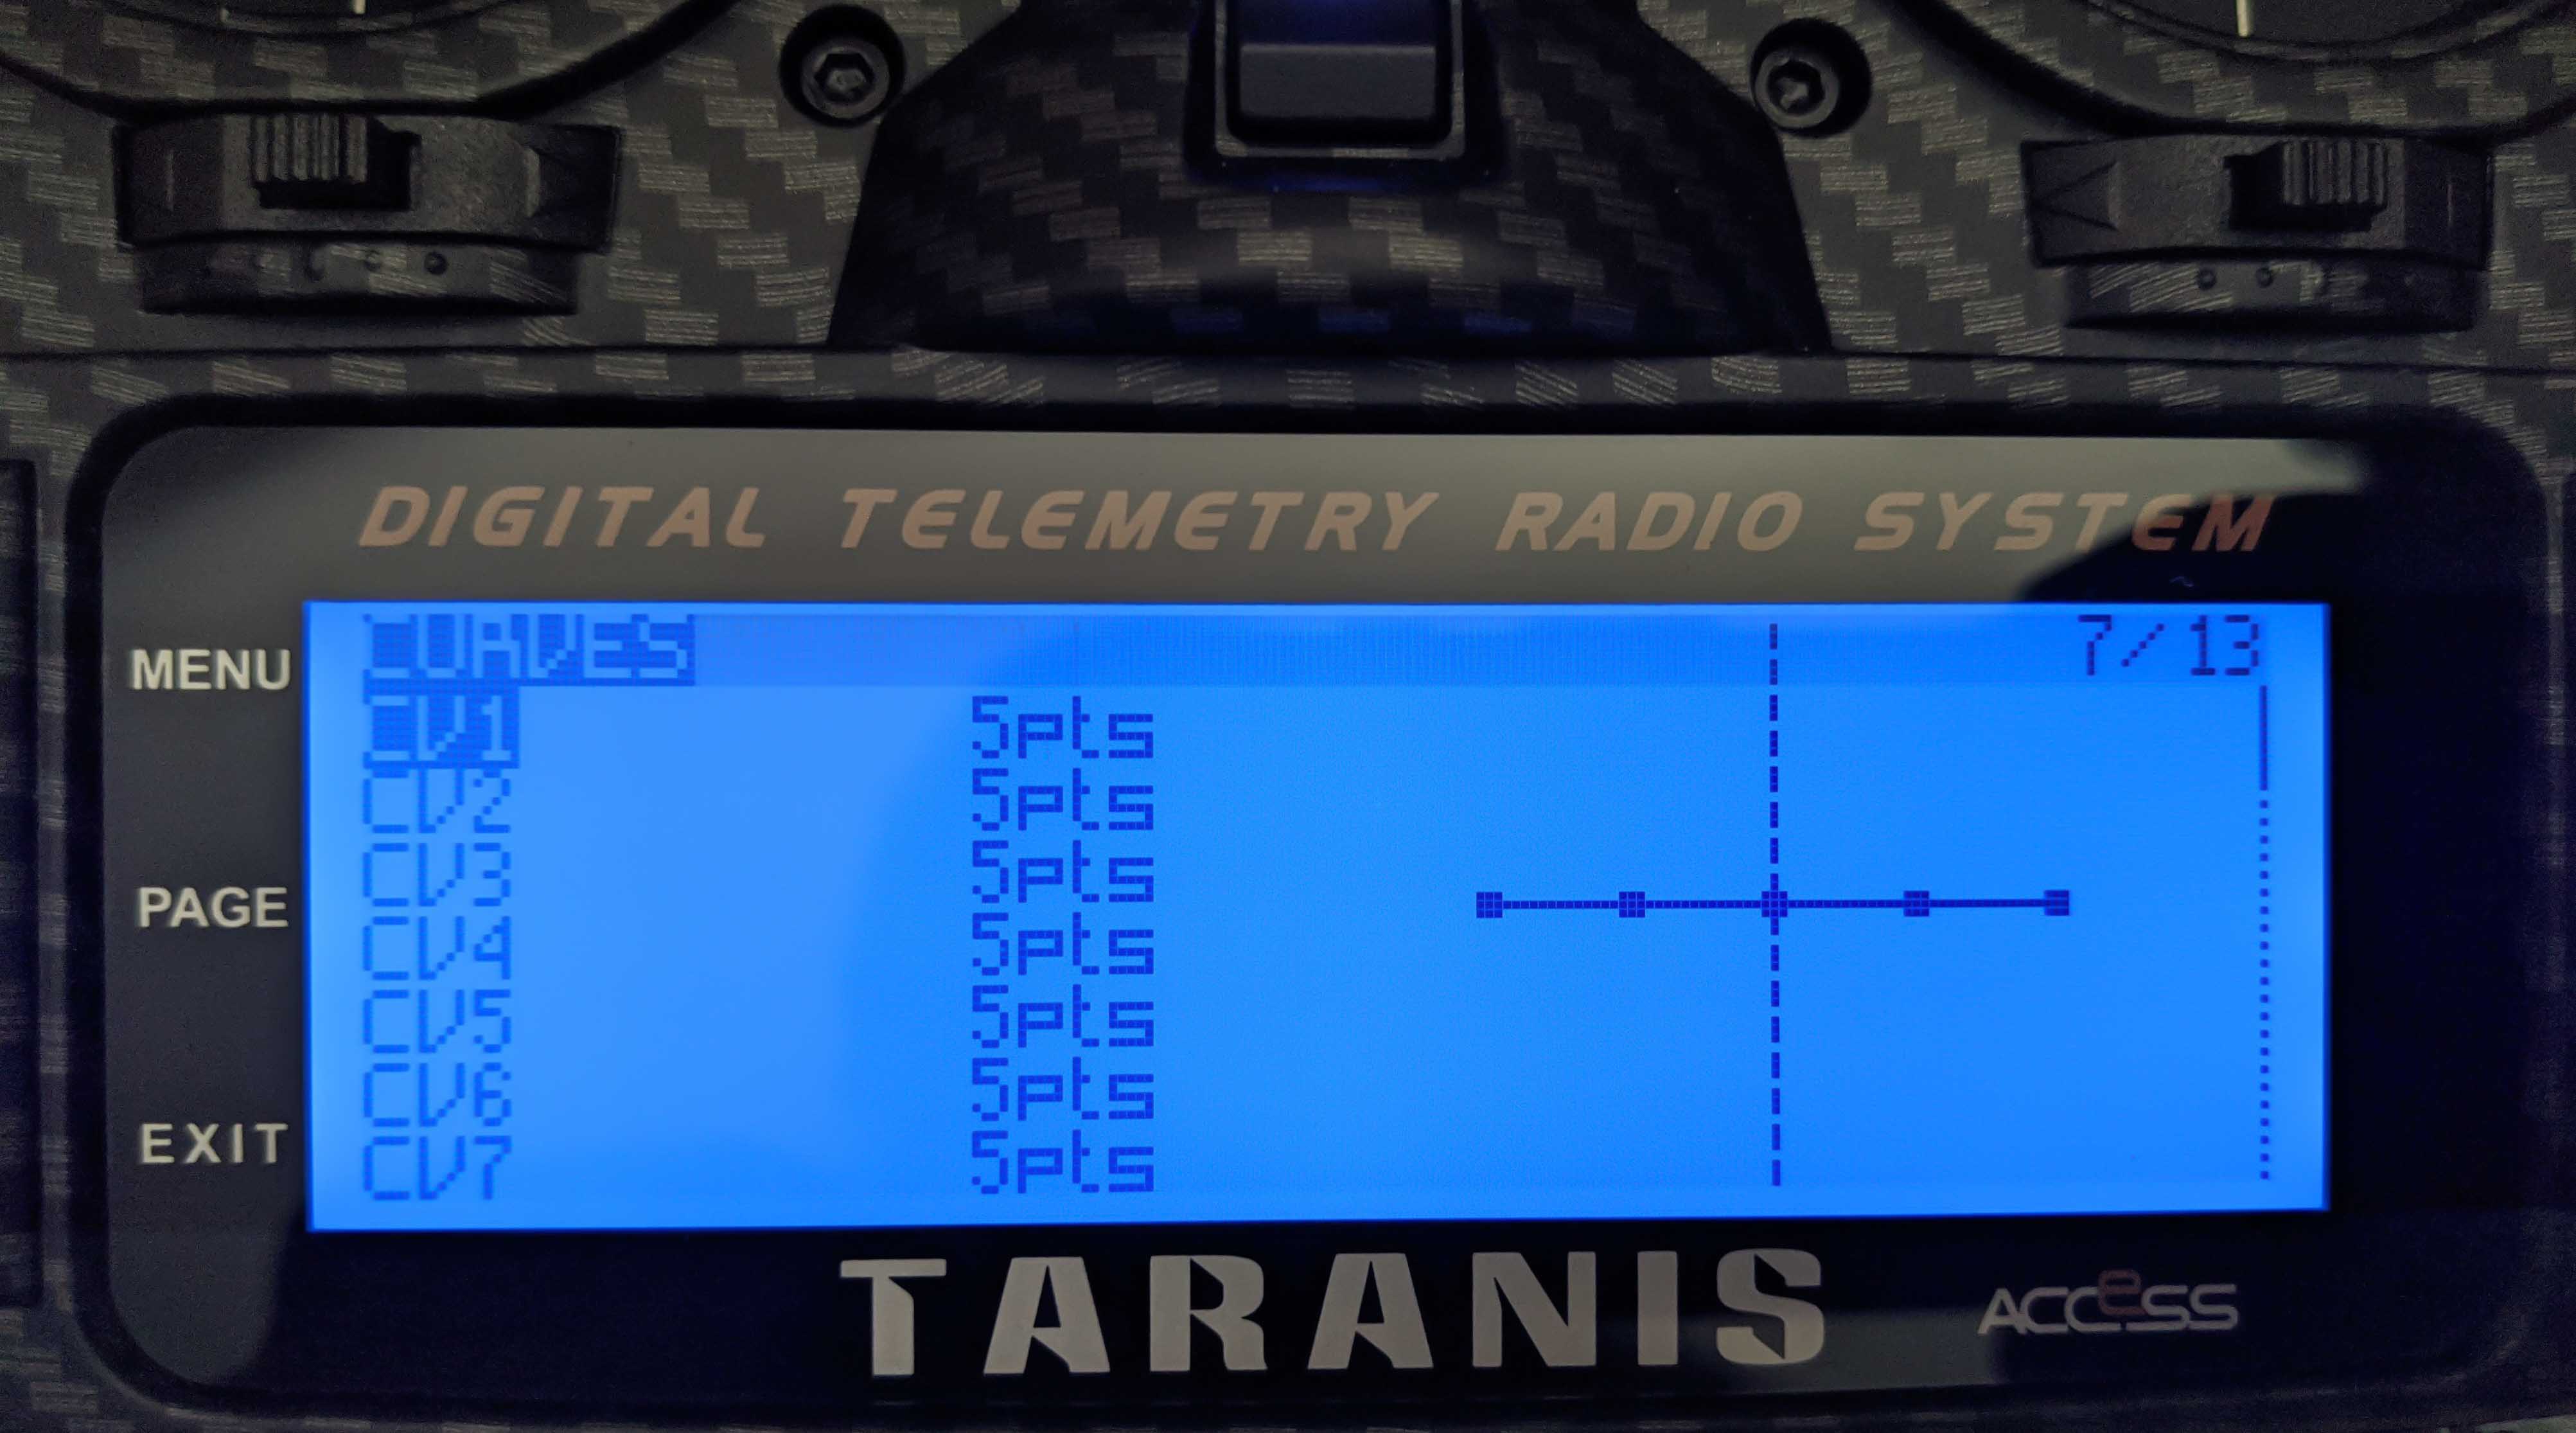
On this page select the first free curve which will lead to the following screen:
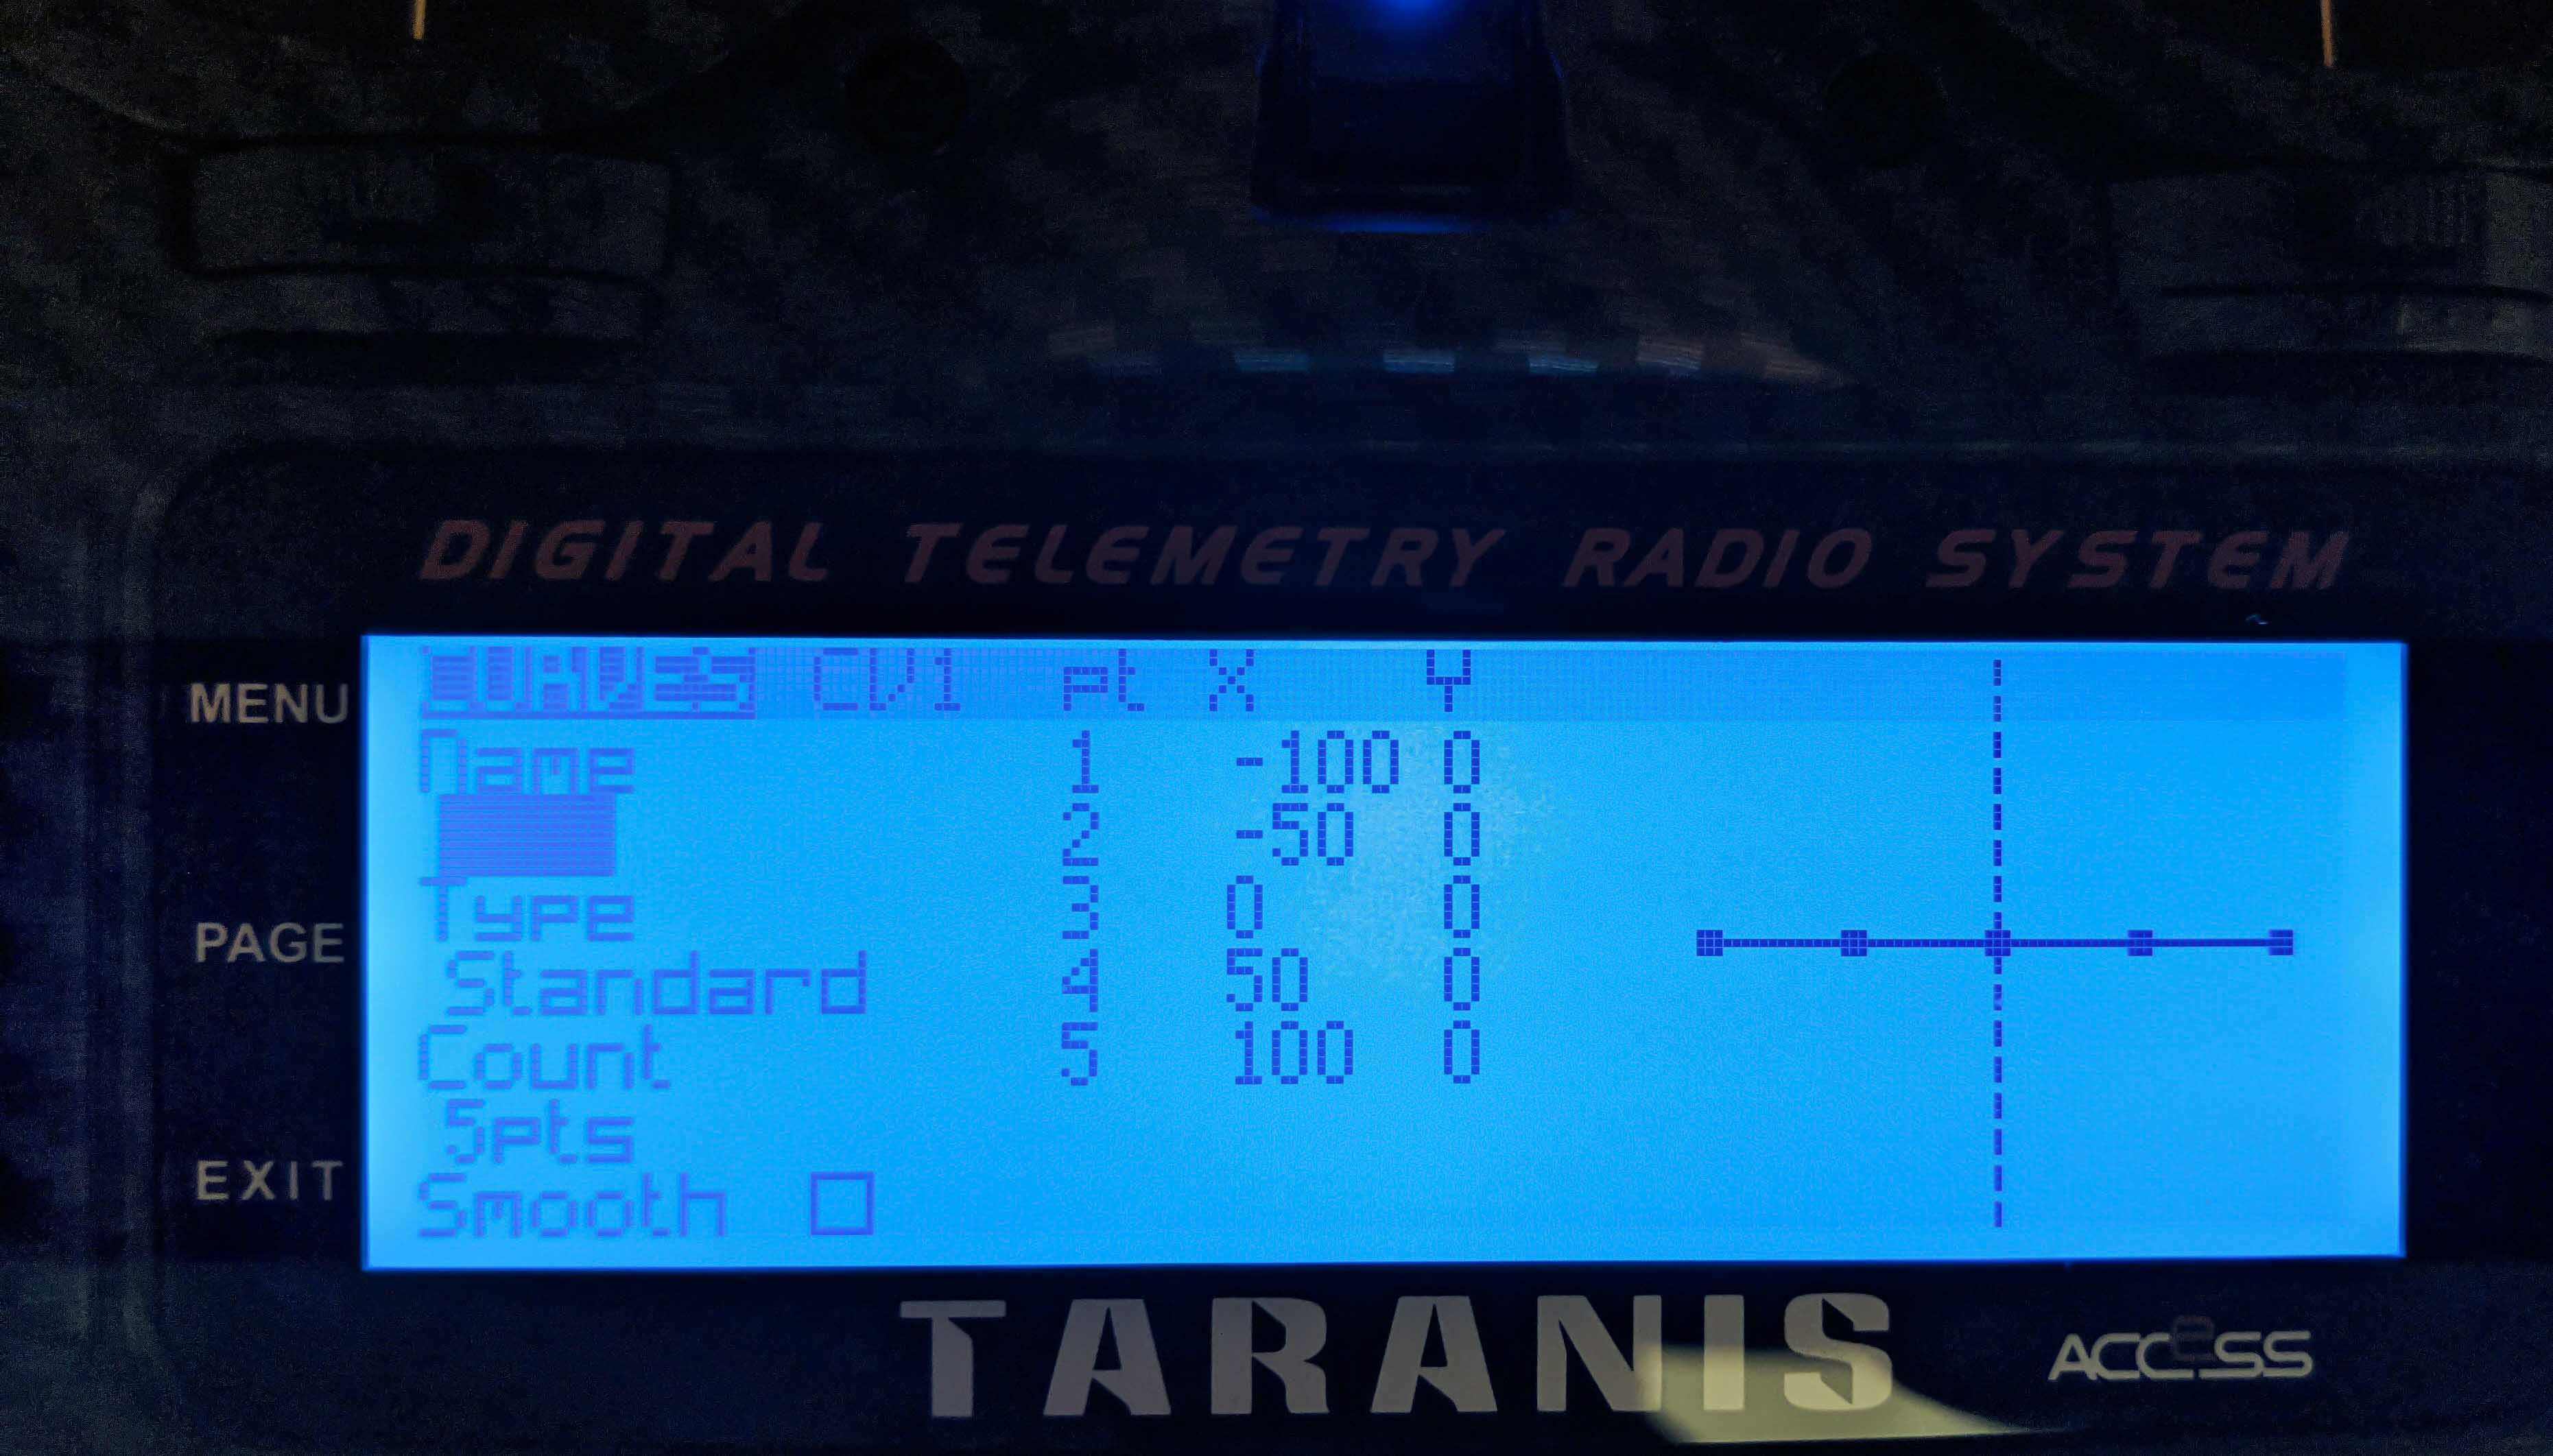
Because we want to create a throttle curve we select the Name field and enter “Thr” (Long press ENTER button for capital letters). Instead of the default 5 control points we select 7 to get finer control and select Smooth.
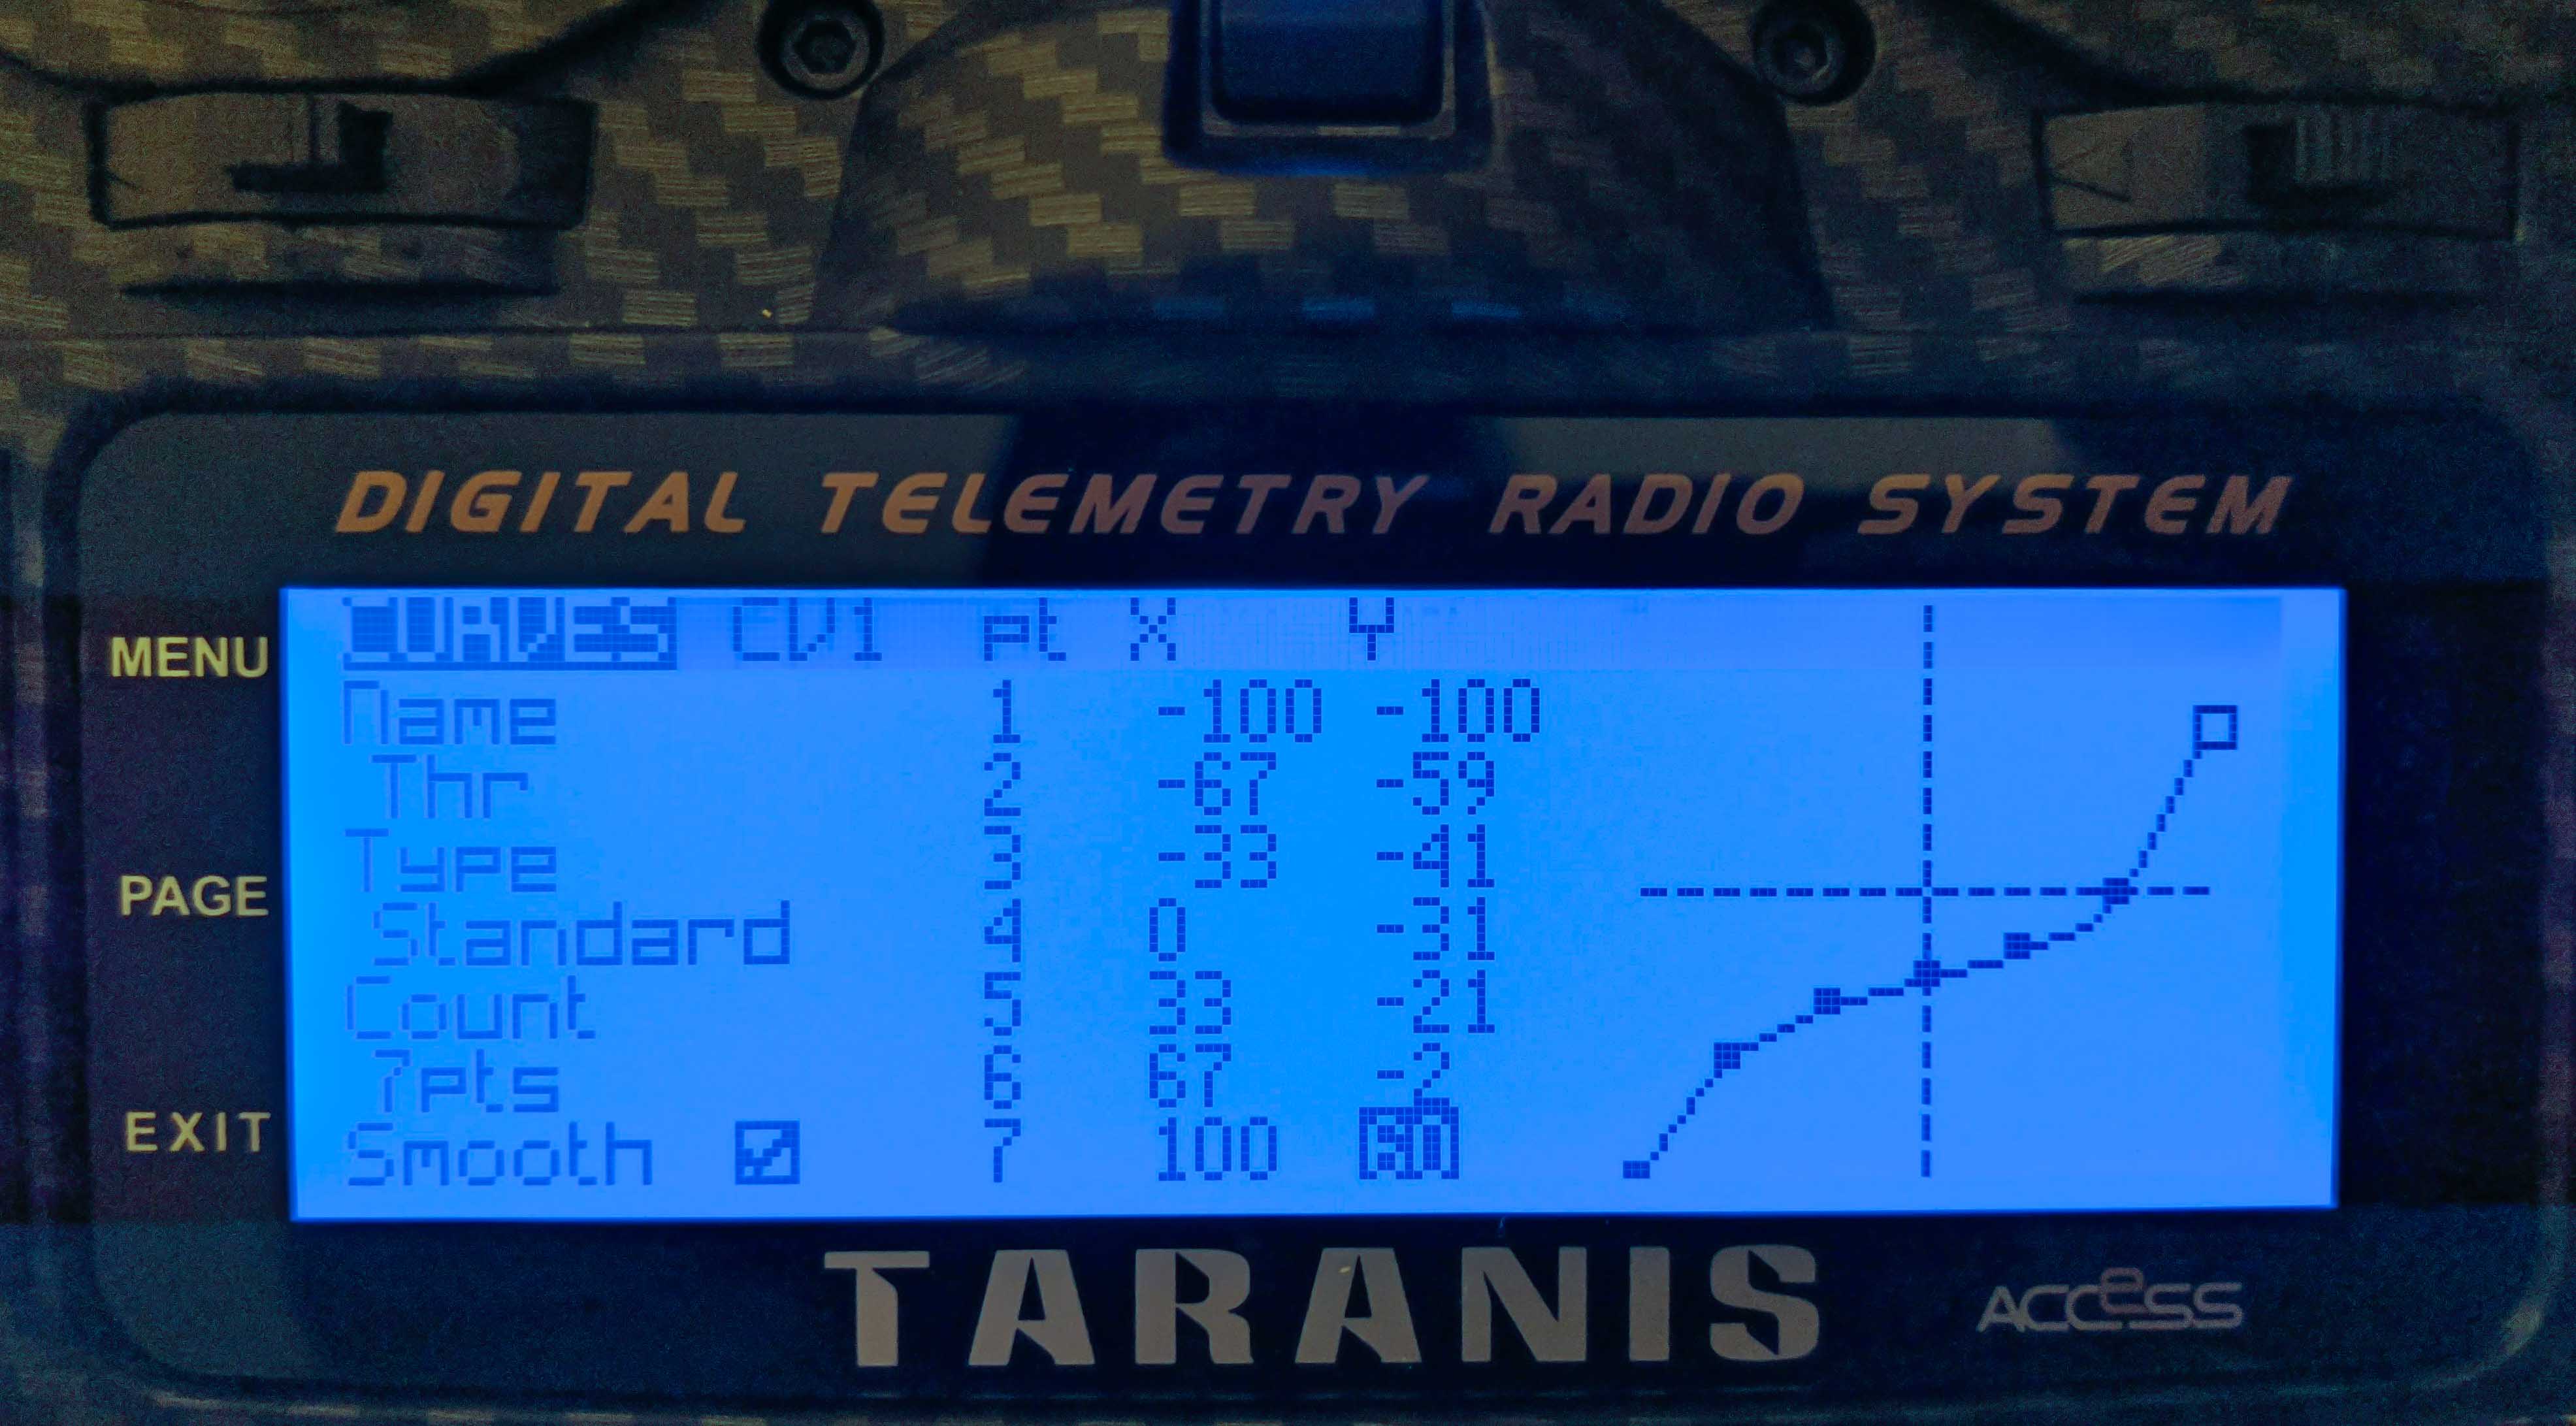
The slope of this curve is low in the region around x equals zero, which is where the hover point should be located. The hover point is set below y equals zero to reduce the overall output power which is also why the last point is set to 60. This curve should help beginners to find the hover point more easily.
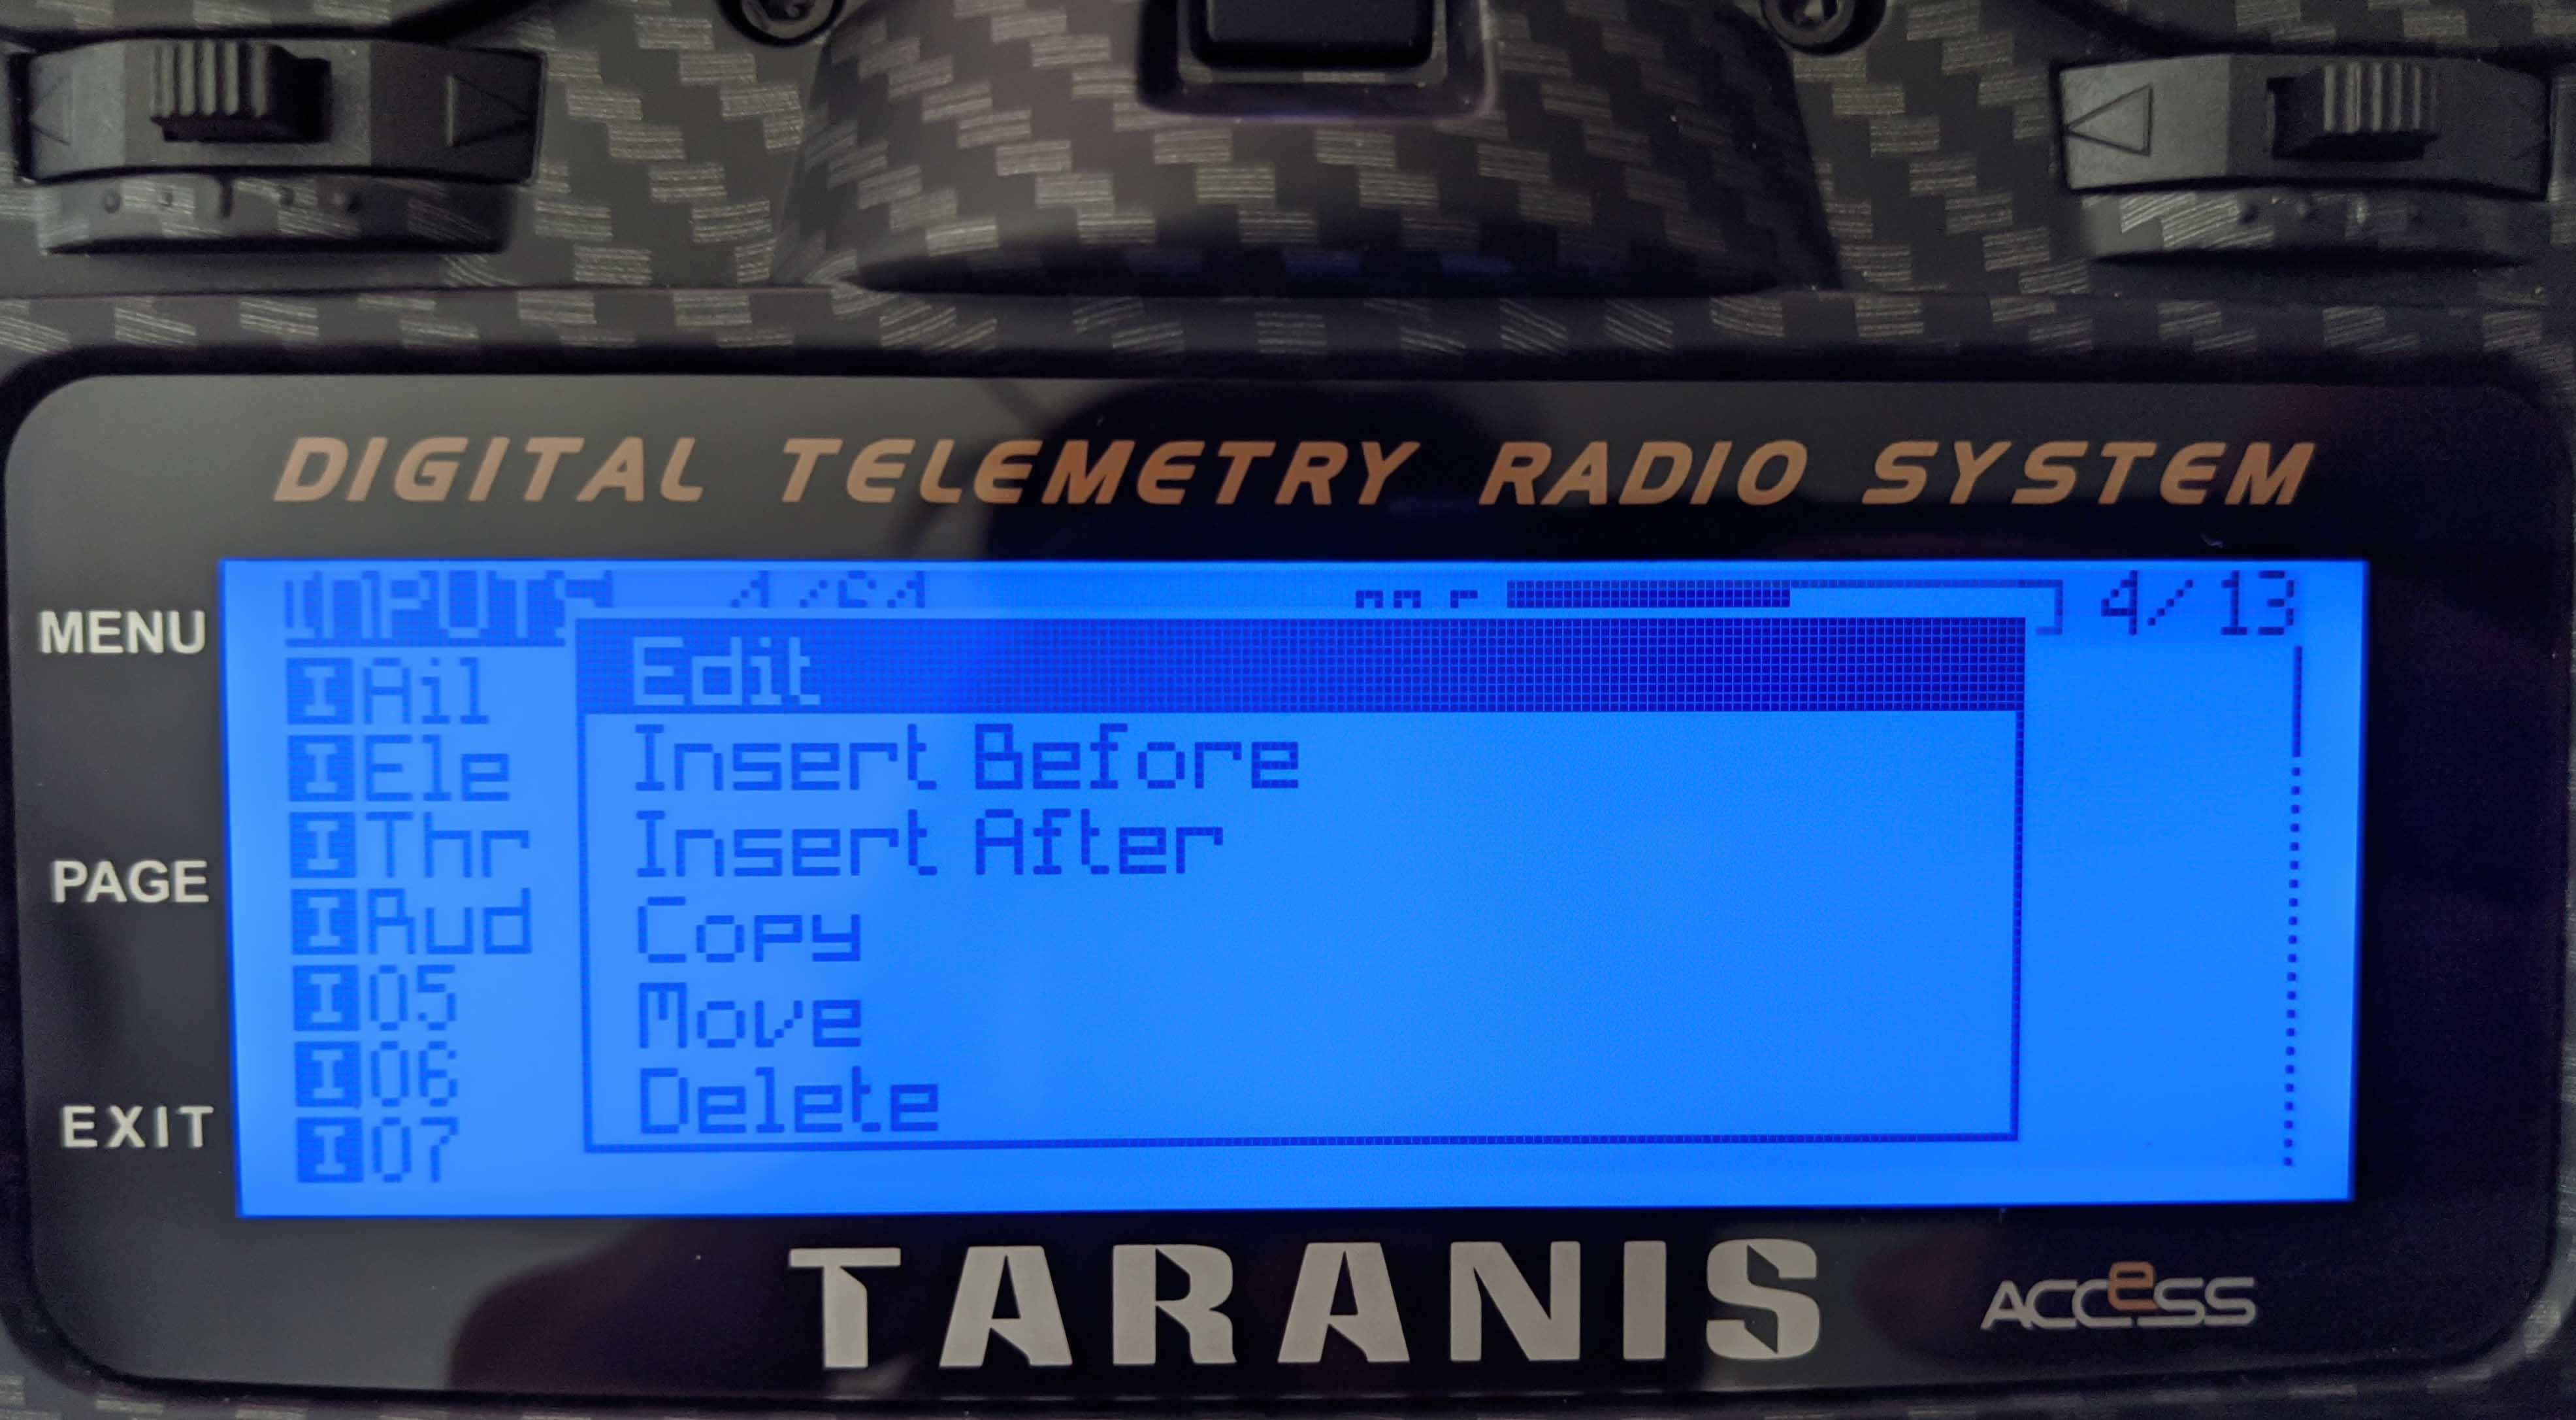
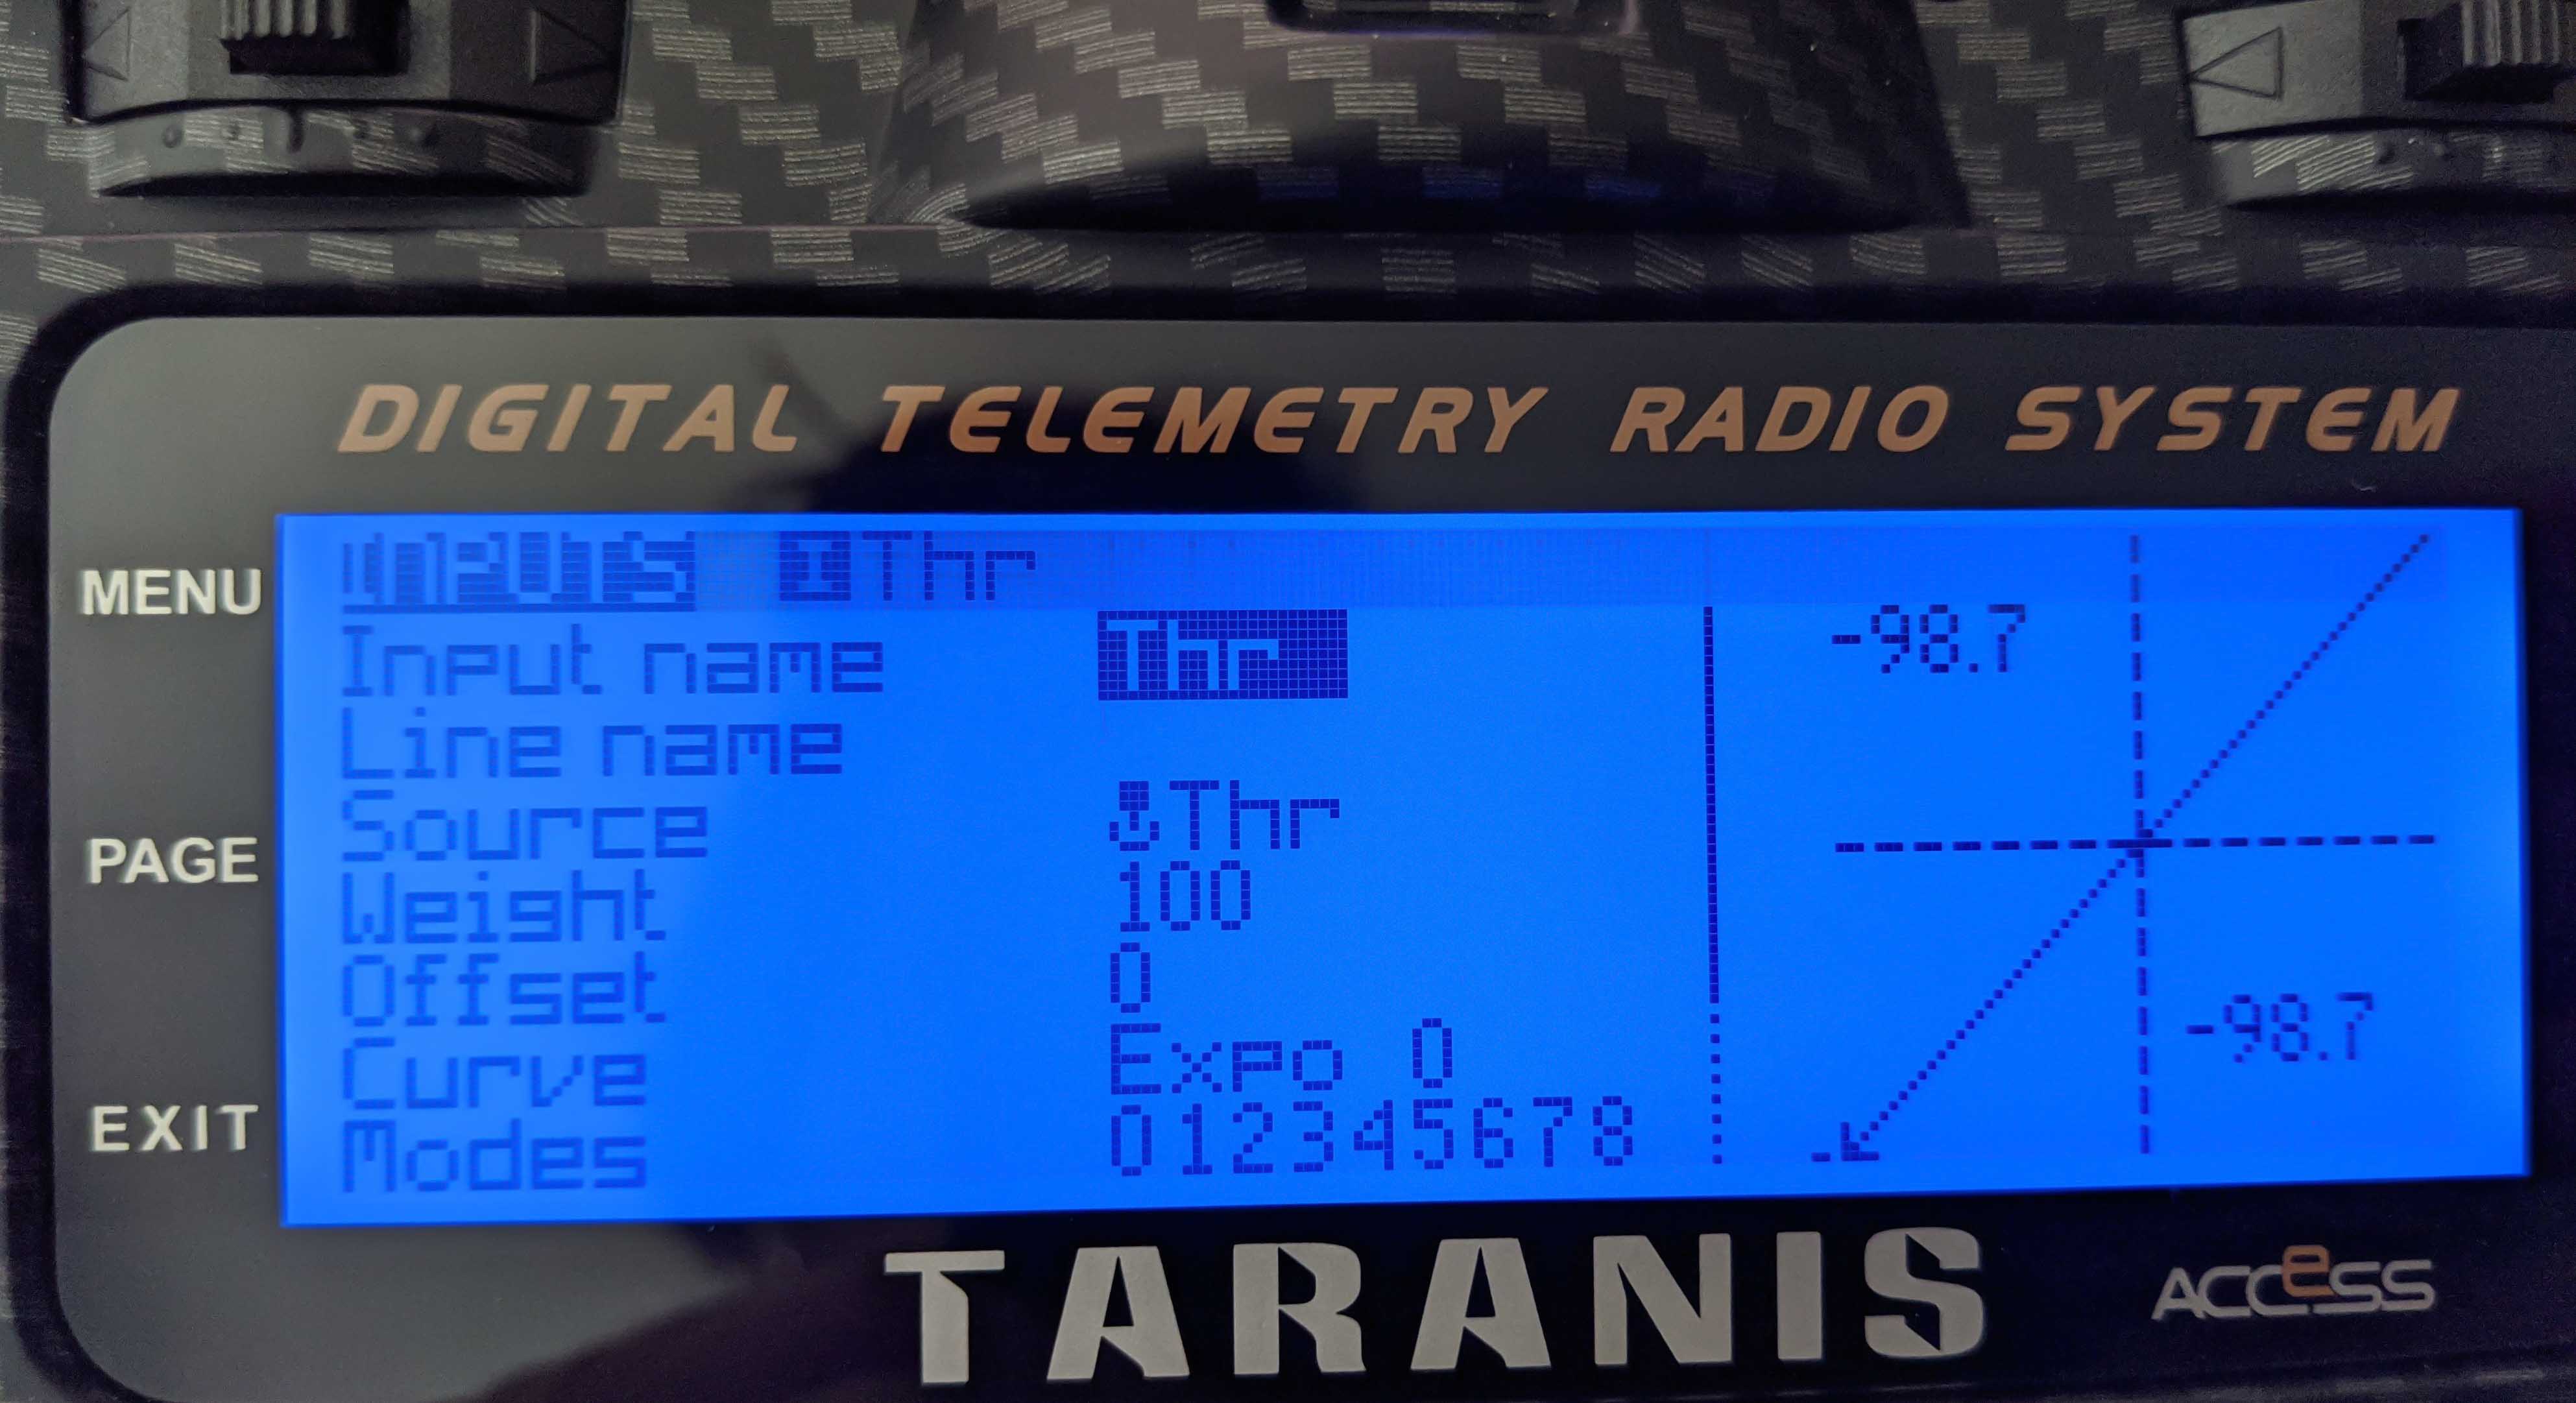
After setting the throttle curve it is time to apply it to the throttle input on the Input page. For this use PAGE to page through to page 4 or EXIT to the main screen and short press MENU, then PAGE until you get to page 4.

Long press ENTER on the Thr entry and select Edit.
This leads to the settings display for the throttle input which has a linear curve set by default:
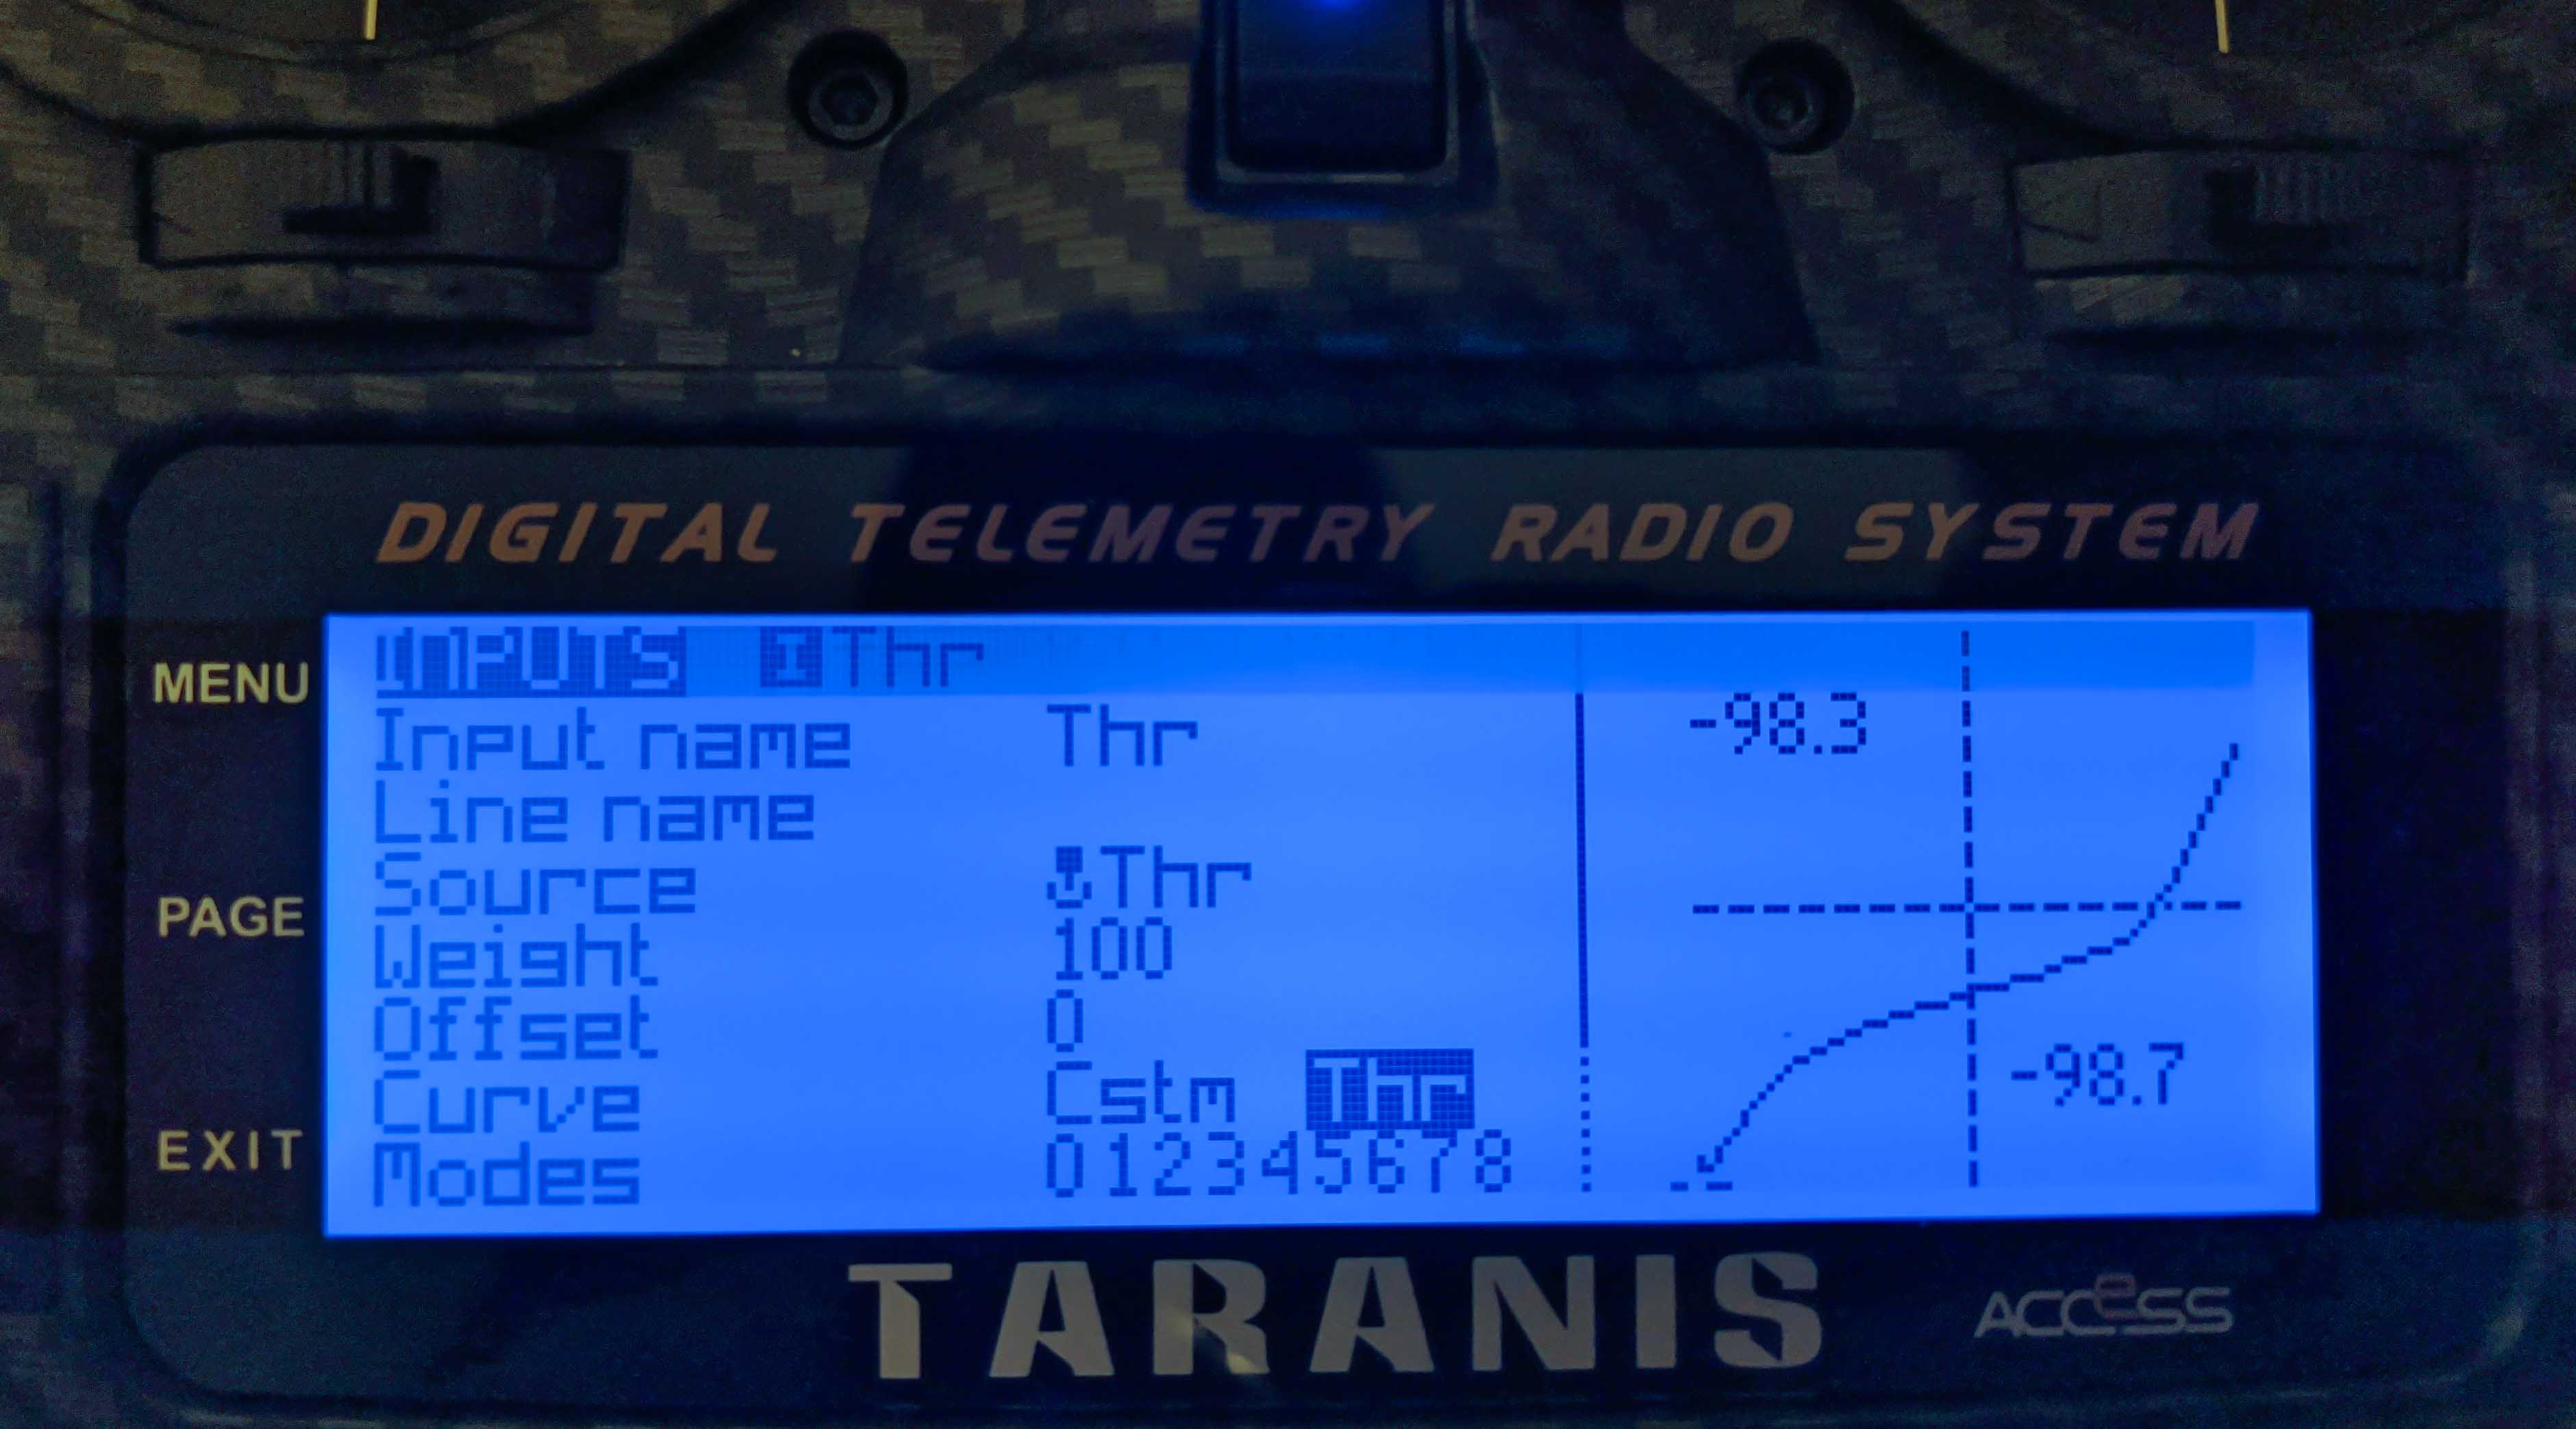
Select Cstm for the Curve entry and choose the previously named curve Thr.
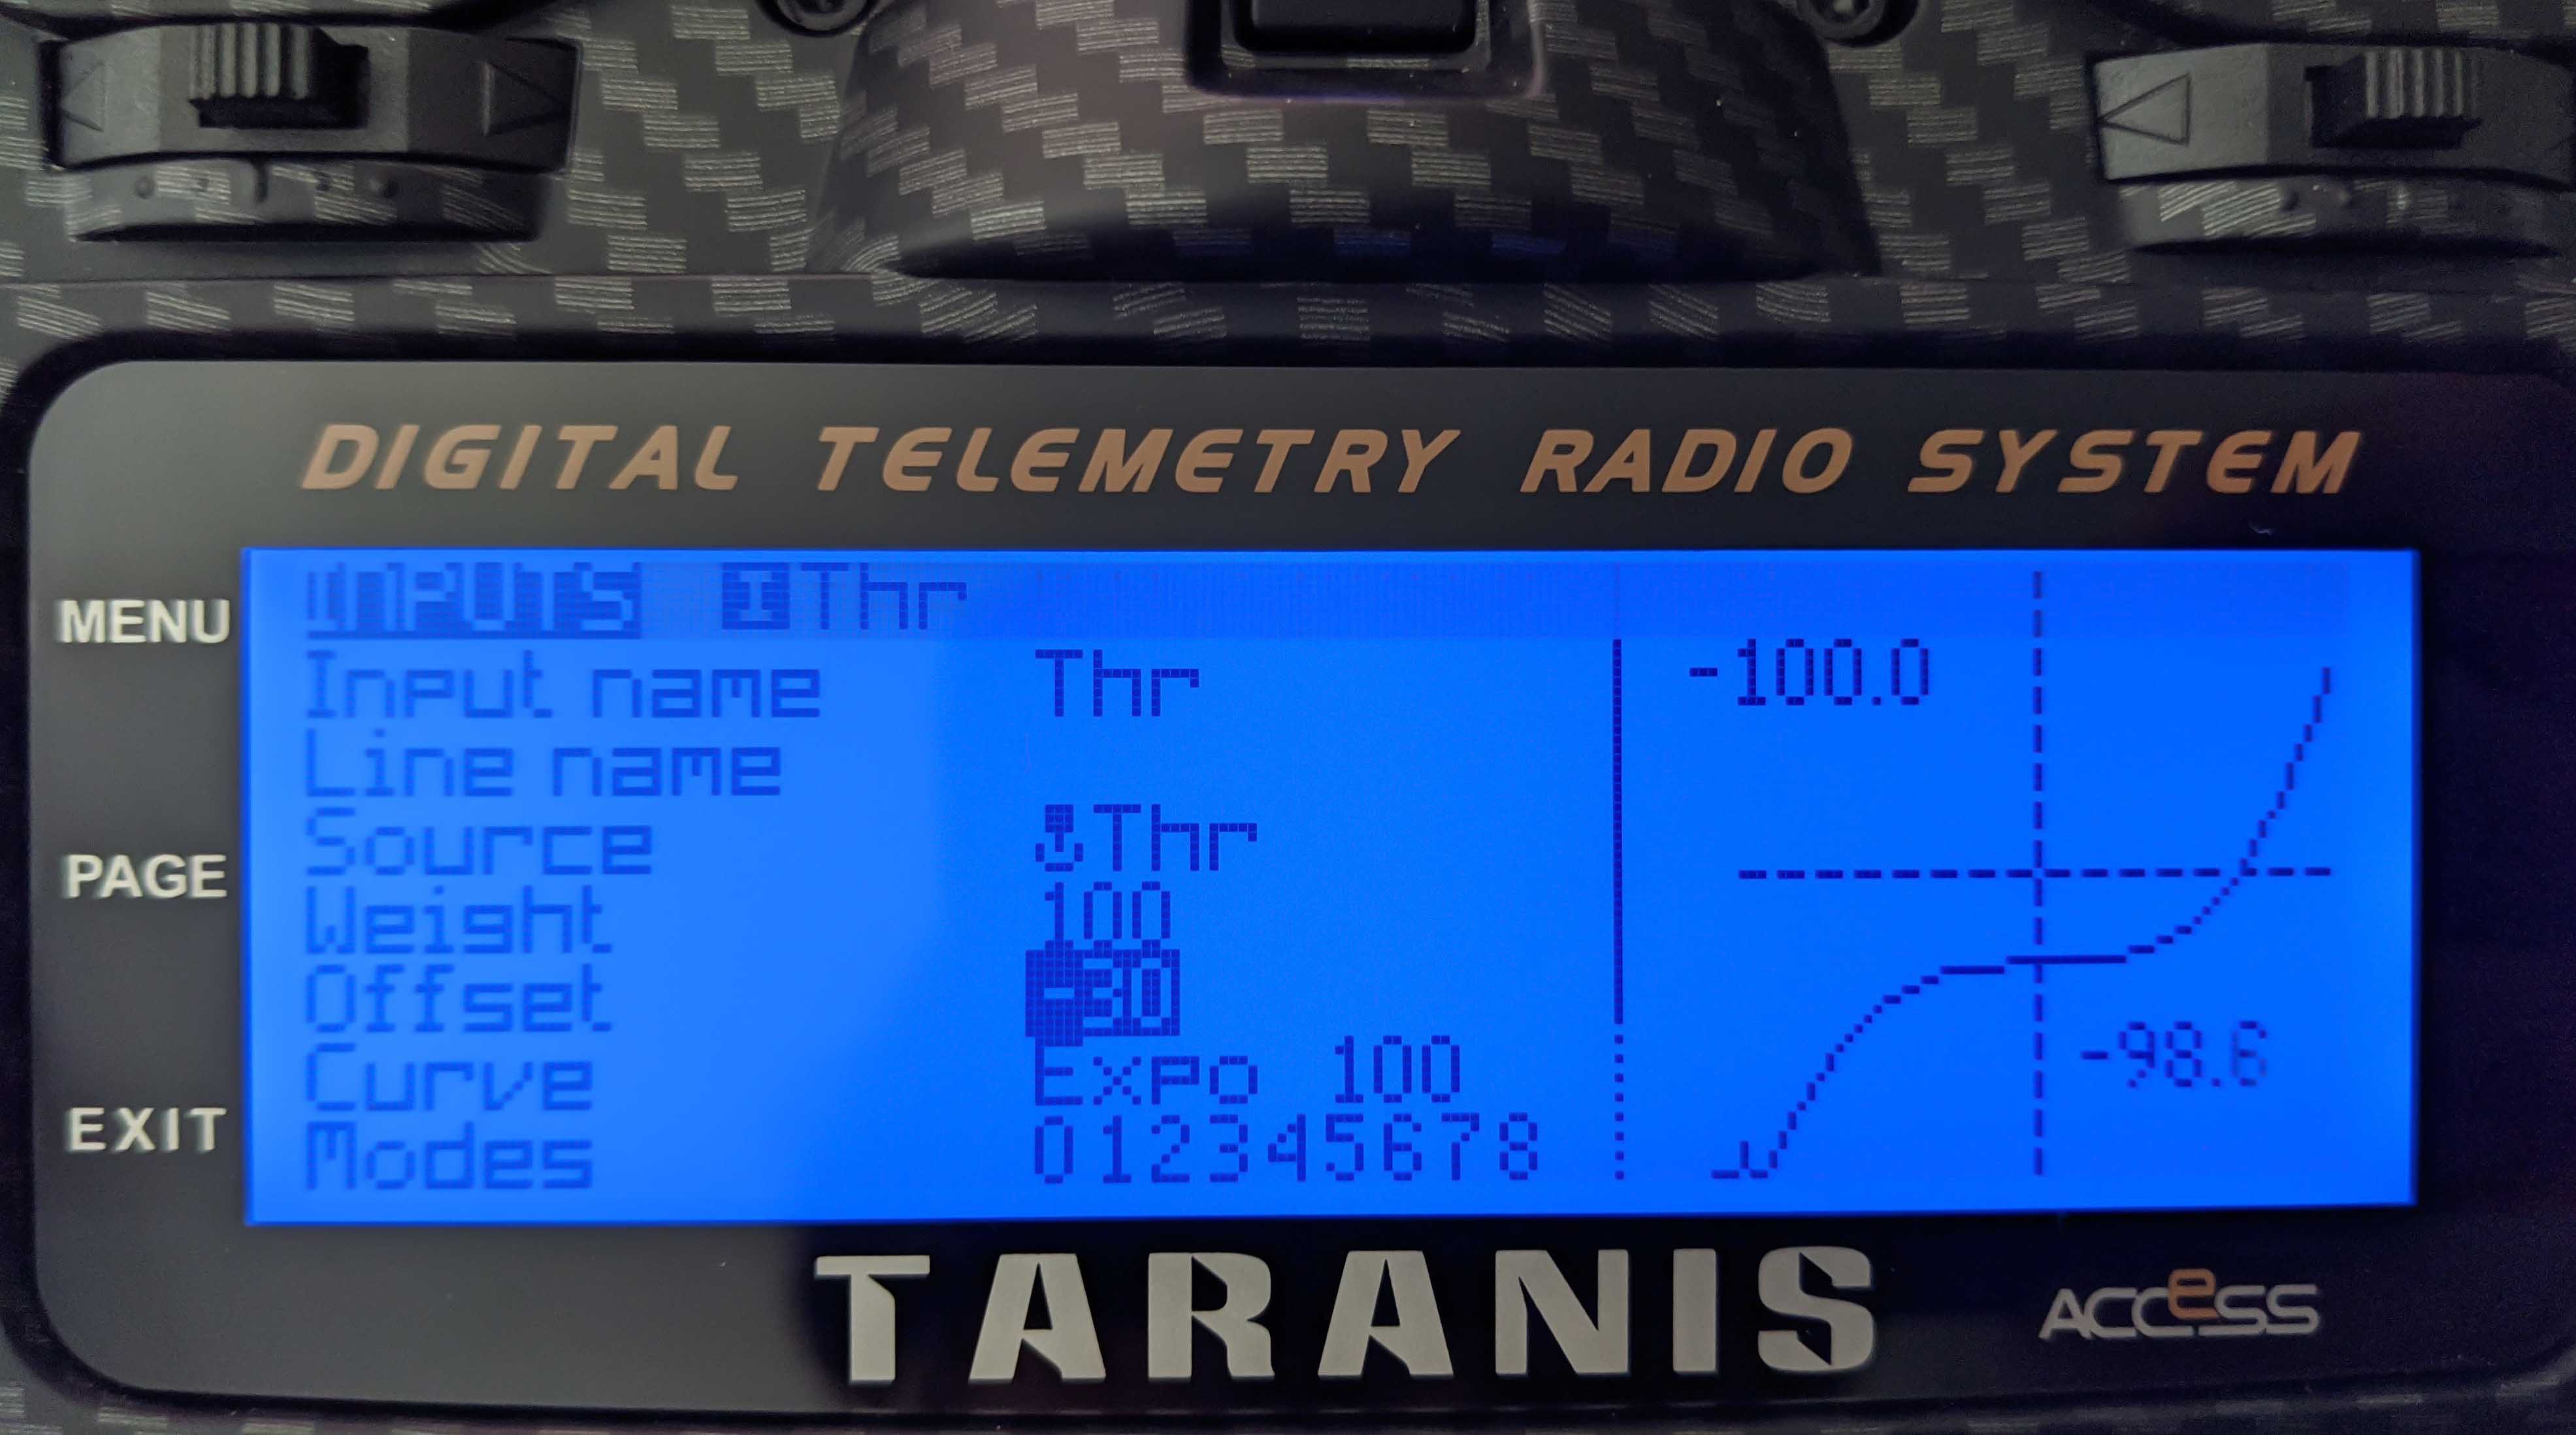
Instead of using a custom throttle curve it is also possible to set Expo or Func:
To verify the setting on your Taranis you can PAGE to the channel monitor screen starting from the main menu,
to see the individual channels.

Comments